Pushed applications to CF or PCF you would of most likely used a manifest.yml file and at some point wanted to use variable substitution. manifest.yml files don't support that and a feature request has been asked for this as follows
https://github.com/cloudfoundry/cli/issues/820
With a recent customer we scripted the creation of a manifest.yml file from a Jenkins job which would inject the required ROUTE to the application by creating the manifest.yml through a script as follows as shown below.
manifest-demo.sh
export ROUTE=$1
echo ""
echo "Setting route to $ROUTE ..."
echo ""
cat > manifest.yml <<!
---
applications:
- name: gs-rest-service
memory: 256M
instances: 1
host: $ROUTE
path: target/gs-rest-service-0.1.0.jar
!
cat manifest.yml
Script tested as follows
pasapicella@pas-macbook:~/bin/manifest-demo$ ./manifest-demo.sh apples-route-pas
Setting route to apples-route-pas ...
---
applications:
- name: gs-rest-service
memory: 256M
instances: 1
host: apples-route-pas
path: target/gs-rest-service-0.1.0.jar
Friday, 19 August 2016


Tuesday, 16 August 2016
HttpSessionListener with Spring Boot Application
I had a requirement to implement a HttpSessionListener in my Spring Boot application which has no web.xml. To achieve this I did the following
1. My HttpSessionListener was defined as follows
2. Register the listener from a @Configration class as shown below
1. My HttpSessionListener was defined as follows
package com.pivotal.pcf.mysqlweb.utils;

import javax.servlet.http.HttpSession;
import javax.servlet.http.HttpSessionEvent;
import javax.servlet.http.HttpSessionListener;

import org.apache.log4j.Logger;

public class SessionListener implements HttpSessionListener
{
    protected static Logger logger = Logger.getLogger("controller");
    private HttpSession session = null;

    public void sessionCreated(HttpSessionEvent event)
    {
        // no need to do anything here as connection may not have been established yet
        session  = event.getSession();
        logger.info("Session created for id " + session.getId());
    }

    public void sessionDestroyed(HttpSessionEvent event)
    {
        session  = event.getSession();
     /*
      * Need to ensure Connection is closed from ConnectionManager
      */

        ConnectionManager cm = null;

        try
        {
            cm = ConnectionManager.getInstance();
            cm.removeConnection(session.getId());
            logger.info("Session destroyed for id " + session.getId());
        }
        catch (Exception e)
        {
            logger.info("SesssionListener.sessionDestroyed Unable to obtain Connection", e);
        }
    }
}
2. Register the listener from a @Configration class as shown below
package com.pivotal.pcf.mysqlweb;

import com.pivotal.pcf.mysqlweb.utils.SessionListener;
import org.springframework.boot.context.embedded.ServletListenerRegistrationBean;
import org.springframework.context.annotation.Bean;
import org.springframework.context.annotation.Configuration;

import javax.servlet.http.HttpSessionListener;

@Configuration
public class ApplicationSessionConfiguration
{
    @Bean
    public ServletListenerRegistrationBean<HttpSessionListener> sessionListener()
    {
        return new ServletListenerRegistrationBean<HttpSessionListener>(new SessionListener());
    }
}
Thats all you have to do to achieve thisFriday, 12 August 2016
Simple Spring Boot Application Deployed through Concourse UI to Pivotal Cloud Foundry
The demo below is a full working example of using Spring Boot Application which will build/deploy to Pivotal Cloud Foundry using Concourse. Concourse pipelines can easily be created within your source code as this demo shows and hence created / executed quite easily. Concourse limits itself to three core concepts: tasks, resources, and the jobs
that compose them.
https://github.com/papicella/SpringBootSimpleRest
Detailed instructions on how to setup/run this demo using Concourse see the link referenced above which is as follows
https://dl.dropboxusercontent.com/u/15829935/platform-demos/concourse-demo/index.html

It's worth reading the details on this link around Concourse Concepts
https://concourse.ci/concepts.html
More Information
https://concourse.ci/
https://github.com/papicella/SpringBootSimpleRest
Detailed instructions on how to setup/run this demo using Concourse see the link referenced above which is as follows
https://dl.dropboxusercontent.com/u/15829935/platform-demos/concourse-demo/index.html

It's worth reading the details on this link around Concourse Concepts
https://concourse.ci/concepts.html
More Information
https://concourse.ci/
Sunday, 31 July 2016
PCFDev application accessing an Oracle 11g RDBMS
PCF Dev is a small footprint distribution of Pivotal Cloud Foundry (PCF)
intended to be run locally on a developer machine. It delivers the
essential elements of the Pivotal Cloud Foundry experience quickly
through a condensed set of components. PCF Dev is ideally suited to developers wanting to explore or evaluate
PCF, or those already actively building cloud native applications to be
run on PCF. Working with PCF Dev, developers can experience the power of
PCF - from the accelerated development cycles enabled by consistent,
structured builds to the operational excellence unlocked through
integrated logging, metrics and health monitoring and management.
In this example we show how you can use PCFDev to access an Oracle RDBMS from a PCFDev deployed Spring Boot Application. The application is using the classic Oracle EMP database table found in the SCOTT schema
Source Code as follows
In order to use the steps below you have to have installed PCFDev on your laptop or desktop as per the link below.
Download from here:
Instructions to setup as follows:
Steps
1. Clone as shown below
$ git clone https://github.com/papicella/PCFOracleDemo.git
2. Edit "./PCFOracleDemo/src/main/resources/application.properties" and add your oracle EMP schema connection details
3. Define a local MAVEN repo for Oracle 11g JDBC driver as per what is in the pom.xml
4. Package as per below
$ cd PCFOracleDemo
$ mvn package
5. Deploy as follows
pasapicella@pas-macbook:~/pivotal/DemoProjects/spring-starter/pivotal/PCFOracleDemo$ cf push
Using manifest file /Users/pasapicella/pivotal/DemoProjects/spring-starter/pivotal/PCFOracleDemo/manifest.yml
Creating app springboot-oracle in org pcfdev-org / space pcfdev-space as admin...
OK
Creating route springboot-oracle.local.pcfdev.io...
OK
Binding springboot-oracle.local.pcfdev.io to springboot-oracle...
OK
Uploading springboot-oracle...
Uploading app files from: /var/folders/c3/27vscm613fjb6g8f5jmc2x_w0000gp/T/unzipped-app506692756
Uploading 26.3M, 154 files
Done uploading
OK
Starting app springboot-oracle in org pcfdev-org / space pcfdev-space as admin...
Downloading binary_buildpack...
Downloading python_buildpack...
Downloading staticfile_buildpack...
Downloading java_buildpack...
Downloading php_buildpack...
Downloading ruby_buildpack...
Downloading go_buildpack...
Downloading nodejs_buildpack...
Downloaded staticfile_buildpack
Downloaded binary_buildpack (8.3K)
Downloaded php_buildpack (262.3M)
Downloaded java_buildpack (241.6M)
Downloaded go_buildpack (450.3M)
Downloaded ruby_buildpack (247.7M)
Downloaded python_buildpack (254.1M)
Downloaded nodejs_buildpack (60.7M)
Creating container
Successfully created container
Downloading app package...
Downloaded app package (23.5M)
Staging...
-----> Java Buildpack Version: v3.6 (offline) | https://github.com/cloudfoundry/java-buildpack.git#5194155
-----> Downloading Open Jdk JRE 1.8.0_71 from https://download.run.pivotal.io/openjdk/trusty/x86_64/openjdk-1.8.0_71.tar.gz (found in cache)
Expanding Open Jdk JRE to .java-buildpack/open_jdk_jre (1.2s)
-----> Downloading Open JDK Like Memory Calculator 2.0.1_RELEASE from https://download.run.pivotal.io/memory-calculator/trusty/x86_64/memory-calculator-2.0.1_RELEASE.tar.gz (found in cache)
Memory Settings: -XX:MetaspaceSize=64M -XX:MaxMetaspaceSize=64M -Xss995K -Xmx382293K -Xms382293K
-----> Downloading Spring Auto Reconfiguration 1.10.0_RELEASE from https://download.run.pivotal.io/auto-reconfiguration/auto-reconfiguration-1.10.0_RELEASE.jar (found in cache)
Exit status 0
Staging complete
Uploading droplet, build artifacts cache...
Uploading build artifacts cache...
Uploading droplet...
Uploaded build artifacts cache (109B)
Uploaded droplet (68.4M)
Uploading complete
1 of 1 instances running
App started
OK
App springboot-oracle was started using this command `CALCULATED_MEMORY=$($PWD/.java-buildpack/open_jdk_jre/bin/java-buildpack-memory-calculator-2.0.1_RELEASE -memorySizes=metaspace:64m.. -memoryWeights=heap:75,metaspace:10,native:10,stack:5 -memoryInitials=heap:100%,metaspace:100% -totMemory=$MEMORY_LIMIT) && JAVA_OPTS="-Djava.io.tmpdir=$TMPDIR -XX:OnOutOfMemoryError=$PWD/.java-buildpack/open_jdk_jre/bin/killjava.sh $CALCULATED_MEMORY" && SERVER_PORT=$PORT eval exec $PWD/.java-buildpack/open_jdk_jre/bin/java $JAVA_OPTS -cp $PWD/.:$PWD/.java-buildpack/spring_auto_reconfiguration/spring_auto_reconfiguration-1.10.0_RELEASE.jar org.springframework.boot.loader.JarLauncher`
Showing health and status for app springboot-oracle in org pcfdev-org / space pcfdev-space as admin...
OK
requested state: started
instances: 1/1
usage: 512M x 1 instances
urls: springboot-oracle.local.pcfdev.io
last uploaded: Sun Jul 31 01:23:03 UTC 2016
stack: unknown
buildpack: java-buildpack=v3.6-offline-https://github.com/cloudfoundry/java-buildpack.git#5194155 java-main open-jdk-like-jre=1.8.0_71 open-jdk-like-memory-calculator=2.0.1_RELEASE spring-auto-reconfiguration=1.10.0_RELEASE
state since cpu memory disk details
#0 running 2016-07-31 11:24:26 AM 0.0% 0 of 512M 0 of 512M
pasapicella@pas-macbook:~/pivotal/DemoProjects/spring-starter/pivotal/PCFOracleDemo$ cf apps
Getting apps in org pcfdev-org / space pcfdev-space as admin...
OK
name requested state instances memory disk urls
springboot-oracle started 1/1 512M 512M springboot-oracle.local.pcfdev.io
6. Access deployed application at the end point "http://springboot-oracle.local.pcfdev.io" or using the application route you set in the manifest.yml

error.whitelabel.enabled=false
oracle.username=scott
oracle.password=tiger
oracle.url=jdbc:oracle:thin:@//192.168.20.131:1521/ora11gr2
<!--
  Installed as follows to allow inclusion into pom.xml
  mvn install:install-file -DgroupId=com.oracle -DartifactId=ojdbc6 -Dversion=11.2.0.3 -Dpackaging=jar -Dfile=ojdbc6.jar
    -DgeneratePom=true
  -->
  <dependency>
   <groupId>com.oracle</groupId>
   <artifactId>ojdbc6</artifactId>
   <version>11.2.0.3</version>
  </dependency>
4. Package as per below
$ cd PCFOracleDemo
$ mvn package
5. Deploy as follows
pasapicella@pas-macbook:~/pivotal/DemoProjects/spring-starter/pivotal/PCFOracleDemo$ cf push
Using manifest file /Users/pasapicella/pivotal/DemoProjects/spring-starter/pivotal/PCFOracleDemo/manifest.yml
Creating app springboot-oracle in org pcfdev-org / space pcfdev-space as admin...
OK
Creating route springboot-oracle.local.pcfdev.io...
OK
Binding springboot-oracle.local.pcfdev.io to springboot-oracle...
OK
Uploading springboot-oracle...
Uploading app files from: /var/folders/c3/27vscm613fjb6g8f5jmc2x_w0000gp/T/unzipped-app506692756
Uploading 26.3M, 154 files
Done uploading
OK
Starting app springboot-oracle in org pcfdev-org / space pcfdev-space as admin...
Downloading binary_buildpack...
Downloading python_buildpack...
Downloading staticfile_buildpack...
Downloading java_buildpack...
Downloading php_buildpack...
Downloading ruby_buildpack...
Downloading go_buildpack...
Downloading nodejs_buildpack...
Downloaded staticfile_buildpack
Downloaded binary_buildpack (8.3K)
Downloaded php_buildpack (262.3M)
Downloaded java_buildpack (241.6M)
Downloaded go_buildpack (450.3M)
Downloaded ruby_buildpack (247.7M)
Downloaded python_buildpack (254.1M)
Downloaded nodejs_buildpack (60.7M)
Creating container
Successfully created container
Downloading app package...
Downloaded app package (23.5M)
Staging...
-----> Java Buildpack Version: v3.6 (offline) | https://github.com/cloudfoundry/java-buildpack.git#5194155
-----> Downloading Open Jdk JRE 1.8.0_71 from https://download.run.pivotal.io/openjdk/trusty/x86_64/openjdk-1.8.0_71.tar.gz (found in cache)
Expanding Open Jdk JRE to .java-buildpack/open_jdk_jre (1.2s)
-----> Downloading Open JDK Like Memory Calculator 2.0.1_RELEASE from https://download.run.pivotal.io/memory-calculator/trusty/x86_64/memory-calculator-2.0.1_RELEASE.tar.gz (found in cache)
Memory Settings: -XX:MetaspaceSize=64M -XX:MaxMetaspaceSize=64M -Xss995K -Xmx382293K -Xms382293K
-----> Downloading Spring Auto Reconfiguration 1.10.0_RELEASE from https://download.run.pivotal.io/auto-reconfiguration/auto-reconfiguration-1.10.0_RELEASE.jar (found in cache)
Exit status 0
Staging complete
Uploading droplet, build artifacts cache...
Uploading build artifacts cache...
Uploading droplet...
Uploaded build artifacts cache (109B)
Uploaded droplet (68.4M)
Uploading complete
1 of 1 instances running
App started
OK
App springboot-oracle was started using this command `CALCULATED_MEMORY=$($PWD/.java-buildpack/open_jdk_jre/bin/java-buildpack-memory-calculator-2.0.1_RELEASE -memorySizes=metaspace:64m.. -memoryWeights=heap:75,metaspace:10,native:10,stack:5 -memoryInitials=heap:100%,metaspace:100% -totMemory=$MEMORY_LIMIT) && JAVA_OPTS="-Djava.io.tmpdir=$TMPDIR -XX:OnOutOfMemoryError=$PWD/.java-buildpack/open_jdk_jre/bin/killjava.sh $CALCULATED_MEMORY" && SERVER_PORT=$PORT eval exec $PWD/.java-buildpack/open_jdk_jre/bin/java $JAVA_OPTS -cp $PWD/.:$PWD/.java-buildpack/spring_auto_reconfiguration/spring_auto_reconfiguration-1.10.0_RELEASE.jar org.springframework.boot.loader.JarLauncher`
Showing health and status for app springboot-oracle in org pcfdev-org / space pcfdev-space as admin...
OK
requested state: started
instances: 1/1
usage: 512M x 1 instances
urls: springboot-oracle.local.pcfdev.io
last uploaded: Sun Jul 31 01:23:03 UTC 2016
stack: unknown
buildpack: java-buildpack=v3.6-offline-https://github.com/cloudfoundry/java-buildpack.git#5194155 java-main open-jdk-like-jre=1.8.0_71 open-jdk-like-memory-calculator=2.0.1_RELEASE spring-auto-reconfiguration=1.10.0_RELEASE
state since cpu memory disk details
#0 running 2016-07-31 11:24:26 AM 0.0% 0 of 512M 0 of 512M
pasapicella@pas-macbook:~/pivotal/DemoProjects/spring-starter/pivotal/PCFOracleDemo$ cf apps
Getting apps in org pcfdev-org / space pcfdev-space as admin...
OK
name requested state instances memory disk urls
springboot-oracle started 1/1 512M 512M springboot-oracle.local.pcfdev.io

Monday, 25 July 2016
Telstra WIFI API Consumer on Pivotal Cloud Foundry
If you heard of Telstra WIFI API you will know it will allow you to search for WIFI Hotspots within a given radius and can be used after signing in for Telstra.dev account at https://dev.telstra.com/ to obtain the Hotpots within a given Radius and Lat/Long location.
The WIFI API for Telstra is described at the link below.
https://dev.telstra.com/content/wifi-api
The following application I built on Pivotal Cloud Foundry consumes this Telstra WIFI API service and using the Google Map API along with Spring Boot will show you all the WIFI Hotspots Telstra provides from a mobile device or a Web Browser at your current location. The live URL is as follows. You will need to agree to share your location and enable Location services from your browser when on a mobile device for the MAP to be of any use. Lastly this is only useful within Australia of course.
http://pas-telstrawifi.cfapps.io/

Source Code as follows:
https://github.com/papicella/TelstraWIFIAPIPublic
More Information
https://dev.telstra.com/content/wifi-api
The WIFI API for Telstra is described at the link below.
https://dev.telstra.com/content/wifi-api
The following application I built on Pivotal Cloud Foundry consumes this Telstra WIFI API service and using the Google Map API along with Spring Boot will show you all the WIFI Hotspots Telstra provides from a mobile device or a Web Browser at your current location. The live URL is as follows. You will need to agree to share your location and enable Location services from your browser when on a mobile device for the MAP to be of any use. Lastly this is only useful within Australia of course.
http://pas-telstrawifi.cfapps.io/

Source Code as follows:
https://github.com/papicella/TelstraWIFIAPIPublic
More Information
https://dev.telstra.com/content/wifi-api
Thursday, 14 July 2016
Billing/Metering on Pivotal Cloud Foundry using the Usage Service API's
Pivotal Cloud Foundry (PCF) provides a REST API to provide billing/metering data for application and service usage. Although this usage can we viewed in the applications manager dashboard UI in this post below we will show how to use the REST based API using PCF 1.7.
Below we will show how to use the cf CLI to retrieve information about your app and service instances via the Cloud Controller and Usage service APIs.
Obtain Usage Information for an Organization
To obtain individual org usage information, use the following procedure. You must log in as an admin or as an Org Manager or Org Auditor for the org you want to view.
1. Target the end point of the cloud controller as follows
papicella@papicella:~/apps/ENV$ cf api https://api.system.yyyy.net --skip-ssl-validation
Setting api endpoint to https://api.system.yyyy.net...
OK
API endpoint: https://api.system.yyyy.net (API version: 2.54.0)
User: papicella@pivotal.io
Org: system
Space: pas
2. Login as shown below
papicella@papicella:~/apps/ENV$ cf login -u papicella@pivotal.io -o system -s pas
API endpoint: https://api.system.yyyy.net
Password>
Authenticating...
OK
Targeted org system
Targeted space pas
API endpoint: https://api.system.yyyy.net (API version: 2.54.0)
User: papicella@pivotal.io
Org: system
Space: pas
Now if your using CURL for example you can inject the GUID of your organization as part of the command as well as the "oauth-token". Here is an example on how that is done.
Endpoint format:
https://app-usage.YOUR-DOMAIN/organizations/{ORG_GUID}/app_usages?start=YYYY-MM-DD&end=YYYY-MM-DD
3. Issue REST call as shown below.
papicella@papicella:~$ curl "https://app-usage.system.yyyy.net/organizations/`cf org system --guid`/app_usages?start=2016-06-01&end=2016-06-30" -k -v -H "authorization: `cf oauth-token`" | python -m json.tool
% Total % Received % Xferd Average Speed Time Time Time Current
Dload Upload Total Spent Left Speed
0 0 0 0 0 0 0 0 --:--:-- --:--:-- --:--:-- 0* Trying 222.237.99.147...
* Connected to app-usage.system.yyyy.net (222.237.99.147) port 443 (#0)
0 0 0 0 0 0 0 0 --:--:-- --:--:-- --:--:-- 0* TLS 1.2 connection using TLS_ECDHE_RSA_WITH_AES_128_GCM_SHA256
* Server certificate: *.system.yyyy.net
0 0 0 0 0 0 0 0 --:--:-- 0:00:01 --:--:-- 0> GET /organizations/b75c9069-83b4-4130-a98e-a5eb4c5454c5/app_usages?start=2016-06-01&end=2016-06-30 HTTP/1.1
> Host: app-usage.system.yyyy.net
> User-Agent: curl/7.43.0
> Accept: */*
> authorization: bearer AwZi1lYjYGVyIMPPO-06eUG1FM12DY964Eh5AA_6Ga8P7IoB4Qr2OVx_vHh6o35IFKw .....
>
< HTTP/1.1 200 OK
< Cache-Control: max-age=0, private, must-revalidate
< Content-Type: application/json; charset=utf-8
< Etag: "16161b20edbc072ab63f8f8acf6ff251"
< Server: thin
< X-Content-Type-Options: nosniff
< X-Frame-Options: SAMEORIGIN
< X-Request-Id: 3ef758d1-3f8d-4942-b0bc-44666c2797e5
< X-Runtime: 0.167997
< X-Vcap-Request-Id: 01794681-8e29-4a07-463c-3660d0c3b349
< X-Xss-Protection: 1; mode=block
< Date: Thu, 14 Jul 2016 00:41:55 GMT
< Content-Length: 1766
<
{ [1766 bytes data]
100 1766 100 1766 0 0 755 0 0:00:02 0:00:02 --:--:-- 755
* Connection #0 to host app-usage.system.yyyy.net left intact
{
"app_usages": [
{
"app_guid": "17eee541-051a-44b5-83ae-bbbba5519af7",
"app_name": "springboot-telstrasms",
"duration_in_seconds": 0,
"instance_count": 1,
"memory_in_mb_per_instance": 512,
"space_guid": "7a0cfa11-d71d-4dd6-a706-b5eff622fb66",
"space_name": "pas"
},
{
"app_guid": "1f102a77-ce84-4cf4-93d1-e015abdf65b5",
"app_name": "company",
"duration_in_seconds": 1622,
"instance_count": 1,
"memory_in_mb_per_instance": 512,
"space_guid": "85d952b4-1acb-45fa-bd8b-d440de745a6f",
"space_name": "development"
},
{
"app_guid": "2d05970c-3f94-4329-a92a-5b81f95a9365",
"app_name": "jay-test",
"duration_in_seconds": 448,
"instance_count": 1,
"memory_in_mb_per_instance": 512,
"space_guid": "85d952b4-1acb-45fa-bd8b-d440de745a6f",
"space_name": "development"
},
{
"app_guid": "2d05970c-3f94-4329-a92a-5b81f95a9365",
"app_name": "jay-test",
"duration_in_seconds": 692,
"instance_count": 1,
"memory_in_mb_per_instance": 1024,
"space_guid": "85d952b4-1acb-45fa-bd8b-d440de745a6f",
"space_name": "development"
},
{
"app_guid": "4b771593-5032-41f9-84ff-1ecfec9a7f4d",
"app_name": "company",
"duration_in_seconds": 18430,
"instance_count": 1,
"memory_in_mb_per_instance": 512,
"space_guid": "85d952b4-1acb-45fa-bd8b-d440de745a6f",
"space_name": "development"
},
{
"app_guid": "a5435de0-1dd3-49ba-a551-94e921a5999b",
"app_name": "springboot-telstrasms",
"duration_in_seconds": 677,
"instance_count": 1,
"memory_in_mb_per_instance": 512,
"space_guid": "7a0cfa11-d71d-4dd6-a706-b5eff622fb66",
"space_name": "pas"
},
{
"app_guid": "f9c7f387-d008-4541-b093-92fb23e01aee",
"app_name": "company",
"duration_in_seconds": 0,
"instance_count": 1,
"memory_in_mb_per_instance": 512,
"space_guid": "85d952b4-1acb-45fa-bd8b-d440de745a6f",
"space_name": "development"
}
],
"organization_guid": "b75c9069-83b4-4130-a98e-a5eb4c5454c5",
"period_end": "2016-06-30T23:59:59Z",
"period_start": "2016-06-01T00:00:00Z"
}
4. To obtain usage information about services you would issue a REST call as follows
Use cf curl to retrieve service instance information. The service_instances? endpoint retrieves details about both bound and unbound service instances:
Endpoint format:
https://app-usage.YOUR-DOMAIN/organizations{ORG_GUID}/service_usages?start=YYYY-MM-DD&end=YYYY-MM-DD
papicella@papicella:~$ curl "https://app-usage.system.yyyy.net/organizations/b75c9069-83b4-4130-a98e-a5eb4c5454c5/service_usages?start=2016-06-01&end=2016-06-30" -k -v -H "authorization: `cf oauth-token`" | python -m json.tool
% Total % Received % Xferd Average Speed Time Time Time Current
Dload Upload Total Spent Left Speed
0 0 0 0 0 0 0 0 --:--:-- --:--:-- --:--:-- 0* Trying 222.237.99.147...
0 0 0 0 0 0 0 0 --:--:-- --:--:-- --:--:-- 0* Connected to app-usage.system.yyyy.net (222.237.99.147) port 443 (#0)
0 0 0 0 0 0 0 0 --:--:-- 0:00:02 --:--:-- 0* TLS 1.2 connection using TLS_ECDHE_RSA_WITH_AES_128_GCM_SHA256
* Server certificate: *.system.yyyy.net
> GET /organizations/b75c9069-83b4-4130-a98e-a5eb4c5454c5/service_usages?start=2016-06-01&end=2016-06-30 HTTP/1.1
> Host: app-usage.system.yyyy.net
> User-Agent: curl/7.43.0
> Accept: */*
> authorization: bearer eyJhbGciOiJSUzI1NiJ9.....
>
0 0 0 0 0 0 0 0 --:--:-- 0:00:03 --:--:-- 0< HTTP/1.1 200 OK
< Cache-Control: max-age=0, private, must-revalidate
< Content-Type: application/json; charset=utf-8
< Etag: "909824b589cbed6c3d19c2f36bec985e"
< Server: thin
< X-Content-Type-Options: nosniff
< X-Frame-Options: SAMEORIGIN
< X-Request-Id: 2255821e-116c-4651-b483-1939f0f1f866
< X-Runtime: 0.137921
< X-Vcap-Request-Id: 3991c5f9-11c2-4c0e-5f2b-d1f94be87ef4
< X-Xss-Protection: 1; mode=block
< Date: Thu, 14 Jul 2016 00:53:47 GMT
< Transfer-Encoding: chunked
<
{ [3632 bytes data]
100 3978 0 3978 0 0 1283 0 --:--:-- 0:00:03 --:--:-- 1283
* Connection #0 to host app-usage.system.yyyy.net left intact
{
"organization_guid": "b75c9069-83b4-4130-a98e-a5eb4c5454c5",
"period_end": "2016-06-30T23:59:59Z",
"period_start": "2016-06-01T00:00:00Z",
"service_usages": [
{
"deleted": false,
"duration_in_seconds": 2592000.0,
"service_guid": "5c03686a-6748-4b76-bb6f-cbd116d5d87e",
"service_instance_creation": "2016-05-10T01:58:01.000Z",
"service_instance_deletion": null,
"service_instance_guid": "bd09176c-483c-4011-b329-fba717abfc27",
"service_instance_name": "spring-cloud-broker-db",
"service_instance_type": "managed_service_instance",
"service_name": "p-mysql",
"service_plan_guid": "b3525660-1a74-452f-9564-65a2556895bd",
"service_plan_name": "100mb-dev",
"space_guid": "8a9788b2-8405-4312-99fc-6854a2972616",
"space_name": "p-spring-cloud-services"
},
{
"deleted": false,
"duration_in_seconds": 2592000.0,
"service_guid": "b0a9fb4e-325b-402b-8a99-d53d7f7df80c",
"service_instance_creation": "2016-05-10T01:58:03.000Z",
"service_instance_deletion": null,
"service_instance_guid": "ad82aa5b-fd7c-4e7d-b56f-523f7b285c5d",
"service_instance_name": "spring-cloud-broker-rmq",
"service_instance_type": "managed_service_instance",
"service_name": "p-rabbitmq",
"service_plan_guid": "0cfd01c4-aea0-4ab0-9817-a312d91eee8d",
"service_plan_name": "standard",
"space_guid": "8a9788b2-8405-4312-99fc-6854a2972616",
"space_name": "p-spring-cloud-services"
},
{
"deleted": false,
"duration_in_seconds": 2592000.0,
"service_guid": "5c03686a-6748-4b76-bb6f-cbd116d5d87e",
"service_instance_creation": "2016-05-11T06:53:19.000Z",
"service_instance_deletion": null,
"service_instance_guid": "9c306f43-b17d-4a59-964d-828db5047e04",
"service_instance_name": "mydb",
"service_instance_type": "managed_service_instance",
"service_name": "p-mysql",
"service_plan_guid": "b3525660-1a74-452f-9564-65a2556895bd",
"service_plan_name": "100mb-dev",
"space_guid": "7938ae22-6a1c-49bc-9cf4-08b9b6281e83",
"space_name": "autoscaling"
},
{
"deleted": false,
"duration_in_seconds": 2592000.0,
"service_guid": "23a0f05f-fed6-4873-b0f5-77457b721626",
"service_instance_creation": "2016-05-11T06:57:01.000Z",
"service_instance_deletion": null,
"service_instance_guid": "75a4f233-25a4-4fb2-b205-354716c6c081",
"service_instance_name": "auto",
"service_instance_type": "managed_service_instance",
"service_name": "app-autoscaler",
"service_plan_guid": "5e0285ad-92b5-4cda-95e7-36db4a16fa05",
"service_plan_name": "bronze",
"space_guid": "7938ae22-6a1c-49bc-9cf4-08b9b6281e83",
"space_name": "autoscaling"
},
{
"deleted": false,
"duration_in_seconds": 2592000.0,
"service_guid": "5c03686a-6748-4b76-bb6f-cbd116d5d87e",
"service_instance_creation": "2016-05-20T08:39:09.000Z",
"service_instance_deletion": null,
"service_instance_guid": "9b69e1d0-2f93-48d2-a0b0-fc009ebbfe1d",
"service_instance_name": "account-db",
"service_instance_type": "managed_service_instance",
"service_name": "p-mysql",
"service_plan_guid": "b3525660-1a74-452f-9564-65a2556895bd",
"service_plan_name": "100mb-dev",
"space_guid": "7938ae22-6a1c-49bc-9cf4-08b9b6281e83",
"space_name": "autoscaling"
},
{
"deleted": false,
"duration_in_seconds": 1947572.0,
"service_guid": "f603ea87-9b24-4114-9bdc-c4e8154b549c",
"service_instance_creation": "2016-06-08T11:00:28.000Z",
"service_instance_deletion": null,
"service_instance_guid": "3d75b148-ee78-4f91-aa49-a1b2aa511fd1",
"service_instance_name": "service-registry",
"service_instance_type": "managed_service_instance",
"service_name": "p-service-registry",
"service_plan_guid": "ee6a7f19-f4d2-44f8-b8a2-08246c5d9a5d",
"service_plan_name": "standard",
"space_guid": "85d952b4-1acb-45fa-bd8b-d440de745a6f",
"space_name": "development"
},
{
"deleted": false,
"duration_in_seconds": 67559.0,
"service_guid": "23da6824-3ee0-4d87-b031-6223e69327ed",
"service_instance_creation": "2016-06-30T05:14:01.000Z",
"service_instance_deletion": null,
"service_instance_guid": "fd8d2f19-6a8c-43ad-81c1-205e6a29d2b8",
"service_instance_name": "api-connectors-service",
"service_instance_type": "managed_service_instance",
"service_name": "apigee-edge",
"service_plan_guid": "36ae6841-9eb3-42b7-b40b-aa44ee72a14c",
"service_plan_name": "org",
"space_guid": "7a0cfa11-d71d-4dd6-a706-b5eff622fb66",
"space_name": "pas"
}
]
}
The following screen shots show how this is done using a REST client from a browser.


More Information
http://docs.pivotal.io/pivotalcf/1-7/opsguide/accounting-report.html
Below we will show how to use the cf CLI to retrieve information about your app and service instances via the Cloud Controller and Usage service APIs.
Obtain Usage Information for an Organization
To obtain individual org usage information, use the following procedure. You must log in as an admin or as an Org Manager or Org Auditor for the org you want to view.
1. Target the end point of the cloud controller as follows
papicella@papicella:~/apps/ENV$ cf api https://api.system.yyyy.net --skip-ssl-validation
Setting api endpoint to https://api.system.yyyy.net...
OK
API endpoint: https://api.system.yyyy.net (API version: 2.54.0)
User: papicella@pivotal.io
Org: system
Space: pas
2. Login as shown below
papicella@papicella:~/apps/ENV$ cf login -u papicella@pivotal.io -o system -s pas
API endpoint: https://api.system.yyyy.net
Password>
Authenticating...
OK
Targeted org system
Targeted space pas
API endpoint: https://api.system.yyyy.net (API version: 2.54.0)
User: papicella@pivotal.io
Org: system
Space: pas
Now if your using CURL for example you can inject the GUID of your organization as part of the command as well as the "oauth-token". Here is an example on how that is done.
Endpoint format:
https://app-usage.YOUR-DOMAIN/organizations/{ORG_GUID}/app_usages?start=YYYY-MM-DD&end=YYYY-MM-DD
3. Issue REST call as shown below.
papicella@papicella:~$ curl "https://app-usage.system.yyyy.net/organizations/`cf org system --guid`/app_usages?start=2016-06-01&end=2016-06-30" -k -v -H "authorization: `cf oauth-token`" | python -m json.tool
% Total % Received % Xferd Average Speed Time Time Time Current
Dload Upload Total Spent Left Speed
0 0 0 0 0 0 0 0 --:--:-- --:--:-- --:--:-- 0* Trying 222.237.99.147...
* Connected to app-usage.system.yyyy.net (222.237.99.147) port 443 (#0)
0 0 0 0 0 0 0 0 --:--:-- --:--:-- --:--:-- 0* TLS 1.2 connection using TLS_ECDHE_RSA_WITH_AES_128_GCM_SHA256
* Server certificate: *.system.yyyy.net
0 0 0 0 0 0 0 0 --:--:-- 0:00:01 --:--:-- 0> GET /organizations/b75c9069-83b4-4130-a98e-a5eb4c5454c5/app_usages?start=2016-06-01&end=2016-06-30 HTTP/1.1
> Host: app-usage.system.yyyy.net
> User-Agent: curl/7.43.0
> Accept: */*
> authorization: bearer AwZi1lYjYGVyIMPPO-06eUG1FM12DY964Eh5AA_6Ga8P7IoB4Qr2OVx_vHh6o35IFKw .....
>
< HTTP/1.1 200 OK
< Cache-Control: max-age=0, private, must-revalidate
< Content-Type: application/json; charset=utf-8
< Etag: "16161b20edbc072ab63f8f8acf6ff251"
< Server: thin
< X-Content-Type-Options: nosniff
< X-Frame-Options: SAMEORIGIN
< X-Request-Id: 3ef758d1-3f8d-4942-b0bc-44666c2797e5
< X-Runtime: 0.167997
< X-Vcap-Request-Id: 01794681-8e29-4a07-463c-3660d0c3b349
< X-Xss-Protection: 1; mode=block
< Date: Thu, 14 Jul 2016 00:41:55 GMT
< Content-Length: 1766
<
{ [1766 bytes data]
100 1766 100 1766 0 0 755 0 0:00:02 0:00:02 --:--:-- 755
* Connection #0 to host app-usage.system.yyyy.net left intact
{
"app_usages": [
{
"app_guid": "17eee541-051a-44b5-83ae-bbbba5519af7",
"app_name": "springboot-telstrasms",
"duration_in_seconds": 0,
"instance_count": 1,
"memory_in_mb_per_instance": 512,
"space_guid": "7a0cfa11-d71d-4dd6-a706-b5eff622fb66",
"space_name": "pas"
},
{
"app_guid": "1f102a77-ce84-4cf4-93d1-e015abdf65b5",
"app_name": "company",
"duration_in_seconds": 1622,
"instance_count": 1,
"memory_in_mb_per_instance": 512,
"space_guid": "85d952b4-1acb-45fa-bd8b-d440de745a6f",
"space_name": "development"
},
{
"app_guid": "2d05970c-3f94-4329-a92a-5b81f95a9365",
"app_name": "jay-test",
"duration_in_seconds": 448,
"instance_count": 1,
"memory_in_mb_per_instance": 512,
"space_guid": "85d952b4-1acb-45fa-bd8b-d440de745a6f",
"space_name": "development"
},
{
"app_guid": "2d05970c-3f94-4329-a92a-5b81f95a9365",
"app_name": "jay-test",
"duration_in_seconds": 692,
"instance_count": 1,
"memory_in_mb_per_instance": 1024,
"space_guid": "85d952b4-1acb-45fa-bd8b-d440de745a6f",
"space_name": "development"
},
{
"app_guid": "4b771593-5032-41f9-84ff-1ecfec9a7f4d",
"app_name": "company",
"duration_in_seconds": 18430,
"instance_count": 1,
"memory_in_mb_per_instance": 512,
"space_guid": "85d952b4-1acb-45fa-bd8b-d440de745a6f",
"space_name": "development"
},
{
"app_guid": "a5435de0-1dd3-49ba-a551-94e921a5999b",
"app_name": "springboot-telstrasms",
"duration_in_seconds": 677,
"instance_count": 1,
"memory_in_mb_per_instance": 512,
"space_guid": "7a0cfa11-d71d-4dd6-a706-b5eff622fb66",
"space_name": "pas"
},
{
"app_guid": "f9c7f387-d008-4541-b093-92fb23e01aee",
"app_name": "company",
"duration_in_seconds": 0,
"instance_count": 1,
"memory_in_mb_per_instance": 512,
"space_guid": "85d952b4-1acb-45fa-bd8b-d440de745a6f",
"space_name": "development"
}
],
"organization_guid": "b75c9069-83b4-4130-a98e-a5eb4c5454c5",
"period_end": "2016-06-30T23:59:59Z",
"period_start": "2016-06-01T00:00:00Z"
}
4. To obtain usage information about services you would issue a REST call as follows
Use cf curl to retrieve service instance information. The service_instances? endpoint retrieves details about both bound and unbound service instances:
Endpoint format:
https://app-usage.YOUR-DOMAIN/organizations{ORG_GUID}/service_usages?start=YYYY-MM-DD&end=YYYY-MM-DD
papicella@papicella:~$ curl "https://app-usage.system.yyyy.net/organizations/b75c9069-83b4-4130-a98e-a5eb4c5454c5/service_usages?start=2016-06-01&end=2016-06-30" -k -v -H "authorization: `cf oauth-token`" | python -m json.tool
% Total % Received % Xferd Average Speed Time Time Time Current
Dload Upload Total Spent Left Speed
0 0 0 0 0 0 0 0 --:--:-- --:--:-- --:--:-- 0* Trying 222.237.99.147...
0 0 0 0 0 0 0 0 --:--:-- --:--:-- --:--:-- 0* Connected to app-usage.system.yyyy.net (222.237.99.147) port 443 (#0)
0 0 0 0 0 0 0 0 --:--:-- 0:00:02 --:--:-- 0* TLS 1.2 connection using TLS_ECDHE_RSA_WITH_AES_128_GCM_SHA256
* Server certificate: *.system.yyyy.net
> GET /organizations/b75c9069-83b4-4130-a98e-a5eb4c5454c5/service_usages?start=2016-06-01&end=2016-06-30 HTTP/1.1
> Host: app-usage.system.yyyy.net
> User-Agent: curl/7.43.0
> Accept: */*
> authorization: bearer eyJhbGciOiJSUzI1NiJ9.....
>
0 0 0 0 0 0 0 0 --:--:-- 0:00:03 --:--:-- 0< HTTP/1.1 200 OK
< Cache-Control: max-age=0, private, must-revalidate
< Content-Type: application/json; charset=utf-8
< Etag: "909824b589cbed6c3d19c2f36bec985e"
< Server: thin
< X-Content-Type-Options: nosniff
< X-Frame-Options: SAMEORIGIN
< X-Request-Id: 2255821e-116c-4651-b483-1939f0f1f866
< X-Runtime: 0.137921
< X-Vcap-Request-Id: 3991c5f9-11c2-4c0e-5f2b-d1f94be87ef4
< X-Xss-Protection: 1; mode=block
< Date: Thu, 14 Jul 2016 00:53:47 GMT
< Transfer-Encoding: chunked
<
{ [3632 bytes data]
100 3978 0 3978 0 0 1283 0 --:--:-- 0:00:03 --:--:-- 1283
* Connection #0 to host app-usage.system.yyyy.net left intact
{
"organization_guid": "b75c9069-83b4-4130-a98e-a5eb4c5454c5",
"period_end": "2016-06-30T23:59:59Z",
"period_start": "2016-06-01T00:00:00Z",
"service_usages": [
{
"deleted": false,
"duration_in_seconds": 2592000.0,
"service_guid": "5c03686a-6748-4b76-bb6f-cbd116d5d87e",
"service_instance_creation": "2016-05-10T01:58:01.000Z",
"service_instance_deletion": null,
"service_instance_guid": "bd09176c-483c-4011-b329-fba717abfc27",
"service_instance_name": "spring-cloud-broker-db",
"service_instance_type": "managed_service_instance",
"service_name": "p-mysql",
"service_plan_guid": "b3525660-1a74-452f-9564-65a2556895bd",
"service_plan_name": "100mb-dev",
"space_guid": "8a9788b2-8405-4312-99fc-6854a2972616",
"space_name": "p-spring-cloud-services"
},
{
"deleted": false,
"duration_in_seconds": 2592000.0,
"service_guid": "b0a9fb4e-325b-402b-8a99-d53d7f7df80c",
"service_instance_creation": "2016-05-10T01:58:03.000Z",
"service_instance_deletion": null,
"service_instance_guid": "ad82aa5b-fd7c-4e7d-b56f-523f7b285c5d",
"service_instance_name": "spring-cloud-broker-rmq",
"service_instance_type": "managed_service_instance",
"service_name": "p-rabbitmq",
"service_plan_guid": "0cfd01c4-aea0-4ab0-9817-a312d91eee8d",
"service_plan_name": "standard",
"space_guid": "8a9788b2-8405-4312-99fc-6854a2972616",
"space_name": "p-spring-cloud-services"
},
{
"deleted": false,
"duration_in_seconds": 2592000.0,
"service_guid": "5c03686a-6748-4b76-bb6f-cbd116d5d87e",
"service_instance_creation": "2016-05-11T06:53:19.000Z",
"service_instance_deletion": null,
"service_instance_guid": "9c306f43-b17d-4a59-964d-828db5047e04",
"service_instance_name": "mydb",
"service_instance_type": "managed_service_instance",
"service_name": "p-mysql",
"service_plan_guid": "b3525660-1a74-452f-9564-65a2556895bd",
"service_plan_name": "100mb-dev",
"space_guid": "7938ae22-6a1c-49bc-9cf4-08b9b6281e83",
"space_name": "autoscaling"
},
{
"deleted": false,
"duration_in_seconds": 2592000.0,
"service_guid": "23a0f05f-fed6-4873-b0f5-77457b721626",
"service_instance_creation": "2016-05-11T06:57:01.000Z",
"service_instance_deletion": null,
"service_instance_guid": "75a4f233-25a4-4fb2-b205-354716c6c081",
"service_instance_name": "auto",
"service_instance_type": "managed_service_instance",
"service_name": "app-autoscaler",
"service_plan_guid": "5e0285ad-92b5-4cda-95e7-36db4a16fa05",
"service_plan_name": "bronze",
"space_guid": "7938ae22-6a1c-49bc-9cf4-08b9b6281e83",
"space_name": "autoscaling"
},
{
"deleted": false,
"duration_in_seconds": 2592000.0,
"service_guid": "5c03686a-6748-4b76-bb6f-cbd116d5d87e",
"service_instance_creation": "2016-05-20T08:39:09.000Z",
"service_instance_deletion": null,
"service_instance_guid": "9b69e1d0-2f93-48d2-a0b0-fc009ebbfe1d",
"service_instance_name": "account-db",
"service_instance_type": "managed_service_instance",
"service_name": "p-mysql",
"service_plan_guid": "b3525660-1a74-452f-9564-65a2556895bd",
"service_plan_name": "100mb-dev",
"space_guid": "7938ae22-6a1c-49bc-9cf4-08b9b6281e83",
"space_name": "autoscaling"
},
{
"deleted": false,
"duration_in_seconds": 1947572.0,
"service_guid": "f603ea87-9b24-4114-9bdc-c4e8154b549c",
"service_instance_creation": "2016-06-08T11:00:28.000Z",
"service_instance_deletion": null,
"service_instance_guid": "3d75b148-ee78-4f91-aa49-a1b2aa511fd1",
"service_instance_name": "service-registry",
"service_instance_type": "managed_service_instance",
"service_name": "p-service-registry",
"service_plan_guid": "ee6a7f19-f4d2-44f8-b8a2-08246c5d9a5d",
"service_plan_name": "standard",
"space_guid": "85d952b4-1acb-45fa-bd8b-d440de745a6f",
"space_name": "development"
},
{
"deleted": false,
"duration_in_seconds": 67559.0,
"service_guid": "23da6824-3ee0-4d87-b031-6223e69327ed",
"service_instance_creation": "2016-06-30T05:14:01.000Z",
"service_instance_deletion": null,
"service_instance_guid": "fd8d2f19-6a8c-43ad-81c1-205e6a29d2b8",
"service_instance_name": "api-connectors-service",
"service_instance_type": "managed_service_instance",
"service_name": "apigee-edge",
"service_plan_guid": "36ae6841-9eb3-42b7-b40b-aa44ee72a14c",
"service_plan_name": "org",
"space_guid": "7a0cfa11-d71d-4dd6-a706-b5eff622fb66",
"space_name": "pas"
}
]
}
The following screen shots show how this is done using a REST client from a browser.


More Information
http://docs.pivotal.io/pivotalcf/1-7/opsguide/accounting-report.html
Tuesday, 12 July 2016
Creating a Service within IntelliJ IDEA to be used by the Service Registry for Pivotal Cloud Foundry
In this example I am going to show how to use IntelliJ IDEA 15 to create a service application from the IDE to be consumed by the Service Registry service in Pivotal Cloud Foundry (PCF). For more information on this service view the docs page below.
http://docs.pivotal.io/spring-cloud-services/service-registry/index.html
Service Registry for Pivotal Cloud Foundry® (PCF) provides your applications with an implementation of the Service Discovery pattern, one of the key tenets of a microservice-based architecture. Trying to hand-configure each client of a service or adopt some form of access convention can be difficult and prove to be brittle in production. Instead, your applications can use the Service Registry to dynamically discover and call registered services
1. Start IntelliJ IDEA and either "Create a New project" or add a "New Module" to an existing project.
2. Ensure you select "Spring Initializer" as shown below

3. Click Next
4. Describe your project or module, I normally use Maven and generate a JAR file

5. Click Next
6. At the minimum here we only need to select "Service Registry (PCF)" as shown below for the dependency. Of course you would select other options dependncies depending on what the service needed such as REST, JPA, H2 or MySQL etc

7. Click Next
8. Name your new model or project

9. Click Finish
10. Click Finish
11. Your service application must include the @EnableDiscoveryClient annotation on a configuration class. To do that we simply add the annotation to our main class as follows

Java Code
12. Set the spring.application.name property in application.yml. It might be an application.properties file BUT rename it to YML as I know that works. below I not only set the application name I also set the registrationMethod to "route" which is the default and then turn off security as it is enabled by default.
spring:
application:
name: employee-service
cloud:
services:
registrationMethod: route
security:
basic:
enabled: false
So that's all we really need to do here. Of course we will need to add code to our service to do what it needs to do BUT all the config required to enable this service to automatically register itself with the "Service Registry" in PCF is done.
13. Before we deploy this to out PCF instance we have to be sure we have a "Service Registry" service created as shown below using the CF CLI mine is already created.

14. Create a manifest.yml file for the service to be deployed, notice how it binds to the service registry "apples-service-registery", this will ensure it automatically gets registered on deployment with the Service Registry service
---
applications:
- name: apples-employee-service
memory: 512M
instances: 1
host: apples-employee-service-${random-word}
path: ./target/EmployeeService-0.0.1-SNAPSHOT.jar
services:
- apples-service-registery
15. Push the service application to PCF as shown below

.....

16. Login into your PCF instance App Manager UI, in this demo I am using PWS instance run.pivotal.io and find your "Service Registry" service and click on it as shown below

17. Click on the "Manage" link as shown below

18. Verify your service is registered as shown below

More Information
http://docs.pivotal.io/spring-cloud-services/service-registry/index.html
https://docs.pivotal.io/spring-cloud-services/service-registry/resources.html
http://docs.pivotal.io/spring-cloud-services/service-registry/writing-client-applications.html
http://docs.pivotal.io/spring-cloud-services/service-registry/index.html
Service Registry for Pivotal Cloud Foundry® (PCF) provides your applications with an implementation of the Service Discovery pattern, one of the key tenets of a microservice-based architecture. Trying to hand-configure each client of a service or adopt some form of access convention can be difficult and prove to be brittle in production. Instead, your applications can use the Service Registry to dynamically discover and call registered services
1. Start IntelliJ IDEA and either "Create a New project" or add a "New Module" to an existing project.
2. Ensure you select "Spring Initializer" as shown below

3. Click Next
4. Describe your project or module, I normally use Maven and generate a JAR file

5. Click Next
6. At the minimum here we only need to select "Service Registry (PCF)" as shown below for the dependency. Of course you would select other options dependncies depending on what the service needed such as REST, JPA, H2 or MySQL etc

7. Click Next
8. Name your new model or project

9. Click Finish
10. Click Finish
11. Your service application must include the @EnableDiscoveryClient annotation on a configuration class. To do that we simply add the annotation to our main class as follows

Java Code
package pas.au.pivotal.service.hr;

import org.springframework.beans.factory.annotation.Autowired;
import org.springframework.boot.SpringApplication;
import org.springframework.boot.autoconfigure.SpringBootApplication;
import org.springframework.cloud.client.discovery.EnableDiscoveryClient;

import javax.annotation.PostConstruct;

@SpringBootApplication
@EnableDiscoveryClient
public class EmployeeServiceApplication
{
 @Autowired
 private EmployeeRepository employeeRepository;

 public static void main(String[] args) {
  SpringApplication.run(EmployeeServiceApplication.class, args);
 }

 @PostConstruct
 public void init()
 {
  employeeRepository.save(new Employee("pas"));
  employeeRepository.save(new Employee("lucia"));
  employeeRepository.save(new Employee("siena"));
  employeeRepository.save(new Employee("lucas"));
 }
}
12. Set the spring.application.name property in application.yml. It might be an application.properties file BUT rename it to YML as I know that works. below I not only set the application name I also set the registrationMethod to "route" which is the default and then turn off security as it is enabled by default.
spring:
application:
name: employee-service
cloud:
services:
registrationMethod: route
security:
basic:
enabled: false
So that's all we really need to do here. Of course we will need to add code to our service to do what it needs to do BUT all the config required to enable this service to automatically register itself with the "Service Registry" in PCF is done.
13. Before we deploy this to out PCF instance we have to be sure we have a "Service Registry" service created as shown below using the CF CLI mine is already created.

14. Create a manifest.yml file for the service to be deployed, notice how it binds to the service registry "apples-service-registery", this will ensure it automatically gets registered on deployment with the Service Registry service
---
applications:
- name: apples-employee-service
memory: 512M
instances: 1
host: apples-employee-service-${random-word}
path: ./target/EmployeeService-0.0.1-SNAPSHOT.jar
services:
- apples-service-registery
15. Push the service application to PCF as shown below

.....

16. Login into your PCF instance App Manager UI, in this demo I am using PWS instance run.pivotal.io and find your "Service Registry" service and click on it as shown below

17. Click on the "Manage" link as shown below

18. Verify your service is registered as shown below

More Information
http://docs.pivotal.io/spring-cloud-services/service-registry/index.html
https://docs.pivotal.io/spring-cloud-services/service-registry/resources.html
http://docs.pivotal.io/spring-cloud-services/service-registry/writing-client-applications.html
Monday, 4 July 2016
Pivotal Cloud Foundry Spring Boot JPA demo written in Kotlin
I created the following demo for PCF using spring boot / PCF. After showing a colleague he decided he would write a Kotlin version of the same application. It's interesting to see how the Kotlin classes differ to those of Java.
https://github.com/papicella/PivotalSpringBootJPA
The Kotlin version of the same application is here.
https://github.com/papicella/Kotlin-PivotalSpringBootJPA
Kotlin is a functional language developed by the JetBrains guys. Its main benefits are:

https://github.com/papicella/PivotalSpringBootJPA
The Kotlin version of the same application is here.
https://github.com/papicella/Kotlin-PivotalSpringBootJPA
Kotlin is a functional language developed by the JetBrains guys. Its main benefits are:
- Conciseness of code
- Code safety - Null safety by not allowing nulls values unless one specifies variables to be null.
- Interoptability - 100% Java interop.
- Ease of use and reduced learning curve
- Great tooling - As support in Intellij Idea is brilliant

Thursday, 30 June 2016
Integrating Telstra SMS API with the Apigee Edge Service Broker for Pivotal Cloud Foundry (PCF)
Apigee and Pivotal partnered to provide comprehensive API management
capabilities that expedite the scalable delivery of apps on the powerful
Pivotal Cloud Foundry platform. Apigee Edge is available for rapid
deployment as a partner service in the Pivotal Network
The following link talks about this service in detail
http://apigee.com/about/solutions/pivotal-cloud-foundry-apigee
In this blog post we walk through how we would use this Service on Pivotal Cloud Foundry 1.7 to expose Telstra SMS Api.

1. First we have to deploy our application which provides access to the Public SMS Api from Telstra. This is deployed to Pivotal Cloud Foundry (PCF). The GitHub project is as follows.
https://github.com/papicella/TelstraSMSAPIPublic

2. Once deployed the application provides two REST endpoints that also includes swagger UI
Note: This Telstra API only works for Australian based mobile numbers and you will need a https://dev.telstra.com/ account to invoke the free Telstra SMS Service. The API is explained in detail at this link https://dev.telstra.com/content/sms-api-0


3. Now at this point we will need to add "Apigee Edge Service Broker for PCF" tile to Pivotal Ops Manager. You can download it from the URL below and follow the instructions to install the Tile onto the
https://network.pivotal.io/products/apigee-edge-for-pcf-service-broker
4. Once installed it will be shown as a tile on Pivotal Ops Manager as per the image below

5. To ensure it's part of our marketplace services we simply log into our PCF instance using the command line as shown below

OR from the Pivotal Apps Manager

6. Use the create-service command to create an instance of the Apigee Edge service broker as shown below
papicella@papicella:~/pivotal/services/apigee$ cf create-service apigee-edge org api-connectors-service -c api-connectors.json
Creating service instance api-connectors-service in org system / space pas as papicella@pivotal.io...
OK
api-connectors.json
{"org":"papicella", "env":"prod", "user":"papicella@pivotal.io", "pass":"yyyyyyy", "host": "apigee.net", "hostpattern": "${apigeeOrganization}-${apigeeEnvironment}.${proxyHost}"}
The JSON specifies the Apigee Edge details needed to route traffic:
papicella@papicella:~/pivotal/services/apigee$ cf bind-route-service pcfdemo.net api-connectors-service --hostname apples-springboot-telstrasms
Binding route apples-springboot-telstrasms.pcfdemo.net to service instance api-connectors-service in org system / space pas as papicella@pivotal.io...
OK
Note: The hostname is the name of your REST based application
8. With the service created it will then exist within the space as per the image below

9. Click on the service as shown below
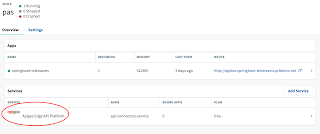
10. Click on Manage as shown below

11. In the Apigee management console, under APIs > API proxies, locate the name of the proxy you just created as shown below

12. Click the PCF proxy's name to view its overview page.
13. Click the Trace tab, the click the Start Trace Session button.
14. Back at the command line, access the REST based application endpoint for the Telstra SMS Service as shown below.
papicella@papicella:~/pivotal/services/apigee$ curl "http://apples-springboot-telstrasms.pcfdemo.net/telstra/sms?to=0411151350&appkey=apples-key&appsecret=apples-password"
{"messageId":"5188529E91E847589079BAFDBF8B63FF"}
15. Return to the Apigee Management Console to verify Trace Output and a Successful HTTP 200 call. The new proxy is just a pass-through. But it's ready for you or someone on your team to add policies to define security, traffic management, and more.

More Information
Pivotal Cloud Foundry and Apigee - http://apigee.com/about/solutions/pivotal-cloud-foundry-apigee
Pivotal Cloud Foundry - http://pivotal.io/platform
The following link talks about this service in detail
http://apigee.com/about/solutions/pivotal-cloud-foundry-apigee
In this blog post we walk through how we would use this Service on Pivotal Cloud Foundry 1.7 to expose Telstra SMS Api.

1. First we have to deploy our application which provides access to the Public SMS Api from Telstra. This is deployed to Pivotal Cloud Foundry (PCF). The GitHub project is as follows.
https://github.com/papicella/TelstraSMSAPIPublic

2. Once deployed the application provides two REST endpoints that also includes swagger UI
Note: This Telstra API only works for Australian based mobile numbers and you will need a https://dev.telstra.com/ account to invoke the free Telstra SMS Service. The API is explained in detail at this link https://dev.telstra.com/content/sms-api-0


3. Now at this point we will need to add "Apigee Edge Service Broker for PCF" tile to Pivotal Ops Manager. You can download it from the URL below and follow the instructions to install the Tile onto the
https://network.pivotal.io/products/apigee-edge-for-pcf-service-broker
4. Once installed it will be shown as a tile on Pivotal Ops Manager as per the image below

5. To ensure it's part of our marketplace services we simply log into our PCF instance using the command line as shown below

OR from the Pivotal Apps Manager

6. Use the create-service command to create an instance of the Apigee Edge service broker as shown below
papicella@papicella:~/pivotal/services/apigee$ cf create-service apigee-edge org api-connectors-service -c api-connectors.json
Creating service instance api-connectors-service in org system / space pas as papicella@pivotal.io...
OK
api-connectors.json
{"org":"papicella", "env":"prod", "user":"papicella@pivotal.io", "pass":"yyyyyyy", "host": "apigee.net", "hostpattern": "${apigeeOrganization}-${apigeeEnvironment}.${proxyHost}"}
The JSON specifies the Apigee Edge details needed to route traffic:
- org -- Organization of the Apigee Edge proxy through which requests should be routed. You'll find this value at the top of the Edge UI while looking at the Dashboard.
- env -- Environment of the Apigee Edge proxy through which requests should be routed. You'll find this value at the top of the Edge UI while looking at the Dashboard.
- user -- Username of an Edge user who has access to create proxies. This is the username you use to log into the Edge UI.
- pass -- Password of an Edge user who has access to create proxies. The password you use to log into the Edge UI.
- host -- Edge host name to which requests to your API proxies can be sent.
- hostpattern -- Pattern for generating the API proxy URL. For example,
#{apigeeOrganization}-#{apigeeEnvironment}.#{proxyHost}for cloud accounts.
bind-route-service command to create an Edge API proxy and bind your Cloud Foundry application to the proxy. This tells the Go router to redirect requests to the Apigee Edge proxy before sending them to the Cloud Foundry application.papicella@papicella:~/pivotal/services/apigee$ cf bind-route-service pcfdemo.net api-connectors-service --hostname apples-springboot-telstrasms
Binding route apples-springboot-telstrasms.pcfdemo.net to service instance api-connectors-service in org system / space pas as papicella@pivotal.io...
OK
Note: The hostname is the name of your REST based application
8. With the service created it will then exist within the space as per the image below

9. Click on the service as shown below

10. Click on Manage as shown below

11. In the Apigee management console, under APIs > API proxies, locate the name of the proxy you just created as shown below

12. Click the PCF proxy's name to view its overview page.
13. Click the Trace tab, the click the Start Trace Session button.
14. Back at the command line, access the REST based application endpoint for the Telstra SMS Service as shown below.
papicella@papicella:~/pivotal/services/apigee$ curl "http://apples-springboot-telstrasms.pcfdemo.net/telstra/sms?to=0411151350&appkey=apples-key&appsecret=apples-password"
{"messageId":"5188529E91E847589079BAFDBF8B63FF"}
15. Return to the Apigee Management Console to verify Trace Output and a Successful HTTP 200 call. The new proxy is just a pass-through. But it's ready for you or someone on your team to add policies to define security, traffic management, and more.

More Information
Pivotal Cloud Foundry and Apigee - http://apigee.com/about/solutions/pivotal-cloud-foundry-apigee
Pivotal Cloud Foundry - http://pivotal.io/platform
Monday, 16 May 2016
IBM Bluemix Liberty Buildpack and Spring Boot Applications for "Auto-Scale" and "Monitoring" Services
Working with a customer last week we determined that Spring Boot applications using Liberty Buildpack failed to allow the "Auto-Scale" service to show up "Throughput" metrics and essentially mean we couldn't scale out or down application instances using Throughput metrics.
https://console.ng.bluemix.net/docs/runtimes/liberty/index.html
It turns out the Agent within the IBM Liberty buildpack isn't quite picking up application WAR files created using Spring Boot and hence "Monitoring and Analytics" and "Auto-Scale" service have limited functionality.
IBM Bluemix Services

To solve this we simply need to select the correct generated WAR file. Spring Boot along with Maven produces two WAR files as shown below when the application packaged as a WAR is packaged using "mvn package"
Eg:
-rw-r--r-- 1 pasapicella staff 12341953 13 May 14:17 demo-sb-war-0.0.1-SNAPSHOT.war.original
-rw-r--r-- 1 pasapicella staff 17229369 13 May 14:17 demo-sb-war-0.0.1-SNAPSHOT.war
The WAR file "demo-sb-war-0.0.1-SNAPSHOT.war.original" is the one that is originally generated using maven and it's this file which we should push to IBM Bluemix using the IBM Liberty buildpack
If there’s a Main-Class defined in the manifest it attempts to start it up using the war file, thats the WAR file "demo-sb-war-0.0.1-SNAPSHOT.war". Once you push the version of our war without the Main-Class Manifest entry defined "demo-sb-war-0.0.1-SNAPSHOT.war.original" everything starts up correctly and is now happily recording both throughput and monitoring. If the WAR has a Main-Class app, the buildpack will only install the JDK for the app, and the app embeds Tomcat (by default for Spring Boot), so essentially the app is running on Tomcat; if it's a WAR app without Main-Class manifest entry, the buildpack installs Liberty as well and the app will run on Liberty.
Simply push the correct WAR file and your Spring Boot WAR files using Liberty Buildpack can take advantage of the Liberty Buildpack agent for extra "Monitoring" and "Auto-Scale" service support.
Screen Shots for Monitoring and Analytics service with Spring Boot WAR file


To verify this you can use the Basic Spring Boot Application at the following URL. It simply exposes one REST end point service displaying "helloworld".
https://github.com/papicella/SpringBootWARDemo
https://console.ng.bluemix.net/docs/runtimes/liberty/index.html
It turns out the Agent within the IBM Liberty buildpack isn't quite picking up application WAR files created using Spring Boot and hence "Monitoring and Analytics" and "Auto-Scale" service have limited functionality.
IBM Bluemix Services

To solve this we simply need to select the correct generated WAR file. Spring Boot along with Maven produces two WAR files as shown below when the application packaged as a WAR is packaged using "mvn package"
Eg:
-rw-r--r-- 1 pasapicella staff 12341953 13 May 14:17 demo-sb-war-0.0.1-SNAPSHOT.war.original
-rw-r--r-- 1 pasapicella staff 17229369 13 May 14:17 demo-sb-war-0.0.1-SNAPSHOT.war
The WAR file "demo-sb-war-0.0.1-SNAPSHOT.war.original" is the one that is originally generated using maven and it's this file which we should push to IBM Bluemix using the IBM Liberty buildpack
If there’s a Main-Class defined in the manifest it attempts to start it up using the war file, thats the WAR file "demo-sb-war-0.0.1-SNAPSHOT.war". Once you push the version of our war without the Main-Class Manifest entry defined "demo-sb-war-0.0.1-SNAPSHOT.war.original" everything starts up correctly and is now happily recording both throughput and monitoring. If the WAR has a Main-Class app, the buildpack will only install the JDK for the app, and the app embeds Tomcat (by default for Spring Boot), so essentially the app is running on Tomcat; if it's a WAR app without Main-Class manifest entry, the buildpack installs Liberty as well and the app will run on Liberty.
Simply push the correct WAR file and your Spring Boot WAR files using Liberty Buildpack can take advantage of the Liberty Buildpack agent for extra "Monitoring" and "Auto-Scale" service support.
Screen Shots for Monitoring and Analytics service with Spring Boot WAR file


To verify this you can use the Basic Spring Boot Application at the following URL. It simply exposes one REST end point service displaying "helloworld".
https://github.com/papicella/SpringBootWARDemo
Thursday, 12 May 2016
IBM Bluemix Dedicated/Local Status Page
With Bluemix Public you can view the status page which details all the runtimes and services and thier current status on all 3 PUBLIC regions. Those customers with Bluemix Dedicated or Local get a status page which includes a column on the status of thier Dedicated or Local instance.
To navigate to it perform the following steps:
1. Log into your Bluemix dedicated or local instance web console
2. Click on the Status link which is accessed through the profile icon on the top right hand corner

3. You will see a table as follows as well as status messages to indicate the current status of your own Bluemix Local or Dedicated Environment.

More Information
https://console.ng.bluemix.net/docs/admin/index.html#oc_status
To navigate to it perform the following steps:
1. Log into your Bluemix dedicated or local instance web console
2. Click on the Status link which is accessed through the profile icon on the top right hand corner

3. You will see a table as follows as well as status messages to indicate the current status of your own Bluemix Local or Dedicated Environment.

More Information
https://console.ng.bluemix.net/docs/admin/index.html#oc_status
Subscribe to:
Posts (Atom)