I decided to try out the 0.0.6 release of kpack and noticed a small change to how you define your registry credentials when using Docker Hub. If you fail to do this it will fail to use Docker Hub as your registry with errors as follows when trying to export the image.
[export] *** Images (sha256:1335a241ab0428043a89626c99ddac8dfb2719b79743652e535898600439e80f):
[export] pasapples/pbs-demo-image:latest - UNAUTHORIZED: authentication required; [map[Action:pull Class: Name:pasapples/pbs-demo-image Type:repository] map[Action:push Class: Name:pasapples/pbs-demo-image Type:repository] map[Action:pull Class: Name:cloudfoundry/run Type:repository]]
[export] index.docker.io/pasapples/pbs-demo-image:b1.20200301.232548 - UNAUTHORIZED: authentication required; [map[Action:pull Class: Name:pasapples/pbs-demo-image Type:repository] map[Action:push Class: Name:pasapples/pbs-demo-image Type:repository] map[Action:pull Class: Name:cloudfoundry/run Type:repository]]
[export] ERROR: failed to export: failed to write image to the following tags: [pasapples/pbs-demo-image:latest: UNAUTHORIZED: authentication required; [map[Action:pull Class: Name:pasapples/pbs-demo-image Type:repository] map[Action:push Class: Name:pasapples/pbs-demo-image Type:repository] map[Action:pull Class: Name:cloudfoundry/run Type:repository]]],[index.docker.io/pasapples/pbs-demo-image:b1.20200301.232548: UNAUTHORIZED: authentication required; [map[Action:pull Class: Name:pasapples/pbs-demo-image Type:repository] map[Action:push Class: Name:pasapples/pbs-demo-image Type:repository] map[Action:pull Class: Name:cloudfoundry/run Type:repository]]]
Previously in kpack 0.0.5 you defined your Dockerhub registry as follows:
---
apiVersion: v1
kind: Secret
metadata:
name: dockerhub
annotations:
build.pivotal.io/docker: index.docker.io
type: kubernetes.io/basic-auth
stringData:
username: dockerhub-user
password: ...
Now with kpack 0.0.6 you need to define the "annotations" using an url with HTTPS and "/v1" appended to the end of the URL as shown below.
---
apiVersion: v1
kind: Secret
metadata:
name: dockerhub
annotations:
build.pivotal.io/docker: https://index.docker.io/v1/
type: kubernetes.io/basic-auth
stringData:
username: dockerhub-user
password: ...
More Information
https://github.com/pivotal/kpack
Showing posts with label Pivotal. Show all posts
Showing posts with label Pivotal. Show all posts
Tuesday, 3 March 2020


Tuesday, 11 February 2020
Taking VMware Tanzu Mission Control for a test drive this time creating a k8s cluster on AWS
Previously I blogged about how to use VMware Tanzu Mission Control (TMC) to attach to kubernetes clusters and in that example we used a GCP GKE cluster. That blog entry exists here
Taking VMware Tanzu Mission Control for a test drive
http://theblasfrompas.blogspot.com/2020/02/taking-tanzu-mission-control-for-test.html
In this example we will use the "Create Cluster" button to create a new k8s cluster on AWS that will be managed by TMC for it's entire lifecycle.
Steps
Note: Before getting started you need to create a "Cloud Provider Account" and that is done using AWS as shown below. You can create one or more connected cloud provider accounts. Adding accounts allows you to start using VMware TMC to create clusters, add data protection, and much more

1. Click on the "Clusters" on the left hand navigation bar
2. In the right hand corner click the button "New Cluster" and select your cloud provider account on AWS as shown below

3. Fill in the details of your new cluster as shown below ensuring you select the correct AWS region where your cluster will be created.

4. Click Next
5. In the next screen I am just going to select a Development control plane

6. Click Next
7. Edit the default-node-pool and add 2 worker nodes instead of just 1 as shown below

8. Click "Create"
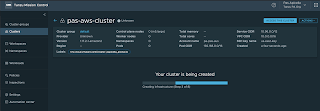
9. This will take you to a screen where your cluster will create. This can take at least 20 minutes so be patient. Progress is shown as per below
10. If we switch over to AWS console we will start to see some running instances and other cloud components being created as shown in the images below


11. Eventually the cluster will create and you are taken to a summary screen for your cluster. It will take a few minutes for all "Agent and extensions health" to show up green so refresh the page serval times until all shows up green as per below.
Note: This can take up to 10 minutes so be patient

12. So to access this cluster using "kubectl" use the button "Access this Cluster" in the top right hand corner and it will take you to a screen as follows. Click the "Download kubeconfig file" and the "Tanzu Mission Control CLI" as you will need both those files and save them locally

13. make the "tmc" CLI executable and save to your $PATH as shown below
$ chmod +x tmc
$ sudo mv tmc /usr/local/bin
14. Access cluster using "kubectl" as follows
Note: You will be taken to a web page to authenticate and once that's done your good to go as shown below

15. You can view the pods created to allows access from the TMC agent as follows
So if you got this far you now have attached a cluster and created a cluster from scratch all from VMware TMC and that's just the start.
Soon I will show to add some policies to our cluster now we have them under management
More Information
Introducing VMware Tanzu Mission Control to Bring Order to Cluster Chaos
https://blogs.vmware.com/cloudnative/2019/08/26/vmware-tanzu-mission-control/
VMware Tanzu Mission Control
https://cloud.vmware.com/tanzu-mission-control
Taking VMware Tanzu Mission Control for a test drive
http://theblasfrompas.blogspot.com/2020/02/taking-tanzu-mission-control-for-test.html
In this example we will use the "Create Cluster" button to create a new k8s cluster on AWS that will be managed by TMC for it's entire lifecycle.
Steps
Note: Before getting started you need to create a "Cloud Provider Account" and that is done using AWS as shown below. You can create one or more connected cloud provider accounts. Adding accounts allows you to start using VMware TMC to create clusters, add data protection, and much more

1. Click on the "Clusters" on the left hand navigation bar
2. In the right hand corner click the button "New Cluster" and select your cloud provider account on AWS as shown below

3. Fill in the details of your new cluster as shown below ensuring you select the correct AWS region where your cluster will be created.

4. Click Next
5. In the next screen I am just going to select a Development control plane

6. Click Next
7. Edit the default-node-pool and add 2 worker nodes instead of just 1 as shown below

8. Click "Create"
9. This will take you to a screen where your cluster will create. This can take at least 20 minutes so be patient. Progress is shown as per below

10. If we switch over to AWS console we will start to see some running instances and other cloud components being created as shown in the images below


11. Eventually the cluster will create and you are taken to a summary screen for your cluster. It will take a few minutes for all "Agent and extensions health" to show up green so refresh the page serval times until all shows up green as per below.
Note: This can take up to 10 minutes so be patient

12. So to access this cluster using "kubectl" use the button "Access this Cluster" in the top right hand corner and it will take you to a screen as follows. Click the "Download kubeconfig file" and the "Tanzu Mission Control CLI" as you will need both those files and save them locally

13. make the "tmc" CLI executable and save to your $PATH as shown below
$ chmod +x tmc
$ sudo mv tmc /usr/local/bin
14. Access cluster using "kubectl" as follows
  $ kubectl --kubeconfig=./kubeconfig-pas-aws-cluster.yml get namespaces
  NAME                STATUS   AGE
  default             Active   19m
  kube-node-lease     Active   19m
  kube-public         Active   19m
  kube-system         Active   19m
  vmware-system-tmc   Active   17m
Note: You will be taken to a web page to authenticate and once that's done your good to go as shown below

15. You can view the pods created to allows access from the TMC agent as follows
$ kubectl --kubeconfig=./kubeconfig-pas-aws-cluster.yml get pods --namespace=vmware-system-tmc
NAME                                     READY   STATUS      RESTARTS   AGE
agent-updater-7b47c659d-8h2mh            1/1     Running     0          25m
agentupdater-workload-1581415620-csz5p   0/1     Completed   0          35s
data-protection-769994df65-6cgfh         1/1     Running     0          24m
extension-manager-657b467c-k4fkl         1/1     Running     0          25m
extension-updater-c76785dc9-vnmdl        1/1     Running     0          25m
inspection-extension-79dcff47f6-7lm5r    1/1     Running     0          24m
intent-agent-7bdf6c8bd4-kgm46            1/1     Running     0          24m
policy-sync-extension-8648685fc7-shn5g   1/1     Running     0          24m
policy-webhook-78f5699b76-bvz5f          1/1     Running     1          24m
policy-webhook-78f5699b76-td74b          1/1     Running     0          24m
sync-agent-84f5f8bcdc-mrc9p              1/1     Running     0          24m
So if you got this far you now have attached a cluster and created a cluster from scratch all from VMware TMC and that's just the start.
Soon I will show to add some policies to our cluster now we have them under management
More Information
Introducing VMware Tanzu Mission Control to Bring Order to Cluster Chaos
https://blogs.vmware.com/cloudnative/2019/08/26/vmware-tanzu-mission-control/
VMware Tanzu Mission Control
https://cloud.vmware.com/tanzu-mission-control
Taking VMware Tanzu Mission Control for a test drive
You may or may not have heard of Tanzu Mission Control (TMC) part of the new VMware Tanzu offering which will help you build, run and manage modern apps. To find out more about Tanzu Mission Control here is the Blog link on that.
https://blogs.vmware.com/cloudnative/2019/08/26/vmware-tanzu-mission-control/
In this blog I show you how easily you can use TMC to monitor your existing k8s clusters. Keep in mind TMC can also create k8s clusters for you but here we will use the "Attach Cluster" part of TMC. Demo as follows
1. Of course you will need access account on TMC which for this demo I already have. Once logged in you will see a home screen as follows

2. In the right hand corner there is a "Attach Cluster" button click this to attach an existing cluster to TMC. Enter some cluster details , in this case I am attaching to a k8s cluster on GKE and giving it a name "pas-gke-cluster".

3. Click the "Register" button which takes you to a screen which allows you to install the VMware Tanzu Mission Control agent. This is simply done by using "kubectl apply ..." on your k8s cluster which allows an agent to communicate back to TMC itself. Everything is created in a namespace called "vmware-system-tmc"

4. Once you have run the "kubectl apply .." on your cluster you can verify the status of the pods and other components installed as follows
$ kubectl get all --namespace=vmware-system-tmc
Or you could just check the status of the various pods as shown below and assume everything else was created ok
5. Now at this point click on "Verify Connection" button to confirm the agent in your k8s cluster is able to communicate with TMC
6. Now let's search for out cluster on the "Clusters" page as shown below

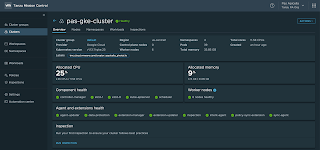
7. Click on "pas-gke-cluster" and you will be taken to an Overview page as shown below. Ensure all green tick boxes are in place this may take a few minutes so refresh the page as needed
8. So this being an empty cluster I will create a deployment with 2 pods so we can see how TMC shows this workload in the UI. These "kubectl commands" should work on any cluster as the image is on Docker Hub
$ kubectl run pbs-deploy --image=pasapples/pbs-demo-image --replicas=2 --port=8080
$ kubectl expose deployment pbs-deploy --type=LoadBalancer --port=80 --target-port=8080 --name=pbs-demo-service
9. Test the workload (Although this isn't really required)
$ echo "http://`kubectl get svc pbs-demo-service -o jsonpath='{.status.loadBalancer.ingress[0].ip}'`/customers/1"
http://104.197.202.165/customers/1
$ http http://104.197.202.165/customers/1
HTTP/1.1 200
Content-Type: application/hal+json;charset=UTF-8
Date: Tue, 11 Feb 2020 01:43:26 GMT
Transfer-Encoding: chunked
{
"_links": {
"customer": {
"href": "http://104.197.202.165/customers/1"
},
"self": {
"href": "http://104.197.202.165/customers/1"
}
},
"name": "pas",
"status": "active"
}
10. Back on the TMC UI click on workloads. You should see our deployment as per below

11. Click on the deployment "pbs-deploy" to see the status of the pods created as part of the deployment replica set plus the YAML of the deployment itself

12. Of course this is just scratching the surface but from the other tabs you can see the cluster nodes, namespaces and other information as required not just for your workloads but also for the cluster itself


One thing to note here is when I attach a cluster as shown in this demo the life cycle of the cluster, for example upgrades, can't be managed / performed by TMC. In the next post I will show how "Create Cluster" will actually be able to control the life cycle of the cluster as well as this time TMC will actually create the cluster for us.
Stay tuned!!!
More Information
Introducing VMware Tanzu Mission Control to Bring Order to Cluster Chaos
https://blogs.vmware.com/cloudnative/2019/08/26/vmware-tanzu-mission-control/
VMware Tanzu Mission Control
https://cloud.vmware.com/tanzu-mission-control
https://blogs.vmware.com/cloudnative/2019/08/26/vmware-tanzu-mission-control/
In this blog I show you how easily you can use TMC to monitor your existing k8s clusters. Keep in mind TMC can also create k8s clusters for you but here we will use the "Attach Cluster" part of TMC. Demo as follows
1. Of course you will need access account on TMC which for this demo I already have. Once logged in you will see a home screen as follows

2. In the right hand corner there is a "Attach Cluster" button click this to attach an existing cluster to TMC. Enter some cluster details , in this case I am attaching to a k8s cluster on GKE and giving it a name "pas-gke-cluster".

3. Click the "Register" button which takes you to a screen which allows you to install the VMware Tanzu Mission Control agent. This is simply done by using "kubectl apply ..." on your k8s cluster which allows an agent to communicate back to TMC itself. Everything is created in a namespace called "vmware-system-tmc"

4. Once you have run the "kubectl apply .." on your cluster you can verify the status of the pods and other components installed as follows
$ kubectl get all --namespace=vmware-system-tmc
Or you could just check the status of the various pods as shown below and assume everything else was created ok
$ kubectl get pods --namespace=vmware-system-tmc
NAME                                     READY   STATUS      RESTARTS   AGE
agent-updater-67bb5bb9c6-khfwh           1/1     Running     0          74m
agentupdater-workload-1581383460-5dsx9   0/1     Completed   0          59s
data-protection-657d8bf96c-v627g         1/1     Running     0          73m
extension-manager-857d46c6c-zfzbj        1/1     Running     0          74m
extension-updater-6ddd9858cf-lr88r       1/1     Running     0          74m
inspection-extension-789bb48b6-mnlqj     1/1     Running     0          73m
intent-agent-cfb49d788-cq8tk             1/1     Running     0          73m
policy-sync-extension-686c757989-jftjc   1/1     Running     0          73m
policy-webhook-5cdc7b87dd-8shlp          1/1     Running     0          73m
policy-webhook-5cdc7b87dd-fzz6s          1/1     Running     0          73m
sync-agent-84bd6c7bf7-rtzcn              1/1     Running     0          73m
5. Now at this point click on "Verify Connection" button to confirm the agent in your k8s cluster is able to communicate with TMC
6. Now let's search for out cluster on the "Clusters" page as shown below

7. Click on "pas-gke-cluster" and you will be taken to an Overview page as shown below. Ensure all green tick boxes are in place this may take a few minutes so refresh the page as needed

8. So this being an empty cluster I will create a deployment with 2 pods so we can see how TMC shows this workload in the UI. These "kubectl commands" should work on any cluster as the image is on Docker Hub
$ kubectl run pbs-deploy --image=pasapples/pbs-demo-image --replicas=2 --port=8080
$ kubectl expose deployment pbs-deploy --type=LoadBalancer --port=80 --target-port=8080 --name=pbs-demo-service
9. Test the workload (Although this isn't really required)
$ echo "http://`kubectl get svc pbs-demo-service -o jsonpath='{.status.loadBalancer.ingress[0].ip}'`/customers/1"
http://104.197.202.165/customers/1
$ http http://104.197.202.165/customers/1
HTTP/1.1 200
Content-Type: application/hal+json;charset=UTF-8
Date: Tue, 11 Feb 2020 01:43:26 GMT
Transfer-Encoding: chunked
{
"_links": {
"customer": {
"href": "http://104.197.202.165/customers/1"
},
"self": {
"href": "http://104.197.202.165/customers/1"
}
},
"name": "pas",
"status": "active"
}
10. Back on the TMC UI click on workloads. You should see our deployment as per below

11. Click on the deployment "pbs-deploy" to see the status of the pods created as part of the deployment replica set plus the YAML of the deployment itself

12. Of course this is just scratching the surface but from the other tabs you can see the cluster nodes, namespaces and other information as required not just for your workloads but also for the cluster itself


One thing to note here is when I attach a cluster as shown in this demo the life cycle of the cluster, for example upgrades, can't be managed / performed by TMC. In the next post I will show how "Create Cluster" will actually be able to control the life cycle of the cluster as well as this time TMC will actually create the cluster for us.
Stay tuned!!!
More Information
Introducing VMware Tanzu Mission Control to Bring Order to Cluster Chaos
https://blogs.vmware.com/cloudnative/2019/08/26/vmware-tanzu-mission-control/
VMware Tanzu Mission Control
https://cloud.vmware.com/tanzu-mission-control
Tuesday, 24 September 2019
Basic VMware Harbor Registry usage for Pivotal Container Service (PKS)
VMware Harbor Registry is an enterprise-class registry server that stores and distributes container images. Harbor allows you to store and manage images for use with Enterprise Pivotal Container Service (Enterprise PKS).
In this simple example we show what you need at a minimum to get an image on Harbor deployed onto your PKS cluster. First we need the following to be able to run this basic demo
Required Steps
1. PKS installed with Harbor Registry tile added as shown below

2. VMware Harbor Registry integrated with Enterprise PKS as per the link below. The most important step is the one as follows "Import the CA Certificate Used to Sign the Harbor Certificate and Key to BOSH". You must complete that prior to creating a PKS cluster
https://docs.pivotal.io/partners/vmware-harbor/integrating-pks.html
3. A PKS cluster created. You must have completed step #2 before you create the cluster
https://docs.pivotal.io/pks/1-4/create-cluster.html
$ pks cluster oranges
Name: oranges
Plan Name: small
UUID: 21998d0d-b9f8-437c-850c-6ee0ed33d781
Last Action: CREATE
Last Action State: succeeded
Last Action Description: Instance provisioning completed
Kubernetes Master Host: oranges.run.yyyy.bbbb.pivotal.io
Kubernetes Master Port: 8443
Worker Nodes: 4
Kubernetes Master IP(s): 1.1.1.1
Network Profile Name:
4. Docker Desktop Installed on your local machine

Steps
1. First let's log into Harbor and create a new project. Make sure you record your username and password you have assigned for the project. In this example I make the project public.


Details
2. Next in order to be able to connect to our registry from our local laptop we will need to install
The VMware Harbor registry isn't running on a public domain, and is using a self-signed certificate. So we need to access this registry with self-signed certificates from my mac osx clients given I am using Docker for Mac. This link shows how to add the self signed certificate to Linux and Mac clients
https://blog.container-solutions.com/adding-self-signed-registry-certs-docker-mac
You can download the self signed cert from Pivotal Ops Manager as sown below

With all that in place a command as follows is all I need to run
$ sudo security add-trusted-cert -d -r trustRoot -k /Library/Keychains/System.keychain ca.crt
3. Now lets login to the registry using a command as follows
$ docker login harbor.haas-bbb.yyyy.pivotal.io -u pas
Password:
Login Succeeded
4. Now I have an image sitting on Docker Hub itself so let's tag that and then deploy that to our VMware Harbor registry as shown below
$ docker tag pasapples/customer-api:latest harbor.haas-bbb.yyyy.io/cto_apj/customer-api:latest
$ docker push harbor.haas-bbb.yyyy.io/cto_apj/customer-api:latest

5. Now lets create a new secret for accessing the container registry
$ kubectl create secret docker-registry regcred --docker-server=harbor.haas-bbb.yyyy.io --docker-username=pas --docker-password=**** --docker-email=papicella@pivotal.io
6. Now let's deploy this image to our PKS cluster using a deployment YAML file as follows
customer-api.yaml
apiVersion: extensions/v1beta1
kind: Deployment
metadata:
name: customer-api
spec:
replicas: 1
template:
metadata:
labels:
app: customer-api
spec:
containers:
- name: customer-api
image: harbor.haas-206.pez.pivotal.io/cto_apj/customer-api:latest
ports:
- containerPort: 8080
---
apiVersion: v1
kind: Service
metadata:
name: customer-api-service
labels:
name: customer-api-service
spec:
ports:
- port: 80
targetPort: 8080
protocol: TCP
selector:
app: customer-api
type: LoadBalancer
7. Deploy as follows
$ kubectl create -f customer-api.yaml
8. You should see the POD and SERVICE running as follows
$ kubectl get pods | grep customer-api
customer-api-7b8fcd5778-czh46 1/1 Running 0 58s
$ kubectl get svc | grep customer-api
customer-api-service LoadBalancer 10.100.2.2 10.195.1.1.80.5 80:31156/TCP
More Information
PKS Release Notes 1.4
https://docs.pivotal.io/pks/1-4/release-notes.html
VMware Harbor Registry
https://docs.vmware.com/en/VMware-Enterprise-PKS/1.4/vmware-harbor-registry/GUID-index.html
In this simple example we show what you need at a minimum to get an image on Harbor deployed onto your PKS cluster. First we need the following to be able to run this basic demo
Required Steps
1. PKS installed with Harbor Registry tile added as shown below

2. VMware Harbor Registry integrated with Enterprise PKS as per the link below. The most important step is the one as follows "Import the CA Certificate Used to Sign the Harbor Certificate and Key to BOSH". You must complete that prior to creating a PKS cluster
https://docs.pivotal.io/partners/vmware-harbor/integrating-pks.html
3. A PKS cluster created. You must have completed step #2 before you create the cluster
https://docs.pivotal.io/pks/1-4/create-cluster.html
$ pks cluster oranges
Name: oranges
Plan Name: small
UUID: 21998d0d-b9f8-437c-850c-6ee0ed33d781
Last Action: CREATE
Last Action State: succeeded
Last Action Description: Instance provisioning completed
Kubernetes Master Host: oranges.run.yyyy.bbbb.pivotal.io
Kubernetes Master Port: 8443
Worker Nodes: 4
Kubernetes Master IP(s): 1.1.1.1
Network Profile Name:
4. Docker Desktop Installed on your local machine

Steps
1. First let's log into Harbor and create a new project. Make sure you record your username and password you have assigned for the project. In this example I make the project public.


Details
- Project Name: cto_apj
- Username: pas
- Password: ****
2. Next in order to be able to connect to our registry from our local laptop we will need to install
The VMware Harbor registry isn't running on a public domain, and is using a self-signed certificate. So we need to access this registry with self-signed certificates from my mac osx clients given I am using Docker for Mac. This link shows how to add the self signed certificate to Linux and Mac clients
https://blog.container-solutions.com/adding-self-signed-registry-certs-docker-mac
You can download the self signed cert from Pivotal Ops Manager as sown below

With all that in place a command as follows is all I need to run
$ sudo security add-trusted-cert -d -r trustRoot -k /Library/Keychains/System.keychain ca.crt
3. Now lets login to the registry using a command as follows
$ docker login harbor.haas-bbb.yyyy.pivotal.io -u pas
Password:
Login Succeeded
4. Now I have an image sitting on Docker Hub itself so let's tag that and then deploy that to our VMware Harbor registry as shown below
$ docker tag pasapples/customer-api:latest harbor.haas-bbb.yyyy.io/cto_apj/customer-api:latest
$ docker push harbor.haas-bbb.yyyy.io/cto_apj/customer-api:latest

5. Now lets create a new secret for accessing the container registry
$ kubectl create secret docker-registry regcred --docker-server=harbor.haas-bbb.yyyy.io --docker-username=pas --docker-password=**** --docker-email=papicella@pivotal.io
6. Now let's deploy this image to our PKS cluster using a deployment YAML file as follows
customer-api.yaml
apiVersion: extensions/v1beta1
kind: Deployment
metadata:
name: customer-api
spec:
replicas: 1
template:
metadata:
labels:
app: customer-api
spec:
containers:
- name: customer-api
image: harbor.haas-206.pez.pivotal.io/cto_apj/customer-api:latest
ports:
- containerPort: 8080
---
apiVersion: v1
kind: Service
metadata:
name: customer-api-service
labels:
name: customer-api-service
spec:
ports:
- port: 80
targetPort: 8080
protocol: TCP
selector:
app: customer-api
type: LoadBalancer
7. Deploy as follows
$ kubectl create -f customer-api.yaml
8. You should see the POD and SERVICE running as follows
$ kubectl get pods | grep customer-api
customer-api-7b8fcd5778-czh46 1/1 Running 0 58s
$ kubectl get svc | grep customer-api
customer-api-service LoadBalancer 10.100.2.2 10.195.1.1.80.5 80:31156/TCP
More Information
PKS Release Notes 1.4
https://docs.pivotal.io/pks/1-4/release-notes.html
VMware Harbor Registry
https://docs.vmware.com/en/VMware-Enterprise-PKS/1.4/vmware-harbor-registry/GUID-index.html
Tuesday, 22 January 2019
Testing out the new PFS (Pivotal Function Service) alpha release on minikube
I quickly installed PFS on minikube as per the instructions below so I could write my own function service. Below shows that function service and how I invoked using the PFS CLI and Postman
1. Install PFS using this url for minikube. Refer to these instructions to install PFS on minikube
https://docs.pivotal.io/pfs/install-on-minikube.html
2. Once installed verify PFS has been installed using some commands as follows
$ watch -n 1 kubectl get pod --all-namespaces
Output:

Various namespaces are created as shown below:
$ kubectl get namespaces
NAME STATUS AGE
default Active 19h
istio-system Active 18h
knative-build Active 18h
knative-eventing Active 18h
knative-serving Active 18h
kube-public Active 19h
kube-system Active 19h
Ensure PFS is installed as shown below:
$ pfs version
Version
pfs cli: 0.1.0 (e5de84d12d10a060aeb595310decbe7409467c99)
3. Now we are going to deploy this employee function which exists on GitHub as follows
https://github.com/papicella/emp-function-service

The Function code is as follows:
https://docs.pivotal.io/pfs/using-java-functions.html
5. Let's create a function called "emp-function" as shown below
$ pfs function create emp-function --git-repo https://github.com/papicella/emp-function-service --image $REGISTRY/$REGISTRY_USER/emp-function -w -v
Output: (Just showing the last few lines here)
papicella@papicella:~/pivotal/software/minikube$ pfs function create emp-function --git-repo https://github.com/papicella/emp-function-service --image $REGISTRY/$REGISTRY_USER/emp-function -w -v
Waiting for LatestCreatedRevisionName
Waiting on function creation: checkService failed to obtain service status for observedGeneration 1
LatestCreatedRevisionName available: emp-function-00001
...
default/emp-function-00001-gpn7p[build-step-build]: [INFO] BUILD SUCCESS
default/emp-function-00001-gpn7p[build-step-build]: [INFO] ------------------------------------------------------------------------
default/emp-function-00001-gpn7p[build-step-build]: [INFO] Total time: 12.407 s
default/emp-function-00001-gpn7p[build-step-build]: [INFO] Finished at: 2019-01-22T00:12:39Z
default/emp-function-00001-gpn7p[build-step-build]: [INFO] ------------------------------------------------------------------------
default/emp-function-00001-gpn7p[build-step-build]: Removing source code
default/emp-function-00001-gpn7p[build-step-build]:
default/emp-function-00001-gpn7p[build-step-build]: -----> riff Buildpack 0.1.0
default/emp-function-00001-gpn7p[build-step-build]: -----> riff Java Invoker 0.1.3: Contributing to launch
default/emp-function-00001-gpn7p[build-step-build]: Reusing cached download from buildpack
default/emp-function-00001-gpn7p[build-step-build]: Copying to /workspace/io.projectriff.riff/riff-invoker-java/java-function-invoker-0.1.3-exec.jar
default/emp-function-00001-gpn7p[build-step-build]: -----> Process types:
default/emp-function-00001-gpn7p[build-step-build]: web: java -jar /workspace/io.projectriff.riff/riff-invoker-java/java-function-invoker-0.1.3-exec.jar $JAVA_OPTS --function.uri='file:///workspace/app'
default/emp-function-00001-gpn7p[build-step-build]: function: java -jar /workspace/io.projectriff.riff/riff-invoker-java/java-function-invoker-0.1.3-exec.jar $JAVA_OPTS --function.uri='file:///workspace/app'
default/emp-function-00001-gpn7p[build-step-build]:
...
default/emp-function-00001-deployment-66fbd6bf4-bbqpq[user-container]: Hibernate: insert into employee (id, name) values (null, ?)
default/emp-function-00001-deployment-66fbd6bf4-bbqpq[user-container]: 2019-01-22 00:13:53.617 INFO 1 --- [ Thread-4] c.e.empfunctionservice.LoadDatabase : Preloading Employee(id=1, name=pas)
default/emp-function-00001-deployment-66fbd6bf4-bbqpq[user-container]: Hibernate: insert into employee (id, name) values (null, ?)
default/emp-function-00001-deployment-66fbd6bf4-bbqpq[user-container]: 2019-01-22 00:13:53.623 INFO 1 --- [ Thread-4] c.e.empfunctionservice.LoadDatabase : Preloading Employee(id=2, name=lucia)
default/emp-function-00001-deployment-66fbd6bf4-bbqpq[user-container]: Hibernate: insert into employee (id, name) values (null, ?)
default/emp-function-00001-deployment-66fbd6bf4-bbqpq[user-container]: 2019-01-22 00:13:53.628 INFO 1 --- [ Thread-4] c.e.empfunctionservice.LoadDatabase : Preloading Employee(id=3, name=lucas)
default/emp-function-00001-deployment-66fbd6bf4-bbqpq[user-container]: Hibernate: insert into employee (id, name) values (null, ?)
default/emp-function-00001-deployment-66fbd6bf4-bbqpq[user-container]: 2019-01-22 00:13:53.632 INFO 1 --- [ Thread-4] c.e.empfunctionservice.LoadDatabase : Preloading Employee(id=4, name=siena)
default/emp-function-00001-deployment-66fbd6bf4-bbqpq[user-container]: 2019-01-22 00:13:53.704 INFO 1 --- [ Thread-2] o.s.c.f.d.FunctionCreatorConfiguration : Located bean: findEmployee of type class com.example.empfunctionservice.EmpFunctionServiceApplication$$Lambda$791/373359604
pfs function create completed successfully
6. Let's invoke our function as shown below by returning each Employee record using it's ID.
$ pfs service invoke emp-function --text -- -w '\n' -d '1'
curl http://192.168.64.3:32380/ -H 'Host: emp-function.default.example.com' -H 'Content-Type: text/plain' -w '\n' -d 1
Employee(id=1, name=pas)
$ pfs service invoke emp-function --text -- -w '\n' -d '2'
curl http://192.168.64.3:32380/ -H 'Host: emp-function.default.example.com' -H 'Content-Type: text/plain' -w '\n' -d 2
Employee(id=2, name=lucia)
The "pfs service invoke" will show you what an external command will look like to invoke the function service. The IP address here is just the same IP address returned by "minikube ip" as shown below.
$ minikube ip
192.168.64.3
7. Let's view our services using "pfs" CLI
$ pfs service list
NAME STATUS
emp-function Running
hello Running
pfs service list completed successfully
8. Invoking from Postman, ensuring we issue a POST request and pass the correct headers as shown below


More Information
https://docs.pivotal.io/pfs/index.html
1. Install PFS using this url for minikube. Refer to these instructions to install PFS on minikube
https://docs.pivotal.io/pfs/install-on-minikube.html
2. Once installed verify PFS has been installed using some commands as follows
$ watch -n 1 kubectl get pod --all-namespaces
Output:

Various namespaces are created as shown below:
$ kubectl get namespaces
NAME STATUS AGE
default Active 19h
istio-system Active 18h
knative-build Active 18h
knative-eventing Active 18h
knative-serving Active 18h
kube-public Active 19h
kube-system Active 19h
Ensure PFS is installed as shown below:
$ pfs version
Version
pfs cli: 0.1.0 (e5de84d12d10a060aeb595310decbe7409467c99)
3. Now we are going to deploy this employee function which exists on GitHub as follows
https://github.com/papicella/emp-function-service
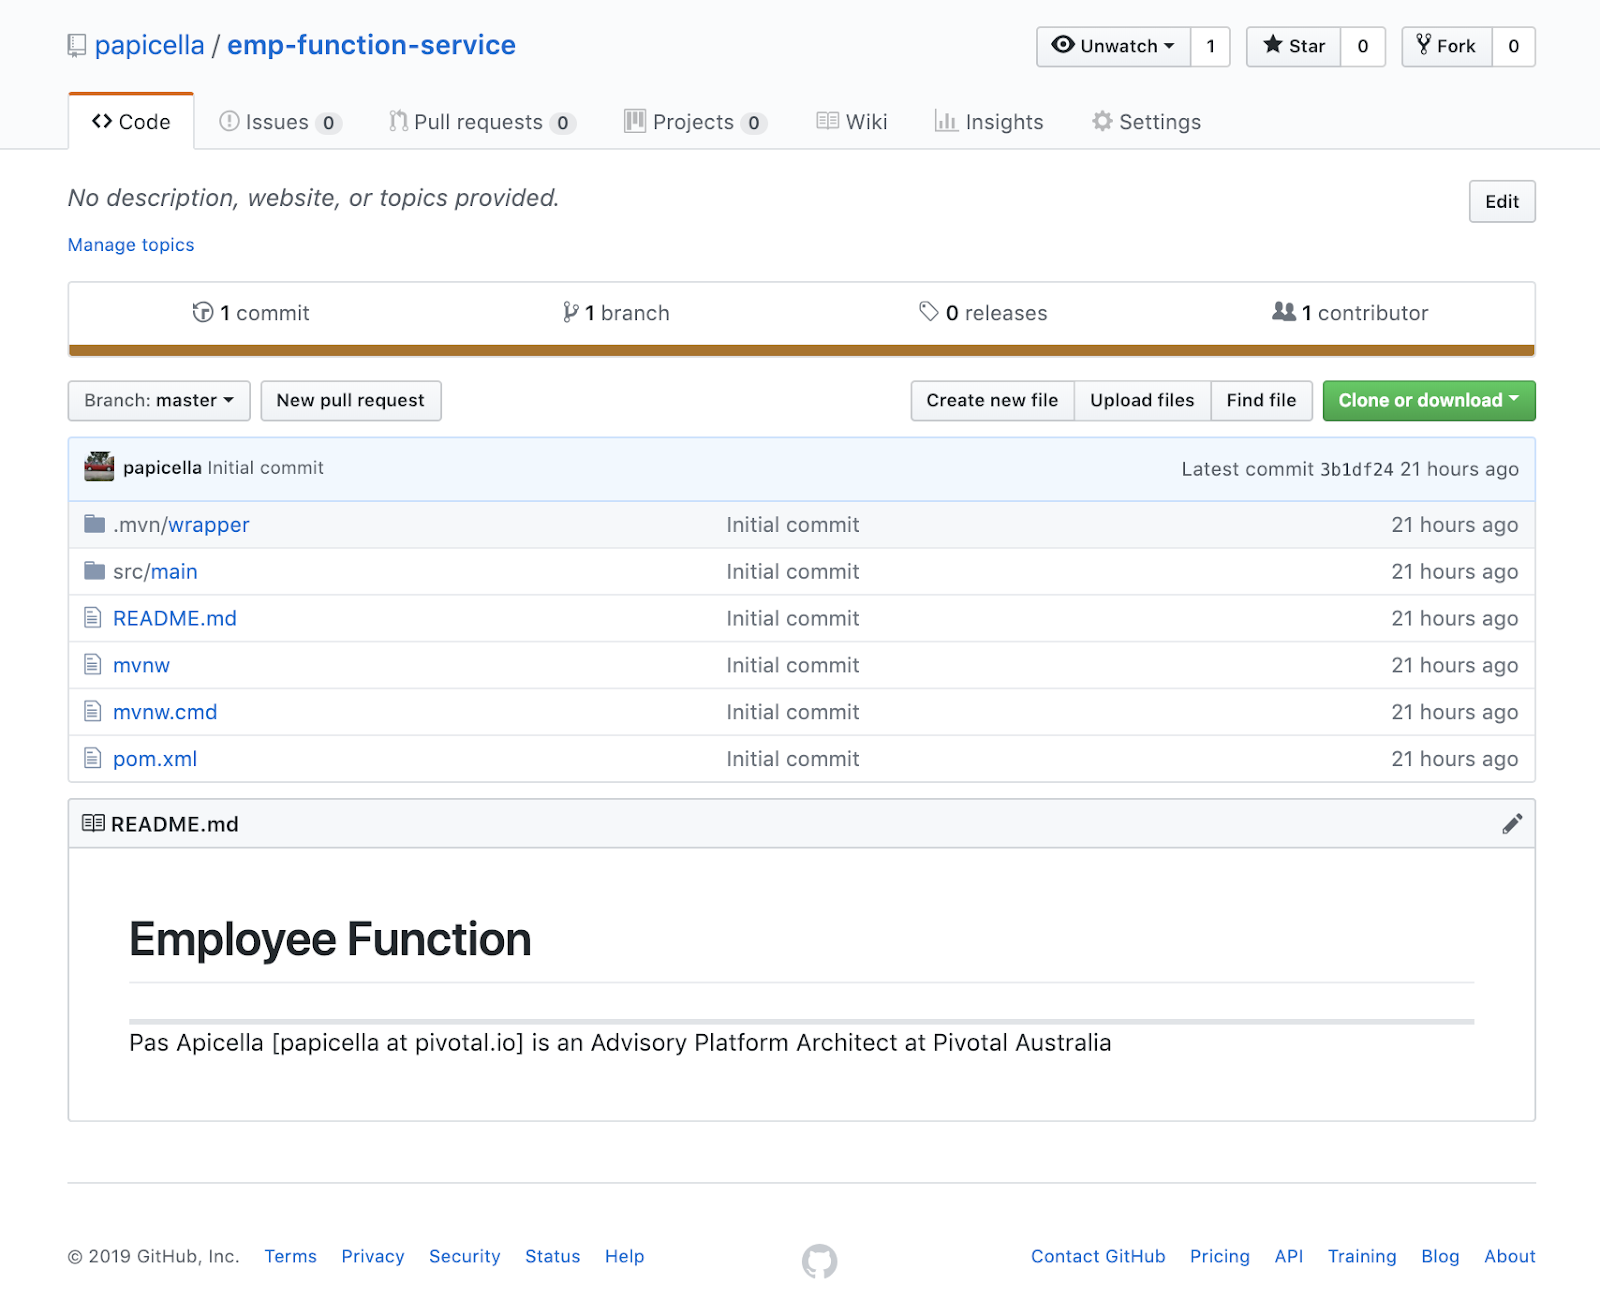
The Function code is as follows:
package com.example.empfunctionservice;

import lombok.extern.slf4j.Slf4j;
import org.springframework.boot.SpringApplication;
import org.springframework.boot.autoconfigure.SpringBootApplication;
import org.springframework.context.annotation.Bean;

import java.util.function.Function;

@Slf4j
@SpringBootApplication
public class EmpFunctionServiceApplication {

    private static EmployeeService employeeService;

    public EmpFunctionServiceApplication(EmployeeService employeeService) {
        this.employeeService = employeeService;
    }

    @Bean
    public Function<String, String> findEmployee() {
        return id -> {
            String response = employeeService.getEmployee(id);

            return response;
        };
    }

    public static void main(String[] args) {
        SpringApplication.run(EmpFunctionServiceApplication.class, args);
    }

}
4. We are going to deploy a Spring Boot Function as per the REPO above. More information on Java Functions for PFS can be found here
https://docs.pivotal.io/pfs/using-java-functions.html
5. Let's create a function called "emp-function" as shown below
$ pfs function create emp-function --git-repo https://github.com/papicella/emp-function-service --image $REGISTRY/$REGISTRY_USER/emp-function -w -v
Output: (Just showing the last few lines here)
papicella@papicella:~/pivotal/software/minikube$ pfs function create emp-function --git-repo https://github.com/papicella/emp-function-service --image $REGISTRY/$REGISTRY_USER/emp-function -w -v
Waiting for LatestCreatedRevisionName
Waiting on function creation: checkService failed to obtain service status for observedGeneration 1
LatestCreatedRevisionName available: emp-function-00001
...
default/emp-function-00001-gpn7p[build-step-build]: [INFO] BUILD SUCCESS
default/emp-function-00001-gpn7p[build-step-build]: [INFO] ------------------------------------------------------------------------
default/emp-function-00001-gpn7p[build-step-build]: [INFO] Total time: 12.407 s
default/emp-function-00001-gpn7p[build-step-build]: [INFO] Finished at: 2019-01-22T00:12:39Z
default/emp-function-00001-gpn7p[build-step-build]: [INFO] ------------------------------------------------------------------------
default/emp-function-00001-gpn7p[build-step-build]: Removing source code
default/emp-function-00001-gpn7p[build-step-build]:
default/emp-function-00001-gpn7p[build-step-build]: -----> riff Buildpack 0.1.0
default/emp-function-00001-gpn7p[build-step-build]: -----> riff Java Invoker 0.1.3: Contributing to launch
default/emp-function-00001-gpn7p[build-step-build]: Reusing cached download from buildpack
default/emp-function-00001-gpn7p[build-step-build]: Copying to /workspace/io.projectriff.riff/riff-invoker-java/java-function-invoker-0.1.3-exec.jar
default/emp-function-00001-gpn7p[build-step-build]: -----> Process types:
default/emp-function-00001-gpn7p[build-step-build]: web: java -jar /workspace/io.projectriff.riff/riff-invoker-java/java-function-invoker-0.1.3-exec.jar $JAVA_OPTS --function.uri='file:///workspace/app'
default/emp-function-00001-gpn7p[build-step-build]: function: java -jar /workspace/io.projectriff.riff/riff-invoker-java/java-function-invoker-0.1.3-exec.jar $JAVA_OPTS --function.uri='file:///workspace/app'
default/emp-function-00001-gpn7p[build-step-build]:
...
default/emp-function-00001-deployment-66fbd6bf4-bbqpq[user-container]: Hibernate: insert into employee (id, name) values (null, ?)
default/emp-function-00001-deployment-66fbd6bf4-bbqpq[user-container]: 2019-01-22 00:13:53.617 INFO 1 --- [ Thread-4] c.e.empfunctionservice.LoadDatabase : Preloading Employee(id=1, name=pas)
default/emp-function-00001-deployment-66fbd6bf4-bbqpq[user-container]: Hibernate: insert into employee (id, name) values (null, ?)
default/emp-function-00001-deployment-66fbd6bf4-bbqpq[user-container]: 2019-01-22 00:13:53.623 INFO 1 --- [ Thread-4] c.e.empfunctionservice.LoadDatabase : Preloading Employee(id=2, name=lucia)
default/emp-function-00001-deployment-66fbd6bf4-bbqpq[user-container]: Hibernate: insert into employee (id, name) values (null, ?)
default/emp-function-00001-deployment-66fbd6bf4-bbqpq[user-container]: 2019-01-22 00:13:53.628 INFO 1 --- [ Thread-4] c.e.empfunctionservice.LoadDatabase : Preloading Employee(id=3, name=lucas)
default/emp-function-00001-deployment-66fbd6bf4-bbqpq[user-container]: Hibernate: insert into employee (id, name) values (null, ?)
default/emp-function-00001-deployment-66fbd6bf4-bbqpq[user-container]: 2019-01-22 00:13:53.632 INFO 1 --- [ Thread-4] c.e.empfunctionservice.LoadDatabase : Preloading Employee(id=4, name=siena)
default/emp-function-00001-deployment-66fbd6bf4-bbqpq[user-container]: 2019-01-22 00:13:53.704 INFO 1 --- [ Thread-2] o.s.c.f.d.FunctionCreatorConfiguration : Located bean: findEmployee of type class com.example.empfunctionservice.EmpFunctionServiceApplication$$Lambda$791/373359604
pfs function create completed successfully
6. Let's invoke our function as shown below by returning each Employee record using it's ID.
$ pfs service invoke emp-function --text -- -w '\n' -d '1'
curl http://192.168.64.3:32380/ -H 'Host: emp-function.default.example.com' -H 'Content-Type: text/plain' -w '\n' -d 1
Employee(id=1, name=pas)
$ pfs service invoke emp-function --text -- -w '\n' -d '2'
curl http://192.168.64.3:32380/ -H 'Host: emp-function.default.example.com' -H 'Content-Type: text/plain' -w '\n' -d 2
Employee(id=2, name=lucia)
The "pfs service invoke" will show you what an external command will look like to invoke the function service. The IP address here is just the same IP address returned by "minikube ip" as shown below.
$ minikube ip
192.168.64.3
7. Let's view our services using "pfs" CLI
$ pfs service list
NAME STATUS
emp-function Running
hello Running
pfs service list completed successfully
8. Invoking from Postman, ensuring we issue a POST request and pass the correct headers as shown below


More Information
https://docs.pivotal.io/pfs/index.html
Sunday, 31 July 2016
PCFDev application accessing an Oracle 11g RDBMS
PCF Dev is a small footprint distribution of Pivotal Cloud Foundry (PCF)
intended to be run locally on a developer machine. It delivers the
essential elements of the Pivotal Cloud Foundry experience quickly
through a condensed set of components. PCF Dev is ideally suited to developers wanting to explore or evaluate
PCF, or those already actively building cloud native applications to be
run on PCF. Working with PCF Dev, developers can experience the power of
PCF - from the accelerated development cycles enabled by consistent,
structured builds to the operational excellence unlocked through
integrated logging, metrics and health monitoring and management.
In this example we show how you can use PCFDev to access an Oracle RDBMS from a PCFDev deployed Spring Boot Application. The application is using the classic Oracle EMP database table found in the SCOTT schema
Source Code as follows
In order to use the steps below you have to have installed PCFDev on your laptop or desktop as per the link below.
Download from here:
Instructions to setup as follows:
Steps
1. Clone as shown below
$ git clone https://github.com/papicella/PCFOracleDemo.git
2. Edit "./PCFOracleDemo/src/main/resources/application.properties" and add your oracle EMP schema connection details
3. Define a local MAVEN repo for Oracle 11g JDBC driver as per what is in the pom.xml
4. Package as per below
$ cd PCFOracleDemo
$ mvn package
5. Deploy as follows
pasapicella@pas-macbook:~/pivotal/DemoProjects/spring-starter/pivotal/PCFOracleDemo$ cf push
Using manifest file /Users/pasapicella/pivotal/DemoProjects/spring-starter/pivotal/PCFOracleDemo/manifest.yml
Creating app springboot-oracle in org pcfdev-org / space pcfdev-space as admin...
OK
Creating route springboot-oracle.local.pcfdev.io...
OK
Binding springboot-oracle.local.pcfdev.io to springboot-oracle...
OK
Uploading springboot-oracle...
Uploading app files from: /var/folders/c3/27vscm613fjb6g8f5jmc2x_w0000gp/T/unzipped-app506692756
Uploading 26.3M, 154 files
Done uploading
OK
Starting app springboot-oracle in org pcfdev-org / space pcfdev-space as admin...
Downloading binary_buildpack...
Downloading python_buildpack...
Downloading staticfile_buildpack...
Downloading java_buildpack...
Downloading php_buildpack...
Downloading ruby_buildpack...
Downloading go_buildpack...
Downloading nodejs_buildpack...
Downloaded staticfile_buildpack
Downloaded binary_buildpack (8.3K)
Downloaded php_buildpack (262.3M)
Downloaded java_buildpack (241.6M)
Downloaded go_buildpack (450.3M)
Downloaded ruby_buildpack (247.7M)
Downloaded python_buildpack (254.1M)
Downloaded nodejs_buildpack (60.7M)
Creating container
Successfully created container
Downloading app package...
Downloaded app package (23.5M)
Staging...
-----> Java Buildpack Version: v3.6 (offline) | https://github.com/cloudfoundry/java-buildpack.git#5194155
-----> Downloading Open Jdk JRE 1.8.0_71 from https://download.run.pivotal.io/openjdk/trusty/x86_64/openjdk-1.8.0_71.tar.gz (found in cache)
Expanding Open Jdk JRE to .java-buildpack/open_jdk_jre (1.2s)
-----> Downloading Open JDK Like Memory Calculator 2.0.1_RELEASE from https://download.run.pivotal.io/memory-calculator/trusty/x86_64/memory-calculator-2.0.1_RELEASE.tar.gz (found in cache)
Memory Settings: -XX:MetaspaceSize=64M -XX:MaxMetaspaceSize=64M -Xss995K -Xmx382293K -Xms382293K
-----> Downloading Spring Auto Reconfiguration 1.10.0_RELEASE from https://download.run.pivotal.io/auto-reconfiguration/auto-reconfiguration-1.10.0_RELEASE.jar (found in cache)
Exit status 0
Staging complete
Uploading droplet, build artifacts cache...
Uploading build artifacts cache...
Uploading droplet...
Uploaded build artifacts cache (109B)
Uploaded droplet (68.4M)
Uploading complete
1 of 1 instances running
App started
OK
App springboot-oracle was started using this command `CALCULATED_MEMORY=$($PWD/.java-buildpack/open_jdk_jre/bin/java-buildpack-memory-calculator-2.0.1_RELEASE -memorySizes=metaspace:64m.. -memoryWeights=heap:75,metaspace:10,native:10,stack:5 -memoryInitials=heap:100%,metaspace:100% -totMemory=$MEMORY_LIMIT) && JAVA_OPTS="-Djava.io.tmpdir=$TMPDIR -XX:OnOutOfMemoryError=$PWD/.java-buildpack/open_jdk_jre/bin/killjava.sh $CALCULATED_MEMORY" && SERVER_PORT=$PORT eval exec $PWD/.java-buildpack/open_jdk_jre/bin/java $JAVA_OPTS -cp $PWD/.:$PWD/.java-buildpack/spring_auto_reconfiguration/spring_auto_reconfiguration-1.10.0_RELEASE.jar org.springframework.boot.loader.JarLauncher`
Showing health and status for app springboot-oracle in org pcfdev-org / space pcfdev-space as admin...
OK
requested state: started
instances: 1/1
usage: 512M x 1 instances
urls: springboot-oracle.local.pcfdev.io
last uploaded: Sun Jul 31 01:23:03 UTC 2016
stack: unknown
buildpack: java-buildpack=v3.6-offline-https://github.com/cloudfoundry/java-buildpack.git#5194155 java-main open-jdk-like-jre=1.8.0_71 open-jdk-like-memory-calculator=2.0.1_RELEASE spring-auto-reconfiguration=1.10.0_RELEASE
state since cpu memory disk details
#0 running 2016-07-31 11:24:26 AM 0.0% 0 of 512M 0 of 512M
pasapicella@pas-macbook:~/pivotal/DemoProjects/spring-starter/pivotal/PCFOracleDemo$ cf apps
Getting apps in org pcfdev-org / space pcfdev-space as admin...
OK
name requested state instances memory disk urls
springboot-oracle started 1/1 512M 512M springboot-oracle.local.pcfdev.io
6. Access deployed application at the end point "http://springboot-oracle.local.pcfdev.io" or using the application route you set in the manifest.yml

error.whitelabel.enabled=false
oracle.username=scott
oracle.password=tiger
oracle.url=jdbc:oracle:thin:@//192.168.20.131:1521/ora11gr2
<!--
  Installed as follows to allow inclusion into pom.xml
  mvn install:install-file -DgroupId=com.oracle -DartifactId=ojdbc6 -Dversion=11.2.0.3 -Dpackaging=jar -Dfile=ojdbc6.jar
    -DgeneratePom=true
  -->
  <dependency>
   <groupId>com.oracle</groupId>
   <artifactId>ojdbc6</artifactId>
   <version>11.2.0.3</version>
  </dependency>
4. Package as per below
$ cd PCFOracleDemo
$ mvn package
5. Deploy as follows
pasapicella@pas-macbook:~/pivotal/DemoProjects/spring-starter/pivotal/PCFOracleDemo$ cf push
Using manifest file /Users/pasapicella/pivotal/DemoProjects/spring-starter/pivotal/PCFOracleDemo/manifest.yml
Creating app springboot-oracle in org pcfdev-org / space pcfdev-space as admin...
OK
Creating route springboot-oracle.local.pcfdev.io...
OK
Binding springboot-oracle.local.pcfdev.io to springboot-oracle...
OK
Uploading springboot-oracle...
Uploading app files from: /var/folders/c3/27vscm613fjb6g8f5jmc2x_w0000gp/T/unzipped-app506692756
Uploading 26.3M, 154 files
Done uploading
OK
Starting app springboot-oracle in org pcfdev-org / space pcfdev-space as admin...
Downloading binary_buildpack...
Downloading python_buildpack...
Downloading staticfile_buildpack...
Downloading java_buildpack...
Downloading php_buildpack...
Downloading ruby_buildpack...
Downloading go_buildpack...
Downloading nodejs_buildpack...
Downloaded staticfile_buildpack
Downloaded binary_buildpack (8.3K)
Downloaded php_buildpack (262.3M)
Downloaded java_buildpack (241.6M)
Downloaded go_buildpack (450.3M)
Downloaded ruby_buildpack (247.7M)
Downloaded python_buildpack (254.1M)
Downloaded nodejs_buildpack (60.7M)
Creating container
Successfully created container
Downloading app package...
Downloaded app package (23.5M)
Staging...
-----> Java Buildpack Version: v3.6 (offline) | https://github.com/cloudfoundry/java-buildpack.git#5194155
-----> Downloading Open Jdk JRE 1.8.0_71 from https://download.run.pivotal.io/openjdk/trusty/x86_64/openjdk-1.8.0_71.tar.gz (found in cache)
Expanding Open Jdk JRE to .java-buildpack/open_jdk_jre (1.2s)
-----> Downloading Open JDK Like Memory Calculator 2.0.1_RELEASE from https://download.run.pivotal.io/memory-calculator/trusty/x86_64/memory-calculator-2.0.1_RELEASE.tar.gz (found in cache)
Memory Settings: -XX:MetaspaceSize=64M -XX:MaxMetaspaceSize=64M -Xss995K -Xmx382293K -Xms382293K
-----> Downloading Spring Auto Reconfiguration 1.10.0_RELEASE from https://download.run.pivotal.io/auto-reconfiguration/auto-reconfiguration-1.10.0_RELEASE.jar (found in cache)
Exit status 0
Staging complete
Uploading droplet, build artifacts cache...
Uploading build artifacts cache...
Uploading droplet...
Uploaded build artifacts cache (109B)
Uploaded droplet (68.4M)
Uploading complete
1 of 1 instances running
App started
OK
App springboot-oracle was started using this command `CALCULATED_MEMORY=$($PWD/.java-buildpack/open_jdk_jre/bin/java-buildpack-memory-calculator-2.0.1_RELEASE -memorySizes=metaspace:64m.. -memoryWeights=heap:75,metaspace:10,native:10,stack:5 -memoryInitials=heap:100%,metaspace:100% -totMemory=$MEMORY_LIMIT) && JAVA_OPTS="-Djava.io.tmpdir=$TMPDIR -XX:OnOutOfMemoryError=$PWD/.java-buildpack/open_jdk_jre/bin/killjava.sh $CALCULATED_MEMORY" && SERVER_PORT=$PORT eval exec $PWD/.java-buildpack/open_jdk_jre/bin/java $JAVA_OPTS -cp $PWD/.:$PWD/.java-buildpack/spring_auto_reconfiguration/spring_auto_reconfiguration-1.10.0_RELEASE.jar org.springframework.boot.loader.JarLauncher`
Showing health and status for app springboot-oracle in org pcfdev-org / space pcfdev-space as admin...
OK
requested state: started
instances: 1/1
usage: 512M x 1 instances
urls: springboot-oracle.local.pcfdev.io
last uploaded: Sun Jul 31 01:23:03 UTC 2016
stack: unknown
buildpack: java-buildpack=v3.6-offline-https://github.com/cloudfoundry/java-buildpack.git#5194155 java-main open-jdk-like-jre=1.8.0_71 open-jdk-like-memory-calculator=2.0.1_RELEASE spring-auto-reconfiguration=1.10.0_RELEASE
state since cpu memory disk details
#0 running 2016-07-31 11:24:26 AM 0.0% 0 of 512M 0 of 512M
pasapicella@pas-macbook:~/pivotal/DemoProjects/spring-starter/pivotal/PCFOracleDemo$ cf apps
Getting apps in org pcfdev-org / space pcfdev-space as admin...
OK
name requested state instances memory disk urls
springboot-oracle started 1/1 512M 512M springboot-oracle.local.pcfdev.io

Thursday, 15 May 2014
Pivotal GemFireXD*Web, Web based Interface For GemFireXD
Pivotal GemFire XD bridges GemFire’s proven in-memory intelligence and
integrates it with Pivotal HD 2.0 and HAWQ. This enables businesses to
make prescriptive decisions in real-time, such as stock trading, fraud
detection, intelligence for energy companies, or routing for the telecom
industries.
You can read more about how GemFireXD and it's integration with PHD here.
https://www.gopivotal.com/big-data/pivotal-hd
While development team worked on GemFireXD I produced another open source web based tool named GemFireXD*Web. It's available with source code as follows.
https://github.com/papicella/GemFireXD-Web
GemFireXD *Web enables schema management from a web browser with features as follows
etc…


You can read more about how GemFireXD and it's integration with PHD here.
https://www.gopivotal.com/big-data/pivotal-hd
While development team worked on GemFireXD I produced another open source web based tool named GemFireXD*Web. It's available with source code as follows.
https://github.com/papicella/GemFireXD-Web
GemFireXD *Web enables schema management from a web browser with features as follows
- Create all Schema Objects via Dialogs
- Generate DDL
- Run multiple SQL Commands, upload SQL files
- Browse / Administer Objects
- Browse / Administer HDFS stores/tables
- Browse / Administer Async Event Listeners
- View data distribution
- View Members / start parameters
etc…
Tuesday, 15 April 2014
Creating some Pivotal Cloud Foundry (PCF) PHD services
After installing PHD add on for Pivotal Cloud Foundry 1.1 I quickly created some development services for PHD using the CLI as shown below.
[Tue Apr 15 22:40:08 papicella@:~/vmware/pivotal/products/cloud-foundry ] $ cf create-service p-hd-hawq-cf free dev-hawq
Creating service dev-hawq in org pivotal / space development as pas...
OK
[Tue Apr 15 22:42:31 papicella@:~/vmware/pivotal/products/cloud-foundry ] $ cf create-service p-hd-hbase-cf free dev-hbase
Creating service dev-hbase in org pivotal / space development as pas...
OK
[Tue Apr 15 22:44:10 papicella@:~/vmware/pivotal/products/cloud-foundry ] $ cf create-service p-hd-hive-cf free dev-hive
Creating service dev-hive in org pivotal / space development as pas...
OK
[Tue Apr 15 22:44:22 papicella@:~/vmware/pivotal/products/cloud-foundry ] $ cf create-service p-hd-yarn-cf free dev-yarn
Creating service dev-yarn in org pivotal / space development as pas...
OK
Finally using the web console to brow the services in the "Development" space

[Tue Apr 15 22:40:08 papicella@:~/vmware/pivotal/products/cloud-foundry ] $ cf create-service p-hd-hawq-cf free dev-hawq
Creating service dev-hawq in org pivotal / space development as pas...
OK
[Tue Apr 15 22:42:31 papicella@:~/vmware/pivotal/products/cloud-foundry ] $ cf create-service p-hd-hbase-cf free dev-hbase
Creating service dev-hbase in org pivotal / space development as pas...
OK
[Tue Apr 15 22:44:10 papicella@:~/vmware/pivotal/products/cloud-foundry ] $ cf create-service p-hd-hive-cf free dev-hive
Creating service dev-hive in org pivotal / space development as pas...
OK
[Tue Apr 15 22:44:22 papicella@:~/vmware/pivotal/products/cloud-foundry ] $ cf create-service p-hd-yarn-cf free dev-yarn
Creating service dev-yarn in org pivotal / space development as pas...
OK
Finally using the web console to brow the services in the "Development" space
Tuesday, 4 March 2014
Pivotal Cloud Foundry using App Direct "newrelic" Monitoring Service
PCF AWS marketplace provides app direct services and in this example I am going to use the "newrelic" monitoring service to monitor my spring based java application. It's really this simple.
1. Create a service as shown below.
[Tue Mar 04 17:19:34 papicella@:~/cfapps/spring-travel ] $ cf create-service newrelic standard dev-newrelic
2. Create a manifest.yml for my spring application which uses the new relic service above.
applications:
- name: pas-springtravel
memory: 1024M
instances: 1
host: pas-springtravel
domain: cfapps.io
path: ./travel.war
services:
- dev-mysql
- dev-newrelic
3. Push the application
[Tue Mar 04 17:19:34 papicella@:~/cfapps/spring-travel ] $ cf push -f manifest.yml
Using manifest file manifest.yml
Creating app pas-springtravel in org papicella-org / space development as papicella@gopivotal.com...
OK
Using route pas-springtravel.cfapps.io
Binding pas-springtravel.cfapps.io to pas-springtravel...
OK
Uploading pas-springtravel...
Uploading from: travel.war
5.3M, 2748 files
OK
Binding service dev-mysql to pas-springtravel in org papicella-org / space development as papicella@gopivotal.com
OK
Binding service dev-newrelic to pas-springtravel in org papicella-org / space development as papicella@gopivotal.com
OK
Starting app pas-springtravel in org papicella-org / space development as papicella@gopivotal.com...
OK
-----> Downloaded app package (22M)
-----> Uploading droplet (67M)
0 of 1 instances running, 1 starting
0 of 1 instances running, 1 starting
0 of 1 instances running, 1 starting
0 of 1 instances running, 1 starting
0 of 1 instances running, 1 starting
1 of 1 instances running
App started
Showing health and status for app pas-springtravel in org papicella-org / space development as papicella@gopivotal.com...
OK
requested state: started
instances: 1/1
usage: 1G x 1 instances
urls: pas-springtravel.cfapps.io
state since cpu memory disk
#0 running 2014-03-04 05:24:43 PM 0.0% 610.7M of 1G 155.9M of 1G
4. Under the services listed on AWS click on "Manage" and here are some screen shots of what the newrelic monitoring service provides with just a simple BIND when we pushed the application.


1. Create a service as shown below.
[Tue Mar 04 17:19:34 papicella@:~/cfapps/spring-travel ] $ cf create-service newrelic standard dev-newrelic
2. Create a manifest.yml for my spring application which uses the new relic service above.
applications:
- name: pas-springtravel
memory: 1024M
instances: 1
host: pas-springtravel
domain: cfapps.io
path: ./travel.war
services:
- dev-mysql
- dev-newrelic
3. Push the application
[Tue Mar 04 17:19:34 papicella@:~/cfapps/spring-travel ] $ cf push -f manifest.yml
Using manifest file manifest.yml
Creating app pas-springtravel in org papicella-org / space development as papicella@gopivotal.com...
OK
Using route pas-springtravel.cfapps.io
Binding pas-springtravel.cfapps.io to pas-springtravel...
OK
Uploading pas-springtravel...
Uploading from: travel.war
5.3M, 2748 files
OK
Binding service dev-mysql to pas-springtravel in org papicella-org / space development as papicella@gopivotal.com
OK
Binding service dev-newrelic to pas-springtravel in org papicella-org / space development as papicella@gopivotal.com
OK
Starting app pas-springtravel in org papicella-org / space development as papicella@gopivotal.com...
OK
-----> Downloaded app package (22M)
-----> Uploading droplet (67M)
0 of 1 instances running, 1 starting
0 of 1 instances running, 1 starting
0 of 1 instances running, 1 starting
0 of 1 instances running, 1 starting
0 of 1 instances running, 1 starting
1 of 1 instances running
App started
Showing health and status for app pas-springtravel in org papicella-org / space development as papicella@gopivotal.com...
OK
requested state: started
instances: 1/1
usage: 1G x 1 instances
urls: pas-springtravel.cfapps.io
state since cpu memory disk
#0 running 2014-03-04 05:24:43 PM 0.0% 610.7M of 1G 155.9M of 1G
4. Under the services listed on AWS click on "Manage" and here are some screen shots of what the newrelic monitoring service provides with just a simple BIND when we pushed the application.
Friday, 10 January 2014
SpringXD : Pre-Packaged Batch Jobs Import CSV Files to GemFireXD
Spring XD comes with several batch import and export modules. You can run them out of the box and show using the "Import CSV Files to JDBC (filejdbc)" as shown below.
This example show's inserting data into GemFireXD, you can use any RDBMS which supports a JDBC driver.
Note: XD_BASE = /Users/papicella/vmware/software/spring/spring-xd-1.0.0.M4
1. Configure connection to RDBMS in "$XD_BASE/xd/config/batch-jdbc-import.properties".
# Setting for the JDBC batch import job module
driverClass=com.vmware.sqlfire.jdbc.ClientDriver
url=jdbc:sqlfire://10.32.240.113:1527
username=APP
password=APP
2. Add jdbc jar file to $XD_BASE/xd/lib directory, in this case GemFireXD which uses "sqlfireclient.jar"
3. Start SpringXD single node using "./$XD_BASE/xd/bin/xd-singlenode"
4. Create a file called people.csv with contents as follows
[Fri Jan 10 14:35:00 papicella@:~/vmware/software/spring/spring-xd-1.0.0.M4/files ] $ cat people.csv
1,pas
2,lucia
3,lucas
4,siena
6. Create table in GemFireXD as shown below.
7. Create a JOB as shown below
More Information
For more information on SpringXD or GemFireXD see the links below.
http://projects.spring.io/spring-xd/ - SpringXD
http://gopivotal.com/products/pivotal-hd - GemFireXD Beta
This example show's inserting data into GemFireXD, you can use any RDBMS which supports a JDBC driver.
Note: XD_BASE = /Users/papicella/vmware/software/spring/spring-xd-1.0.0.M4
1. Configure connection to RDBMS in "$XD_BASE/xd/config/batch-jdbc-import.properties".
# Setting for the JDBC batch import job module
driverClass=com.vmware.sqlfire.jdbc.ClientDriver
url=jdbc:sqlfire://10.32.240.113:1527
username=APP
password=APP
3. Start SpringXD single node using "./$XD_BASE/xd/bin/xd-singlenode"
4. Create a file called people.csv with contents as follows
[Fri Jan 10 14:35:00 papicella@:~/vmware/software/spring/spring-xd-1.0.0.M4/files ] $ cat people.csv
1,pas
2,lucia
3,lucas
4,siena
5. Log into SpringXD shell as shown below using "$XD_BASE/shell/bin/xd-shell"
sqlf> create table people (id int, name varchar(20));
0 rows inserted/updated/deleted
7. Create a JOB as shown below
xd:>job create myjob --definition "filejdbc --resources=file:/Users/papicella/vmware/software/spring/spring-xd-1.0.0.M4/files/*.csv --names=id,name --tableName=people"
Successfully created and deployed job 'myjob'
8. Start the JOB
xd:>job launch myjob
Successfully launched the job 'myjob'
9. Verify that the CSV data has been inserted into the table PEOPLE in GemFireXD
xd:>job launch myjob
Successfully launched the job 'myjob'
sqlf> select * from people;
ID         |NAME
--------------------------------
2          |lucia
1          |pas
4          |siena
3          |lucas

4 rows selected
More Information
For more information on SpringXD or GemFireXD see the links below.
http://projects.spring.io/spring-xd/ - SpringXD
http://gopivotal.com/products/pivotal-hd - GemFireXD Beta
Friday, 20 December 2013
Pivotal GemFireXD provides a graphical dashboard for monitoring known as Pulse
Like GemFire 7 , GemFireXD now includes Pulse. GemFire XD Pulse
is a Web Application that provides a graphical dashboard for monitoring
vital, real-time health and performance of GemFire XD clusters,
members, and tables.
Use Pulse to examine total memory, CPU, and disk space used by members, uptime statistics, client connections, WAN connections, query statistics, and critical notifications. Pulse communicates with a GemFire XD JMX manager to provide a complete view of your GemFire XD deployment. You can drill down from a high-level cluster view to examine individual members and tables within a member.
By default, GemFire XD Pulse runs in a Tomcat server container that is embedded in a GemFire XD JMX manager node which you can enable by starting your locator as follows.
sqlf locator start -peer-discovery-address=localhost -peer-discovery-port=41111 -jmx-manager-start=true -jmx-manager-http-port=7075 -conserve-sockets=false -client-bind-address=localhost -client-port=1527 -dir=locator -sync=false
Then you just need to start a browser, point to http://locator-ip:7075/pulse and login as "admin/admin".
Screen Shot Below.

Use Pulse to examine total memory, CPU, and disk space used by members, uptime statistics, client connections, WAN connections, query statistics, and critical notifications. Pulse communicates with a GemFire XD JMX manager to provide a complete view of your GemFire XD deployment. You can drill down from a high-level cluster view to examine individual members and tables within a member.
By default, GemFire XD Pulse runs in a Tomcat server container that is embedded in a GemFire XD JMX manager node which you can enable by starting your locator as follows.
sqlf locator start -peer-discovery-address=localhost -peer-discovery-port=41111 -jmx-manager-start=true -jmx-manager-http-port=7075 -conserve-sockets=false -client-bind-address=localhost -client-port=1527 -dir=locator -sync=false
Then you just need to start a browser, point to http://locator-ip:7075/pulse and login as "admin/admin".
Screen Shot Below.

Thursday, 19 December 2013
User Defined Types (UTS's) in Pivotal GemFireXD
The CREATE TYPE statement creates a user-defined type (UDT). A UDT is
a serializable Java class whose instances are stored in columns. The class must
implement the
java.io.Serializable interface. In this example below we create a TYPE with just one string property to highlight how it's done and then how we can create a FUNCTION to allow us to insert the TYPE using sqlf command line.
1. Create 2 Java classes as shown below. One is our UDT class while the other is used to create an instance of it and expose it as a FUNCTION
SqlfireString.java
SqlfireStringFactory.java
2. Create TYPE as shown below
3. Create FUNCTION to enable us to use TYPE
4. Create TABLE using TYPE and insert data
Note: When using JDBC you would use a PreparedStatement and setObject method to add the TYPE column as shown below.
More Information
http://gemfirexd-05.run.pivotal.io/index.jsp?topic=/com.pivotal.gemfirexd.0.5/reference/language_ref/rrefsqljcreatetype.html
1. Create 2 Java classes as shown below. One is our UDT class while the other is used to create an instance of it and expose it as a FUNCTION
SqlfireString.java
package pas.au.apples.sqlfire.types;

public class SqlfireString implements java.io.Serializable
{
 public String value;

 public SqlfireString()
 {
 }

 public SqlfireString(String value)
 {
  this.value = value;
 }

 @Override
 public String toString()
 {
  return value;
 }
}
SqlfireStringFactory.java
package pas.au.apples.sqlfire.types;

public class SqlfireStringFactory
{
 public static SqlfireString newInstance (String s)
 {
  return new SqlfireString(s);
 }
}
2. Create TYPE as shown below
CREATE TYPE LARGE_STRING
EXTERNAL NAME 'pas.au.apples.sqlfire.types.SqlfireString' LANGUAGE JAVA;
3. Create FUNCTION to enable us to use TYPE
CREATE FUNCTION udt_large_string(VARCHAR(32672)) RETURNS LARGE_STRING
LANGUAGE JAVA
PARAMETER STYLE JAVA
NO SQL
EXTERNAL NAME 'pas.au.apples.sqlfire.types.SqlfireStringFactory.newInstance';
4. Create TABLE using TYPE and insert data
create table udt_table (id int, text LARGE_STRING);

insert into udt_table values (1, udt_large_string('pas'));
Note: When using JDBC you would use a PreparedStatement and setObject method to add the TYPE column as shown below.
SqlfireString udtLargeString = new SqlfireString("pas");
pstmt.setObject(1, udtLargeString);
More Information
http://gemfirexd-05.run.pivotal.io/index.jsp?topic=/com.pivotal.gemfirexd.0.5/reference/language_ref/rrefsqljcreatetype.html
Thursday, 5 December 2013
HikariCP (Connection Pool) with Pivotal GemFireXD
I decided to try out the HikariCP as per the link below it says it's the fastest Connection Pool and the most lightweight. It probably is so I thought I would set it up for GemFireXD.
Quote: There is nothing faster.1 There is nothing more correct. HikariCP is a "zero-overhead" production-quality connection pool. Coming in at roughly 50Kb, the library is extremely light.
https://github.com/brettwooldridge/HikariCP
Example Below.
1. Create a Pool class as follows
3. Run Test class and verify output as follows
SLF4J: Failed to load class "org.slf4j.impl.StaticLoggerBinder".
SLF4J: Defaulting to no-operation (NOP) logger implementation
SLF4J: See http://www.slf4j.org/codes.html#StaticLoggerBinder for further details.
Dept[10, ACCOUNTING, NEW YORK]
Dept[20, RESEARCH, DALLAS]
Dept[30, SALES, CHICAGO]
Dept[40, OPERATIONS, BRISBANE]
Dept[50, MARKETING, ADELAIDE]
Dept[60, DEV, PERTH]
Dept[70, SUPPORT, SYDNEY]
Quote: There is nothing faster.1 There is nothing more correct. HikariCP is a "zero-overhead" production-quality connection pool. Coming in at roughly 50Kb, the library is extremely light.
https://github.com/brettwooldridge/HikariCP
Example Below.
1. Create a Pool class as follows
package pivotal.au.gemfirexd.demos.connectionpool;

import com.zaxxer.hikari.HikariConfig;
import com.zaxxer.hikari.HikariDataSource;

import java.sql.Connection;
import java.sql.SQLException;

public class HikariGFXDPool
{

    private static HikariGFXDPool instance = null;
    private HikariDataSource ds = null;

    static
    {
        try
        {
            instance = new HikariGFXDPool();
        }
        catch (Exception e)
        {
            throw new RuntimeException(e.getMessage(), e);
        }

    }

    private HikariGFXDPool()
    {
        HikariConfig config = new HikariConfig();
        config.setMaximumPoolSize(10);
        config.setMinimumPoolSize(2);

        config.setDataSourceClassName("com.vmware.sqlfire.internal.jdbc.ClientDataSource");

        config.addDataSourceProperty("portNumber", 1527);
        config.addDataSourceProperty("serverName", "192.168.1.6");
        config.addDataSourceProperty("user", "app");
        config.addDataSourceProperty("password", "app");

        ds = new HikariDataSource(config);
    }

    public static HikariGFXDPool getInstance ()
    {
        return instance;
    }

    public Connection getConnection()  throws SQLException
    {
        return ds.getConnection();
    }

}
2. Create a Test Class as follows
package pivotal.au.gemfirexd.demos.connectionpool;

import java.sql.Connection;
import java.sql.ResultSet;
import java.sql.SQLException;
import java.sql.Statement;
import java.util.logging.Level;
import java.util.logging.Logger;

public class TestPool
{
    private Logger logger = Logger.getLogger(this.getClass().getSimpleName());

    public void run () throws SQLException
    {
        Statement   stmt = null;
        ResultSet   rset = null;
        Connection  conn = null;

        HikariGFXDPool pool = HikariGFXDPool.getInstance();

        try
        {
            conn = pool.getConnection();
            stmt = conn.createStatement();
            rset = stmt.executeQuery("select * from dept order by 1");
            while (rset.next())
            {
                System.out.println(String.format("Dept[%s, %s, %s]",
                                        rset.getInt(1),
                                        rset.getString(2),
                                        rset.getString(3)));
            }
        }
        catch (SQLException se)
        {
            logger.log(Level.SEVERE, se.getMessage());
        }
        finally
        {
            if (stmt != null)
            {
                stmt.close();
            }

            if (rset != null)
            {
                rset.close();
            }

            if (conn != null)
            {
                conn.close();
            }

        }

    }

    public static void main(String[] args) throws SQLException
    {
        TestPool test = new TestPool();
        test.run();
    }
}
3. Run Test class and verify output as follows
SLF4J: Failed to load class "org.slf4j.impl.StaticLoggerBinder".
SLF4J: Defaulting to no-operation (NOP) logger implementation
SLF4J: See http://www.slf4j.org/codes.html#StaticLoggerBinder for further details.
Dept[10, ACCOUNTING, NEW YORK]
Dept[20, RESEARCH, DALLAS]
Dept[30, SALES, CHICAGO]
Dept[40, OPERATIONS, BRISBANE]
Dept[50, MARKETING, ADELAIDE]
Dept[60, DEV, PERTH]
Dept[70, SUPPORT, SYDNEY]
Monday, 16 September 2013
Spring JDBC with PivotalHD and Hawq
HAWQ enables SQL for Hadoop ensuring we can use something like Spring JDBC as shown below. In this example we use the PivotalHD VM with data from a HAWQ append only table as shown below.
Code
Customer.java (POJO)
DAO : Constants.java
DAO : CustomerDAO.java
DAO : CustomerDAOImpl.java
application-context.xml
jdbc.properties
jdbc.driverClassName=org.postgresql.Driver
jdbc.url=jdbc:postgresql://172.16.62.142:5432/gpadmin
jdbc.username=gpadmin
jdbc.password=gpadmin
TestCustomerDAO.java
Output
http://blog.gopivotal.com/products/pivotal-hd-ga
This page dives deeper into the PHD VM with a walkthrough from data loading, map reduce and SQL queries.
http://pivotalhd.cfapps.io/getting-started/pivotalhd-vm.html
Finally, the following link is the direct download location of the VM discussed above above.
http://bitcast-a.v1.o1.sjc1.bitgravity.com/greenplum/pivotal-sw/pivotalhd_singlenodevm_101_v1.7z
gpadmin=# \dt
                             List of relations
   Schema    |            Name             | Type  |  Owner  |   Storage
-------------+-----------------------------+-------+---------+-------------
 retail_demo | categories_dim_hawq         | table | gpadmin | append only
 retail_demo | customer_addresses_dim_hawq | table | gpadmin | append only
 retail_demo | customers_dim_hawq          | table | gpadmin | append only
 retail_demo | date_dim_hawq               | table | gpadmin | append only
 retail_demo | email_addresses_dim_hawq    | table | gpadmin | append only
 retail_demo | order_lineitems_hawq        | table | gpadmin | append only
 retail_demo | orders_hawq                 | table | gpadmin | append only
 retail_demo | payment_methods_hawq        | table | gpadmin | append only
 retail_demo | products_dim_hawq           | table | gpadmin | append only
(9 rows)

gpadmin=# select * from customers_dim_hawq limit 5;
 customer_id | first_name | last_name | gender
-------------+------------+-----------+--------
 11371       | Delphine   | Williams  | F
 5480        | Everett    | Johnson   | M
 26030       | Dominique  | Davis     | M
 41922       | Brice      | Martinez  | M
 47265       | Iva        | Wilson    | F
(5 rows)

Time: 57.334 ms
Code
Customer.java (POJO)
package pivotal.au.hawq.beans;

public class Customer {

 public String customerId;
 public String firstName;
 public String lastName;
 public String gender;

 public Customer()
 {
 }

 public Customer(String customerId, String firstName, String lastName,
   String gender) {
  super();
  this.customerId = customerId;
  this.firstName = firstName;
  this.lastName = lastName;
  this.gender = gender;
 }

..... getters/setters etc ....
DAO : Constants.java
package pivotal.au.hawq.dao;

public interface Constants
{
   public static final String SELECT_CUSTOMER = "select * from retail_demo.customers_dim_hawq where customer_id = ?";

   public static final String SELECT_FIRST_FIVE_CUSTOMERS = "select * from retail_demo.customers_dim_hawq limit 5";

}
DAO : CustomerDAO.java
package pivotal.au.hawq.dao;

import java.util.List;

import pivotal.au.hawq.beans.Customer;

public interface CustomerDAO
{
   public Customer selectCustomer (String customerId);

   public List<Customer> firstFiveCustomers();

}
DAO : CustomerDAOImpl.java
package pivotal.au.hawq.dao;

import java.util.ArrayList;
import java.util.List;
import javax.sql.DataSource;

import org.springframework.jdbc.core.BeanPropertyRowMapper;
import org.springframework.jdbc.core.JdbcTemplate;
import pivotal.au.hawq.beans.Customer;

public class CustomerDAOImpl implements CustomerDAO
{
 private JdbcTemplate jdbcTemplate;

 public void setDataSource(DataSource dataSource)
 {
     this.jdbcTemplate = new JdbcTemplate(dataSource);
 }

 public Customer selectCustomer(String customerId)
 {
     return (Customer) jdbcTemplate.queryForObject
            (Constants.SELECT_CUSTOMER,
              new Object[] { customerId },
              new BeanPropertyRowMapper<Customer>( Customer.class));
 }

 public List<Customer> firstFiveCustomers()
 {
  List<Customer> customers = new ArrayList<Customer>();

  customers = jdbcTemplate.query(Constants.SELECT_FIRST_FIVE_CUSTOMERS,
                           new BeanPropertyRowMapper<Customer>( Customer.class));

  return customers;

 }

}
application-context.xml
<?xml version="1.0" encoding="UTF-8"?>
<beans xmlns="http://www.springframework.org/schema/beans"
 xmlns:xsi="http://www.w3.org/2001/XMLSchema-instance"
 xmlns:jdbc="http://www.springframework.org/schema/jdbc"
 xmlns:context="http://www.springframework.org/schema/context"
 xsi:schemaLocation="http://www.springframework.org/schema/jdbc http://www.springframework.org/schema/jdbc/spring-jdbc-3.2.xsd
  http://www.springframework.org/schema/beans http://www.springframework.org/schema/beans/spring-beans.xsd
  http://www.springframework.org/schema/context http://www.springframework.org/schema/context/spring-context-3.2.xsd">

 <context:property-placeholder location="classpath:/jdbc.properties"/>

 <bean id="pivotalHDDataSource" class="org.apache.commons.dbcp.BasicDataSource" destroy-method="close">
  <property name="driverClassName" value="${jdbc.driverClassName}" />
  <property name="url" value="${jdbc.url}" />
  <property name="username" value="${jdbc.username}" />
  <property name="password" value="${jdbc.password}" />
 </bean>

 <bean id="customerDAOImpl" class="pivotal.au.hawq.dao.CustomerDAOImpl">
      <property name="dataSource" ref="pivotalHDDataSource" />
   </bean>
</beans>
jdbc.properties
jdbc.driverClassName=org.postgresql.Driver
jdbc.url=jdbc:postgresql://172.16.62.142:5432/gpadmin
jdbc.username=gpadmin
jdbc.password=gpadmin
TestCustomerDAO.java
package pivotal.au.hawq.dao.test;

import java.util.List;
import java.util.logging.Level;
import java.util.logging.Logger;

import org.springframework.context.ApplicationContext;
import org.springframework.context.support.ClassPathXmlApplicationContext;

import pivotal.au.hawq.beans.Customer;
import pivotal.au.hawq.dao.CustomerDAO;

public class TestCustomerDAO
{
 private Logger logger = Logger.getLogger(this.getClass().getSimpleName());
 private ApplicationContext context;
 private static final String BEAN_NAME = "customerDAOImpl";
 private CustomerDAO customerDAO;

 public TestCustomerDAO()
 {
     context = new ClassPathXmlApplicationContext("application-context.xml");
     customerDAO = (CustomerDAO) context.getBean(BEAN_NAME);
     logger.log (Level.INFO, "Obtained customerDAOImpl BEAN...");
 }

 public void run()
 {
  System.out.println("Select single customer from HAWQ -> ");
  Customer customer = customerDAO.selectCustomer("59047");
  System.out.println(customer.toString());

  System.out.println("Select five customers from HAWQ -> ");

  List<Customer> customers = customerDAO.firstFiveCustomers();

  for (Customer cust: customers)
  {
   System.out.println(cust.toString());
  }

 }

 public static void main(String[] args)
 {
  // TODO Auto-generated method stub
  TestCustomerDAO test = new TestCustomerDAO();
  test.run();
 }

}
Output
log4j:WARN No appenders could be found for logger (org.springframework.core.env.StandardEnvironment).
log4j:WARN Please initialize the log4j system properly.
Sep 16, 2013 9:59:09 PM pivotal.au.hawq.dao.test.TestCustomerDAO
INFO: Obtained customerDAOImpl BEAN...
Select single customer from HAWQ ->
Customer [customerId=59047, firstName=Olivia, lastName=Anderson, gender=F]
Select five customers from HAWQ ->
Customer [customerId=11371, firstName=Delphine, lastName=Williams, gender=F]
Customer [customerId=5480, firstName=Everett, lastName=Johnson, gender=M]
Customer [customerId=26030, firstName=Dominique, lastName=Davis, gender=M]
Customer [customerId=41922, firstName=Brice, lastName=Martinez, gender=M]
Customer [customerId=47265, firstName=Iva, lastName=Wilson, gender=F]
More Information
Here is the high level page describing the Pivotal HD & HAWQ technology.http://blog.gopivotal.com/products/pivotal-hd-ga
This page dives deeper into the PHD VM with a walkthrough from data loading, map reduce and SQL queries.
http://pivotalhd.cfapps.io/getting-started/pivotalhd-vm.html
Finally, the following link is the direct download location of the VM discussed above above.
http://bitcast-a.v1.o1.sjc1.bitgravity.com/greenplum/pivotal-sw/pivotalhd_singlenodevm_101_v1.7z
Subscribe to:
Posts (Atom)