Search This Blog

Friday, 17 July 2020

Stumbled upon this today : Lens | The Kubernetes IDE

Lens is the only IDE you’ll ever need to take control of your Kubernetes clusters. It is a standalone application for MacOS, Windows and Linux operating systems. It is open source and free.

I installed it today and was impressed. Below is some screen shots of new Tanzu Application Service running on my Kubernetes cluster using Lens IDE. Simply point it to your Kube Config for the cluster you wish to examine.

On Mac SX it's installed as follows

$ brew cask install lens


More Information

https://github.com/lensapp/lens


Tuesday, 14 July 2020

Spring Data Elasticsearch using Elastic Cloud on Kubernetes (ECK) on VMware Tanzu Kubernetes Grid Integrated Edition (TKGI)

VMware Tanzu Kubernetes Grid Integrated Edition (formerly known as VMware Enterprise PKS) is a Kubernetes-based container solution with advanced networking, a private container registry, and life cycle management.

In this post I show how to get Elastic Cloud on Kubernetes (ECK) up and running on VMware Tanzu Kubernetes Grid Integrated Edition and how to access it using a Spring Boot Application using Spring Data Elasticsearch.

With ECK, users now have a seamless way of deploying, managing, and operating the Elastic Stack on Kubernetes.

If you have a K8s cluster that's all you need to follow along.

Steps

1. Let's install ECK on our cluster we do that as follows

Note: There is a 1.1 version as the latest BUT I installing a slightly older one here

$ kubectl apply -f https://download.elastic.co/downloads/eck/1.0.1/all-in-one.yaml

2. Make sure the operator is up and running as shown below
  
$ kubectl get all -n elastic-system
NAME                     READY   STATUS    RESTARTS   AGE
pod/elastic-operator-0   1/1     Running   0          26d

NAME                             TYPE        CLUSTER-IP      EXTERNAL-IP   PORT(S)   AGE
service/elastic-webhook-server   ClusterIP   10.100.200.55   <none>        443/TCP   26d

NAME                                READY   AGE
statefulset.apps/elastic-operator   1/1     26d

3. We can also see a CRD for Elasticsearch as shown below.

elasticsearches.elasticsearch.k8s.elastic.co
  
$ kubectl get crd
NAME                                           CREATED AT
apmservers.apm.k8s.elastic.co                  2020-06-17T00:37:32Z
clusterlogsinks.pksapi.io                      2020-06-16T23:04:43Z
clustermetricsinks.pksapi.io                   2020-06-16T23:04:44Z
elasticsearches.elasticsearch.k8s.elastic.co   2020-06-17T00:37:33Z
kibanas.kibana.k8s.elastic.co                  2020-06-17T00:37:34Z
loadbalancers.vmware.com                       2020-06-16T22:51:52Z
logsinks.pksapi.io                             2020-06-16T23:04:43Z
metricsinks.pksapi.io                          2020-06-16T23:04:44Z
nsxerrors.nsx.vmware.com                       2020-06-16T22:51:52Z
nsxlbmonitors.vmware.com                       2020-06-16T22:51:52Z
nsxlocks.nsx.vmware.com                        2020-06-16T22:51:51Z

4. We are now ready to create our first Elasticsearch cluster. To do that create a file YML file as shown below

create-elastic-cluster-from-operator.yaml

apiVersion: elasticsearch.k8s.elastic.co/v1
kind: Elasticsearch
metadata:
  name: quickstart
spec:
  version: 7.7.0
  http:
    service:
      spec:
        type: LoadBalancer # default is ClusterIP
    tls:
      selfSignedCertificate:
        disabled: true
  nodeSets:
  - name: default
    count: 2
    volumeClaimTemplates:
    - metadata:
        name: elasticsearch-data
      spec:
        accessModes:
          - ReadWriteOnce
        resources:
          requests:
            storage: 1Gi
    config:
      node.master: true
      node.data: true
      node.ingest: true
      node.store.allow_mmap: false

From the YML a few things to note:

  • We are creating two pods for our Elasticsearch cluster
  • We are using a K8s LoadBalancer to expose access to the cluster through HTTP
  • We are using version 7.7.0 but this is not the latest Elasticsearch version
  • We have disabled the use of TLS given this is just a demo
5. Apply that as shown below.

$ kubectl apply -f create-elastic-cluster-from-operator.yaml

6. After about a minute we should have our Elasticsearch cluster running. The following commands show that
  
$ kubectl get elasticsearch
NAME         HEALTH   NODES   VERSION   PHASE   AGE
quickstart   green    2       7.7.0     Ready   47h

$ kubectl get all -n default
NAME                                   READY   STATUS    RESTARTS   AGE
pod/quickstart-es-default-0            1/1     Running   0          47h
pod/quickstart-es-default-1            1/1     Running   0          47h

NAME                            TYPE           CLUSTER-IP      EXTERNAL-IP     PORT(S)          AGE
service/kubernetes              ClusterIP      10.100.200.1    <none>          443/TCP          27d
service/quickstart-es-default   ClusterIP      None            <none>          <none>           47h
service/quickstart-es-http      LoadBalancer   10.100.200.92   10.195.93.137   9200:30590/TCP   47h

NAME                                     READY   AGE
statefulset.apps/quickstart-es-default   2/2     47h

7. Let's deploy a Kibana instance. To do that create a YML as shown below

create-kibana.yaml

apiVersion: kibana.k8s.elastic.co/v1
kind: Kibana
metadata:
  name: kibana-sample
spec:
  version: 7.7.0
  count: 1
  elasticsearchRef:
    name: quickstart
    namespace: default
  http:
    service:
      spec:
        type: LoadBalancer # default is ClusterIP

8. Apply that as shown below.

$ kubectl apply -f create-kibana.yaml

9. To verify everything is up and running we can run a command as follows
  
$ kubectl get all
NAME                                   READY   STATUS    RESTARTS   AGE
pod/kibana-sample-kb-f8fcb88d5-jdzh5   1/1     Running   0          2d
pod/quickstart-es-default-0            1/1     Running   0          2d
pod/quickstart-es-default-1            1/1     Running   0          2d

NAME                            TYPE           CLUSTER-IP      EXTERNAL-IP     PORT(S)          AGE
service/kibana-sample-kb-http   LoadBalancer   10.100.200.46   10.195.93.174   5601:32459/TCP   2d
service/kubernetes              ClusterIP      10.100.200.1    <none>          443/TCP          27d
service/quickstart-es-default   ClusterIP      None            <none>          <none>           2d
service/quickstart-es-http      LoadBalancer   10.100.200.92   10.195.93.137   9200:30590/TCP   2d

NAME                               READY   UP-TO-DATE   AVAILABLE   AGE
deployment.apps/kibana-sample-kb   1/1     1            1           2d

NAME                                         DESIRED   CURRENT   READY   AGE
replicaset.apps/kibana-sample-kb-f8fcb88d5   1         1         1       2d

NAME                                     READY   AGE
statefulset.apps/quickstart-es-default   2/2     2d

10. So to access out cluster we will need to obtain the following which we can do using a script as follows. This was tested on Mac OSX

What do we need?

  • Elasticsearch password
  • IP address of the LoadBalancer service we created


access.sh

export PASSWORD=`kubectl get secret quickstart-es-elastic-user -o go-template='{{.data.elastic | base64decode}}'`
export IP=`kubectl get svc quickstart-es-http -o jsonpath='{.status.loadBalancer.ingress[0].ip}'`

echo ""
echo $IP
echo ""

curl -u "elastic:$PASSWORD" "http://$IP:9200"

echo ""

curl -u "elastic:$PASSWORD" "http://$IP:9200/_cat/health?v"

Output:

10.195.93.137

{
  "name" : "quickstart-es-default-1",
  "cluster_name" : "quickstart",
  "cluster_uuid" : "Bbpb7Pu7SmaQaCmEY2Er8g",
  "version" : {
    "number" : "7.7.0",
    "build_flavor" : "default",
    "build_type" : "docker",
    "build_hash" : "81a1e9eda8e6183f5237786246f6dced26a10eaf",
    "build_date" : "2020-05-12T02:01:37.602180Z",
    "build_snapshot" : false,
    "lucene_version" : "8.5.1",
    "minimum_wire_compatibility_version" : "6.8.0",
    "minimum_index_compatibility_version" : "6.0.0-beta1"
  },
  "tagline" : "You Know, for Search"
}

.....

11. Ideally I would load some data into the Elasticsearch cluster BUT let's do that as part of a sample application using "Spring Data Elasticsearch". Clone the demo project as shown below.

$ git clone https://github.com/papicella/boot-elastic-demo.git
Cloning into 'boot-elastic-demo'...
remote: Enumerating objects: 36, done.
remote: Counting objects: 100% (36/36), done.
remote: Compressing objects: 100% (26/26), done.
remote: Total 36 (delta 1), reused 36 (delta 1), pack-reused 0
Unpacking objects: 100% (36/36), done.

12. Edit "./src/main/resources/application.yml" with your details for the Elasticsearch cluster above.

spring:
  elasticsearch:
    rest:
      username: elastic
      password: {PASSWORD}
      uris: http://{IP}:9200

13. Package as follows

$ ./mvnw -DskipTests package

14. Run as follows

$ ./mvnw spring-boot:run

....
2020-07-14 11:10:11.947  INFO 76260 --- [           main] o.s.b.w.embedded.tomcat.TomcatWebServer  : Tomcat started on port(s): 8080 (http) with context path ''
2020-07-14 11:10:11.954  INFO 76260 --- [           main] c.e.e.demo.BootElasticDemoApplication    : Started BootElasticDemoApplication in 2.495 seconds (JVM running for 2.778)
....

15. Access application using "http://localhost:8080/"


16. If we look at our code we will see the data was loaded into the Elasticsearch cluster using a java class called "LoadData.java". Ideally data should already exist in the cluster but for demo purposes we load some data as part of the Spring Boot Application and clear the data prior to each application run given it's just a demo.

2020-07-14 11:12:33.109  INFO 76277 --- [           main] com.example.elastic.demo.LoadData        : Pre loading Car{id='OjThSnMBLjyTRl7lZsDL', make='holden', model='commodore', bodystyles=[BodyStyle{type='2-door'}, BodyStyle{type='4-door'}, BodyStyle{type='5-door'}]}
2020-07-14 11:12:33.584  INFO 76277 --- [           main] com.example.elastic.demo.LoadData        : Pre loading Car{id='OzThSnMBLjyTRl7laMCo', make='holden', model='astra', bodystyles=[BodyStyle{type='2-door'}, BodyStyle{type='4-door'}]}
2020-07-14 11:12:34.189  INFO 76277 --- [           main] com.example.elastic.demo.LoadData        : Pre loading Car{id='PDThSnMBLjyTRl7lasCC', make='nissan', model='skyline', bodystyles=[BodyStyle{type='4-door'}]}
2020-07-14 11:12:34.744  INFO 76277 --- [           main] com.example.elastic.demo.LoadData        : Pre loading Car{id='PTThSnMBLjyTRl7lbMDe', make='nissan', model='pathfinder', bodystyles=[BodyStyle{type='5-door'}]}
2020-07-14 11:12:35.227  INFO 76277 --- [           main] com.example.elastic.demo.LoadData        : Pre loading Car{id='PjThSnMBLjyTRl7lb8AL', make='ford', model='falcon', bodystyles=[BodyStyle{type='4-door'}, BodyStyle{type='5-door'}]}
2020-07-14 11:12:36.737  INFO 76277 --- [           main] com.example.elastic.demo.LoadData        : Pre loading Car{id='QDThSnMBLjyTRl7lcMDu', make='ford', model='territory', bodystyles=[BodyStyle{type='5-door'}]}
2020-07-14 11:12:37.266  INFO 76277 --- [           main] com.example.elastic.demo.LoadData        : Pre loading Car{id='QTThSnMBLjyTRl7ldsDU', make='toyota', model='camry', bodystyles=[BodyStyle{type='4-door'}, BodyStyle{type='5-door'}]}
2020-07-14 11:12:37.777  INFO 76277 --- [           main] com.example.elastic.demo.LoadData        : Pre loading Car{id='QjThSnMBLjyTRl7leMDk', make='toyota', model='corolla', bodystyles=[BodyStyle{type='2-door'}, BodyStyle{type='5-door'}]}
2020-07-14 11:12:38.285  INFO 76277 --- [           main] com.example.elastic.demo.LoadData        : Pre loading Car{id='QzThSnMBLjyTRl7lesDj', make='kia', model='sorento', bodystyles=[BodyStyle{type='5-door'}]}
2020-07-14 11:12:38.800  INFO 76277 --- [           main] com.example.elastic.demo.LoadData        : Pre loading Car{id='RDThSnMBLjyTRl7lfMDg', make='kia', model='sportage', bodystyles=[BodyStyle{type='4-door'}]}

LoadData.java
  
package com.example.elastic.demo;

import com.example.elastic.demo.indices.BodyStyle;
import com.example.elastic.demo.indices.Car;
import com.example.elastic.demo.repo.CarRepository;
import org.springframework.boot.CommandLineRunner;
import org.springframework.context.annotation.Bean;
import org.springframework.context.annotation.Configuration;
import lombok.extern.slf4j.Slf4j;

import static java.util.Arrays.asList;

@Configuration
@Slf4j
public class LoadData {
    @Bean
    public CommandLineRunner initElasticsearchData(CarRepository carRepository) {
        return args -> {
            carRepository.deleteAll();
            log.info("Pre loading " + carRepository.save(new Car("holden", "commodore", asList(new BodyStyle("2-door"), new BodyStyle("4-door"), new BodyStyle("5-door")))));
            log.info("Pre loading " + carRepository.save(new Car("holden", "astra", asList(new BodyStyle("2-door"), new BodyStyle("4-door")))));
            log.info("Pre loading " + carRepository.save(new Car("nissan", "skyline", asList(new BodyStyle("4-door")))));
            log.info("Pre loading " + carRepository.save(new Car("nissan", "pathfinder", asList(new BodyStyle("5-door")))));
            log.info("Pre loading " + carRepository.save(new Car("ford", "falcon", asList(new BodyStyle("4-door"), new BodyStyle("5-door")))));
            log.info("Pre loading " + carRepository.save(new Car("ford", "territory", asList(new BodyStyle("5-door")))));
            log.info("Pre loading " + carRepository.save(new Car("toyota", "camry", asList(new BodyStyle("4-door"), new BodyStyle("5-door")))));
            log.info("Pre loading " + carRepository.save(new Car("toyota", "corolla", asList(new BodyStyle("2-door"), new BodyStyle("5-door")))));
            log.info("Pre loading " + carRepository.save(new Car("kia", "sorento", asList(new BodyStyle("5-door")))));
            log.info("Pre loading " + carRepository.save(new Car("kia", "sportage", asList(new BodyStyle("4-door")))));
        };
    }
}

17. Our CarRepository interface is defined as follows

CarRepository.java
  
package com.example.elastic.demo.repo;

import com.example.elastic.demo.indices.Car;
import org.springframework.data.domain.Page;
import org.springframework.data.domain.Pageable;
import org.springframework.data.elasticsearch.repository.ElasticsearchRepository;
import org.springframework.stereotype.Repository;

@Repository
public interface CarRepository extends ElasticsearchRepository <Car, String> {

    Page<Car> findByMakeContaining(String make, Pageable page);

}

18. So let's also via this data using "curl" and Kibana as shown below.

curl -X GET -u "elastic:{PASSWORD}" "http://{IP}:9200/vehicle/_search?pretty" -H 'Content-Type: application/json' -d'
{
  "query": { "match_all": {} },
  "sort": [
    { "_id": "asc" }
  ]
}
'

Output:

{
  "took" : 2,
  "timed_out" : false,
  "_shards" : {
    "total" : 1,
    "successful" : 1,
    "skipped" : 0,
    "failed" : 0
  },
  "hits" : {
    "total" : {
      "value" : 10,
      "relation" : "eq"
    },
    "max_score" : null,
    "hits" : [
      {
        "_index" : "vehicle",
        "_type" : "_doc",
        "_id" : "OjThSnMBLjyTRl7lZsDL",
        "_score" : null,
        "_source" : {
          "_class" : "com.example.elastic.demo.indices.Car",
          "make" : "holden",
          "model" : "commodore",
          "bodystyles" : [
            {
              "type" : "2-door"
            },
            {
              "type" : "4-door"
            },
            {
              "type" : "5-door"
            }
          ]
        },
        "sort" : [
          "OjThSnMBLjyTRl7lZsDL"
        ]
      },
      {
        "_index" : "vehicle",
        "_type" : "_doc",
        "_id" : "OzThSnMBLjyTRl7laMCo",
        "_score" : null,
        "_source" : {
          "_class" : "com.example.elastic.demo.indices.Car",
          "make" : "holden",
          "model" : "astra",
          "bodystyles" : [
            {
              "type" : "2-door"
            },
            {
              "type" : "4-door"
            }
          ]
        },
        "sort" : [
          "OzThSnMBLjyTRl7laMCo"
        ]
      },
      {
        "_index" : "vehicle",
        "_type" : "_doc",
        "_id" : "PDThSnMBLjyTRl7lasCC",
        "_score" : null,
        "_source" : {
          "_class" : "com.example.elastic.demo.indices.Car",
          "make" : "nissan",
          "model" : "skyline",
          "bodystyles" : [
            {
              "type" : "4-door"
            }
          ]
        },
        "sort" : [
          "PDThSnMBLjyTRl7lasCC"
        ]
      },
      {
        "_index" : "vehicle",
        "_type" : "_doc",
        "_id" : "PTThSnMBLjyTRl7lbMDe",
        "_score" : null,
        "_source" : {
          "_class" : "com.example.elastic.demo.indices.Car",
          "make" : "nissan",
          "model" : "pathfinder",
          "bodystyles" : [
            {
              "type" : "5-door"
            }
          ]
        },
        "sort" : [
          "PTThSnMBLjyTRl7lbMDe"
        ]
      },
      {
        "_index" : "vehicle",
        "_type" : "_doc",
        "_id" : "PjThSnMBLjyTRl7lb8AL",
        "_score" : null,
        "_source" : {
          "_class" : "com.example.elastic.demo.indices.Car",
          "make" : "ford",
          "model" : "falcon",
          "bodystyles" : [
            {
              "type" : "4-door"
            },
            {
              "type" : "5-door"
            }
          ]
        },
        "sort" : [
          "PjThSnMBLjyTRl7lb8AL"
        ]
      },
      {
        "_index" : "vehicle",
        "_type" : "_doc",
        "_id" : "QDThSnMBLjyTRl7lcMDu",
        "_score" : null,
        "_source" : {
          "_class" : "com.example.elastic.demo.indices.Car",
          "make" : "ford",
          "model" : "territory",
          "bodystyles" : [
            {
              "type" : "5-door"
            }
          ]
        },
        "sort" : [
          "QDThSnMBLjyTRl7lcMDu"
        ]
      },
      {
        "_index" : "vehicle",
        "_type" : "_doc",
        "_id" : "QTThSnMBLjyTRl7ldsDU",
        "_score" : null,
        "_source" : {
          "_class" : "com.example.elastic.demo.indices.Car",
          "make" : "toyota",
          "model" : "camry",
          "bodystyles" : [
            {
              "type" : "4-door"
            },
            {
              "type" : "5-door"
            }
          ]
        },
        "sort" : [
          "QTThSnMBLjyTRl7ldsDU"
        ]
      },
      {
        "_index" : "vehicle",
        "_type" : "_doc",
        "_id" : "QjThSnMBLjyTRl7leMDk",
        "_score" : null,
        "_source" : {
          "_class" : "com.example.elastic.demo.indices.Car",
          "make" : "toyota",
          "model" : "corolla",
          "bodystyles" : [
            {
              "type" : "2-door"
            },
            {
              "type" : "5-door"
            }
          ]
        },
        "sort" : [
          "QjThSnMBLjyTRl7leMDk"
        ]
      },
      {
        "_index" : "vehicle",
        "_type" : "_doc",
        "_id" : "QzThSnMBLjyTRl7lesDj",
        "_score" : null,
        "_source" : {
          "_class" : "com.example.elastic.demo.indices.Car",
          "make" : "kia",
          "model" : "sorento",
          "bodystyles" : [
            {
              "type" : "5-door"
            }
          ]
        },
        "sort" : [
          "QzThSnMBLjyTRl7lesDj"
        ]
      },
      {
        "_index" : "vehicle",
        "_type" : "_doc",
        "_id" : "RDThSnMBLjyTRl7lfMDg",
        "_score" : null,
        "_source" : {
          "_class" : "com.example.elastic.demo.indices.Car",
          "make" : "kia",
          "model" : "sportage",
          "bodystyles" : [
            {
              "type" : "4-door"
            }
          ]
        },
        "sort" : [
          "RDThSnMBLjyTRl7lfMDg"
        ]
      }
    ]
  }
}

Kibana

Obtain Kibana HTTP IP as shown below and login using username "elastic" and password we obtained previously.

$ kubectl get svc kibana-sample-kb-http -o jsonpath='{.status.loadBalancer.ingress[0].ip}'
10.195.93.174


Finally maybe you want to deploy the application to Kubernetes. To do that take a look at Cloud Native Buildpacks CNCF project and/or Tanzu Build Service to turn your code into a Container Image stored in a registry.


More Information

Spring Data Elasticsearch
https://spring.io/projects/spring-data-elasticsearch

VMware Tanzu Kubernetes Grid Integrated Edition Documentation
https://docs.vmware.com/en/VMware-Tanzu-Kubernetes-Grid-Integrated-Edition/index.html

Friday, 10 July 2020

Multi-Factor Authentication (MFA) using OKTA with Spring Boot and Tanzu Application Service

Recently I was asked to build a quick demo showing how to use MFA with OKTA and Spring Boot application running on Tanzu Application Service. Here is the demo application plus how to setup and run this yourself.

Steps

1. Clone the existing repo as shown below

$ git clone https://github.com/papicella/mfa-boot-fsi
Cloning into 'mfa-boot-fsi'...
remote: Enumerating objects: 47, done.
remote: Counting objects: 100% (47/47), done.
remote: Compressing objects: 100% (31/31), done.
remote: Total 47 (delta 2), reused 47 (delta 2), pack-reused 0
Unpacking objects: 100% (47/47), done.


2. Create a free account of https://developer.okta.com/

Once created login to the dev account. Your account URL will look like something as follows

https://dev-{ID}-admin.okta.com


3. You will need your default authorization server settings. From the top menu in the developer.okta.com dashboard, go to API -> Authorization Servers and click on the default server


You will need this data shortly. Image above is an example those details won't work for your own setup.

4. From the top menu, go to Applications and click the Add Application button. Click on the Web button and click Next. Name your app whatever you like. I named mine "pas-okta-springapp". Otherwise the default settings are fine. Click Done.

From this screen shot you can see that the default's refer to localhost which for DEV purposes is fine.


You will need the Client ID and Client secret from the final screen so make a note of these

5. Edit the "./mfa-boot-fsi/src/main/resources/application-DEV.yml" to include the details as per #3 and #4 above.

You will need to edit

  • issuer
  • client-id
  • client-secret


application-DEV.yaml

spring:
  security:
    oauth2:
      client:
        provider:
          okta:
            user-name-attribute: email

okta:
  oauth2:
    issuer: https://dev-213269.okta.com/oauth2/default
    redirect-uri: /authorization-code/callback
    scopes:
      - profile
      - email
      - openid
    client-id: ....
    client-secret: ....

6. In order to pick up this application-DEV.yaml we have to set the spring profile correctly. That can be done using a JVM property as follows.

-Dspring.profiles.active=DEV

In my example I use IntelliJ IDEA so I set it on the run configurations dialog as follows


7. Finally let's setup MFA which we do as follows by switching to classic UI as shown below


8. Click on Security -> Multifactor and setup another Multifactor policy. In the screen shot below I select "Email Policy" and make sure it is "Required" along with the default policy


9. Now run the application making sure you set the spring active profile to DEV.

...
2020-07-10 13:34:57.528  INFO 55990 --- [  restartedMain] pas.apa.apj.mfa.demo.DemoApplication     : The following profiles are active: DEV
...

10. Navigate to http://localhost:8080/


11. Click on the "Login" button

Verify you are taken to the default OKTA login page


12. Once logged in the second factor should then ask for a verification code to be sent to your email. Press the "Send me the code" button


13. Once you enter the code sent to your email you will be granted access to the application endpoints


14. Finally to deploy the application to Tanzu Application Service perform these steps below

- Create a manifest.yaml as follows

---
applications:
- name: pas-okta-boot-app 
  memory: 1024M
  buildpack: https://github.com/cloudfoundry/java-buildpack.git#v4.16
  instances: 2
  path: ./target/demo-0.0.1-SNAPSHOT.jar
  env:
    JBP_CONFIG_OPEN_JDK_JRE: '{ jre: { version: 11.+}}'

- Package the application as follows

$ ./mvnw -DskipTests package

- In the DEV OTKA console create a second application which will be for the deployed application on Tanzu Application Service which refers to it's FQDN rather then localhost as shown below


- Edit "application.yml" to ensure you set the following correctly for the new "Application" we created above.

You will need to edit

  • issuer
  • client-id
  • client-secret
- Push the application using "cf push -f manifest.yaml"

$ cf apps
Getting apps in org papicella-org / space apple as papicella@pivotal.io...
OK

name                requested state   instances   memory   disk   urls
pas-okta-boot-app   started           1/1         1G       1G     pas-okta-boot-app.cfapps.io


That's It!!!!

Thursday, 18 June 2020

GitHub Actions to deploy Spring Boot application to Tanzu Application Service for Kubernetes

In this demo I show how to deploy a simple Spring boot application using GitHub Actions onto Tanzu Application Service for Kubernetes (TAS4K8s).

Steps

Ensure you have Tanzu Application Service for Kubernetes (TAS4K8s) running as shown below.
  
$ kapp list
Target cluster 'https://35.189.13.31' (nodes: gke-tanzu-gke-lab-f67-np-f67b23a0f590-abbca04e-5sqc, 8+)

Apps in namespace 'default'

Name                        Namespaces                                             Lcs    Lca
certmanager-cluster-issuer  (cluster)                                              true   8d
externaldns                 (cluster),external-dns                                 true   8d
harbor-cert                 harbor                                                 true   8d
tas                         (cluster),cf-blobstore,cf-db,cf-system,                false  8d
                            cf-workloads,cf-workloads-staging,istio-system,kpack,
                            metacontroller
tas4k8s-cert                cf-system                                              true   8d

Lcs: Last Change Successful
Lca: Last Change Age

5 apps

Succeeded

The demo exists on GitHub using the following URL, to follow along simply use your own GitHub repository making the changes as detailed below. The example below is for a Spring Boot application so your YAML file for the action would differ for non Java applications but there are many starter templates to choose from for other programming languages.

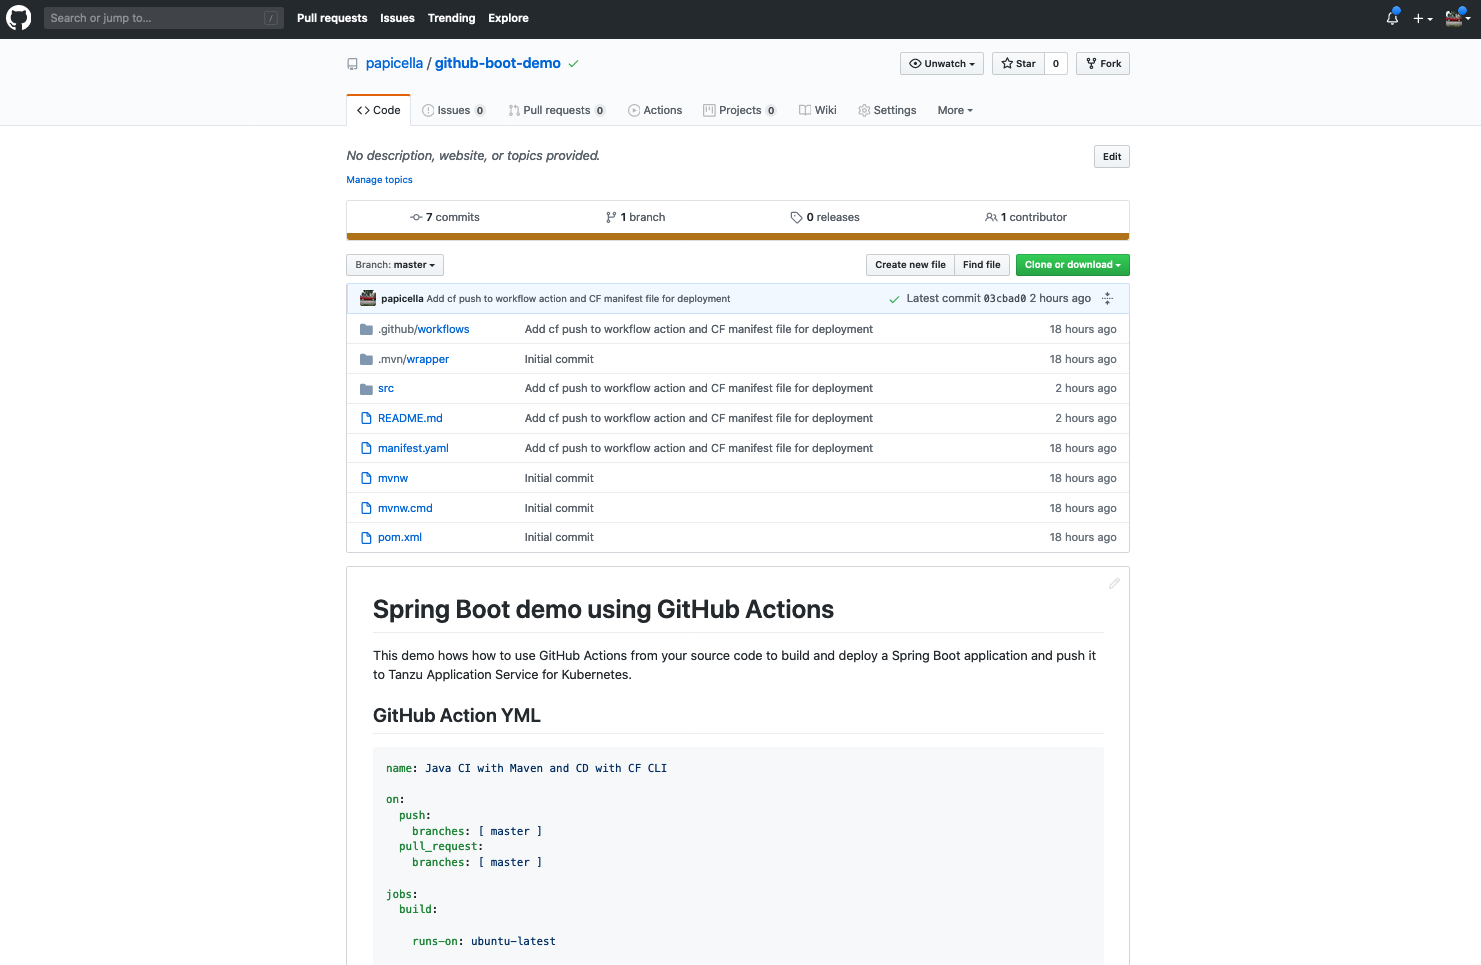
https://github.com/papicella/github-boot-demo


GitHub Actions help you automate your software development workflows in the same place you store code and collaborate on pull requests and issues. You can write individual tasks, called actions, and combine them to create a custom workflow. Workflows are custom automated processes that you can set up in your repository to build, test, package, release, or deploy any code project on GitHub

1. Create a folder at the root of your project source code as follows

$ mkdir ".github/workflows"

2. In ".github/workflows" folder, add a .yml or .yaml file for your workflow. For example, ".github/workflows/maven.yml"

3. Use the "Workflow syntax for GitHub Actions" reference documentation to choose events to trigger an action, add actions, and customize your workflow. In this example the YML "maven.yml" looks as follows.

maven.yml
  
name: Java CI with Maven and CD with CF CLI

on:
  push:
    branches: [ master ]
  pull_request:
    branches: [ master ]

jobs:
  build:

    runs-on: ubuntu-latest

    steps:
    - uses: actions/checkout@v2
    - name: Set up JDK 11.0.5
      uses: actions/setup-java@v1
      with:
        java-version: 11.0.5
    - name: Build with Maven
      run: mvn -B package --file pom.xml
    - name: push to TAS4K8s
      env:
        CF_USERNAME: ${{ secrets.CF_USERNAME }}
        CF_PASSWORD: ${{ secrets.CF_PASSWORD }}
      run: |
        curl --location "https://cli.run.pivotal.io/stable?release=linux64-binary&source=github" | tar zx
        ./cf api https://api.tas.lab.pasapples.me --skip-ssl-validation
        ./cf auth $CF_USERNAME $CF_PASSWORD
        ./cf target -o apples-org -s development
        ./cf push -f manifest.yaml

Few things here around the YML Workflow syntax for the GitHub Action above

  • We are using a maven action sample which will FIRE on a push or pull request on the master branch
  • We are using JDK 11 rather then Java 8
  • 3 Steps exists here
    • Setup JDK
    • Maven Build/Package
    • CF CLI Push to TAS4K8s using the built JAR artifact from the maven build
  • We download the CF CLI into ubuntu image 
  • We have masked the username and password using Secrets

4. Next in the project root add a manifest YAML for deployment to TAS4K8s

- Add a manifest.yaml file in the project root to deploy our simple Spring boot RESTful application

---
applications:
  - name: github-TAS4K8s-boot-demo
    memory: 1024M
    instances: 1
    path: ./target/demo-0.0.1-SNAPSHOT.jar

5. Now we need to add Secrets to the Github repo which are referenced in out "maven.yml" file. In our case they are as follows.
  • CF_USERNAME 
  • CF_PASSWORD
In your GitHub repository click on "Settings" tab then on left hand side navigation bar click on "Secrets" and define your username and password for your TAS4K8s instance as shown below


6. At this point that is all we need to test our GitHub Action. Here in IntelliJ IDEA I issue a commit/push to trigger the GitHub action


7. If all went well using "Actions" tab in your GitHub repo will show you the status and logs as follows


8. Finally our application will be deployed to TAS4K8s as shown below and we can invoke it using HTTPie or CURL for example
  
$ cf apps
Getting apps in org apples-org / space development as pas...
OK

name                       requested state   instances   memory   disk   urls
github-TAS4K8s-boot-demo   started           1/1         1G       1G     github-tas4k8s-boot-demo.apps.tas.lab.pasapples.me
my-springboot-app          started           1/1         1G       1G     my-springboot-app.apps.tas.lab.pasapples.me
test-node-app              started           1/1         1G       1G     test-node-app.apps.tas.lab.pasapples.me

$ cf app github-TAS4K8s-boot-demo
Showing health and status for app github-TAS4K8s-boot-demo in org apples-org / space development as pas...

name:                github-TAS4K8s-boot-demo
requested state:     started
isolation segment:   placeholder
routes:              github-tas4k8s-boot-demo.apps.tas.lab.pasapples.me
last uploaded:       Thu 18 Jun 12:03:19 AEST 2020
stack:
buildpacks:

type:           web
instances:      1/1
memory usage:   1024M
     state     since                  cpu    memory         disk      details
#0   running   2020-06-18T02:03:32Z   0.2%   136.5M of 1G   0 of 1G

$ http http://github-tas4k8s-boot-demo.apps.tas.lab.pasapples.me
HTTP/1.1 200 OK
content-length: 28
content-type: text/plain;charset=UTF-8
date: Thu, 18 Jun 2020 02:07:39 GMT
server: istio-envoy
x-envoy-upstream-service-time: 141

Thu Jun 18 02:07:39 GMT 2020


More Information

Download TAS4K8s
https://network.pivotal.io/products/tas-for-kubernetes/

GitHub Actions
https://github.com/features/actions

GitHub Marketplace - Actions
https://github.com/marketplace?type=actions

Tuesday, 16 June 2020

Deploying a Spring Boot application to Tanzu Application Service for Kubernetes using GitLab

In this demo I show how to deploy a simple Springboot application using GitLab pipeline onto Tanzu Application Service for Kubernetes (TAS4K8s).

Steps

Ensure you have Tanzu Application Service for Kubernetes (TAS4K8s) running as shown below
  
$ kapp list
Target cluster 'https://lemons.run.haas-236.pez.pivotal.io:8443' (nodes: a51852ac-e449-40ad-bde7-1beb18340854, 5+)

Apps in namespace 'default'

Name  Namespaces                                    Lcs   Lca
cf    (cluster),build-service,cf-blobstore,cf-db,   true  10d
      cf-system,cf-workloads,cf-workloads-staging,
      istio-system,kpack,metacontroller

Lcs: Last Change Successful
Lca: Last Change Age

1 apps

Succeeded

Ensure you have GitLab running. In this example it's installed on a Kubernetes cluster but it doesn't have to be. All that matters here is that GitLab can access the API endpoint of your TAS4K8s install
  
$ helm ls -A
NAME   NAMESPACE REVISION UPDATED                               STATUS   CHART        APP VERSION
gitlab gitlab    2        2020-05-15 13:22:15.470219 +1000 AEST deployed gitlab-3.3.4 12.10.5

1. First let's create a basic Springboot application with a simple RESTful endpoint as shown below. It's best to use the Spring Initializer to create this application. I simply used the web and lombok dependancies as shown below.

Note: Make sure you select java version 11.

Spring Initializer Web Interface


Using built in Spring Initializer in IntelliJ IDEA.


Here is my simple RESTful controller which simply output's todays date.
  
package com.example.demo;

import lombok.extern.slf4j.Slf4j;
import org.springframework.web.bind.annotation.GetMapping;
import org.springframework.web.bind.annotation.RestController;

import java.util.Date;

@RestController
@Slf4j
public class FrontEnd {
    @GetMapping("/")
    public String index () {
        log.info("An INFO Message");
        return new Date().toString();
    }
}

2. Create an empty project in GitLab using the name "gitlab-TAS4K8s-boot-demo"


3. At this point this add our project files from step #1 above into the empty GitLab project repository. We do that as follows.

$ cd "existing project folder from step #1"
$ git init
$ git remote add origin http://gitlab.ci.run.haas-236.pez.pivotal.io/root/gitlab-tas4k8s-boot-demo.git
$ git add .
$ git commit -m "Initial commit"
$ git push -u origin master

Once done we now have out GitLab project repository with the files we created as part of the project setup


4. It's always worth running the code locally just to make sure it's working so if you like you can do that as follows

RUN:

$ ./mvnw spring-boot:run

CURL:

$ curl http://localhost:8080/
Tue Jun 16 10:46:26 AEST 2020

HTTPie:

papicella@papicella:~$
papicella@papicella:~$ http :8080/
HTTP/1.1 200
Connection: keep-alive
Content-Length: 29
Content-Type: text/plain;charset=UTF-8
Date: Tue, 16 Jun 2020 00:46:40 GMT
Keep-Alive: timeout=60

Tue Jun 16 10:46:40 AEST 2020

5. Our GitLab project as no pipelines defined so let's create one as follows in the project root directory using the default pipeline name ".gitlab-ci.yml"

image: openjdk:11-jdk

stages:
  - build
  - deploy

build:
  stage: build
  script: ./mvnw package
  artifacts:
    paths:
      - target/demo-0.0.1-SNAPSHOT.jar

production:
  stage: deploy
  script:
  - curl --location "https://cli.run.pivotal.io/stable?release=linux64-binary&source=github" | tar zx
  - ./cf api https://api.system.run.haas-236.pez.pivotal.io --skip-ssl-validation
  - ./cf auth $CF_USERNAME $CF_PASSWORD
  - ./cf target -o apples-org -s development
  - ./cf push -f manifest.yaml
  only:
  - master


Note: We have not defined any tests in our pipeline which we should do but we haven't written any in this example.

6. For this pipeline to work we will need to do the following

- Add a manifest.yaml file in the project root to deploy our simple Springboot RESTful application

---
applications:
  - name: gitlab-TAS4K8s-boot-demo
    memory: 1024M
    instances: 1
    path: ./target/demo-0.0.1-SNAPSHOT.jar

- Alter the API endpoint to match your TAS4K8s endpoint

- ./cf api https://api.system.run.haas-236.pez.pivotal.io --skip-ssl-validation

- Alter the target to use your ORG and SPACE within TAs4K8s.

- ./cf target -o apples-org -s development

This command shows you what your current CF CLI is targeted to so you can ensure you edit it with correct details
  
$ cf target
api endpoint:   https://api.system.run.haas-236.pez.pivotal.io
api version:    2.150.0
user:           pas
org:            apples-org
space:          development

7. For the ".gitlab-ci.yml" to work we need to define two ENV variables for our username and password. Those two are as follows which is our login credentials to TAS4K8s

  • CF_USERNAME 
  • CF_PASSWORD

To do that we need to navigate to "Project Settings -> CI/CD - Variables" and fill in the appropriate details as shown below


8. Now let's add the two new files using git , add a commit message and push the changes

$ git add .gitlab-ci.yml
$ git add manifest.yaml
git commit -m "add pipeline configuration"
$ git push -u origin master

9. Navigate to GitLab UI "CI/CD -> Pipelines" and we should see our pipeline starting to run


10. If everything went well!!!


11. Finally our application will be deployed to TAS4K8s as shown below
  
$ cf apps
Getting apps in org apples-org / space development as pas...
OK

name                       requested state   instances   memory   disk   urls
gitlab-TAS4K8s-boot-demo   started           1/1         1G       1G     gitlab-tas4k8s-boot-demo.apps.system.run.haas-236.pez.pivotal.io
gitlab-tas4k8s-demo        started           1/1         1G       1G     gitlab-tas4k8s-demo.apps.system.run.haas-236.pez.pivotal.io
test-node-app              started           1/1         1G       1G     test-node-app.apps.system.run.haas-236.pez.pivotal.io

$ cf app gitlab-TAS4K8s-boot-demo
Showing health and status for app gitlab-TAS4K8s-boot-demo in org apples-org / space development as pas...

name:                gitlab-TAS4K8s-boot-demo
requested state:     started
isolation segment:   placeholder
routes:              gitlab-tas4k8s-boot-demo.apps.system.run.haas-236.pez.pivotal.io
last uploaded:       Tue 16 Jun 11:29:03 AEST 2020
stack:
buildpacks:

type:           web
instances:      1/1
memory usage:   1024M
     state     since                  cpu    memory         disk      details
#0   running   2020-06-16T01:29:16Z   0.1%   118.2M of 1G   0 of 1G

12. Access it as follows.

$ http http://gitlab-tas4k8s-boot-demo.apps.system.run.haas-236.pez.pivotal.io
HTTP/1.1 200 OK
content-length: 28
content-type: text/plain;charset=UTF-8
date: Tue, 16 Jun 2020 01:35:28 GMT
server: istio-envoy
x-envoy-upstream-service-time: 198

Tue Jun 16 01:35:28 GMT 2020

Of course if you wanted to create an API like service you could use the source code at this repo rather then the simple demo shown here using OpenAPI.

https://github.com/papicella/spring-book-service


More Information

Download TAS4K8s
https://network.pivotal.io/products/tas-for-kubernetes/

GitLab
https://about.gitlab.com/