VMware enterprise PKS 1.7 was just released. For details please review the release notes using the link below.
https://docs.pivotal.io/pks/1-7/release-notes.html
More Information
https://docs.pivotal.io/pks/1-7/index.html
Search This Blog
Showing posts with label Pivotal Container Service. Show all posts
Friday, 3 April 2020
Tuesday, 24 September 2019
Basic VMware Harbor Registry usage for Pivotal Container Service (PKS)
VMware Harbor Registry is an enterprise-class registry server that stores and distributes container images. Harbor allows you to store and manage images for use with Enterprise Pivotal Container Service (Enterprise PKS).
In this simple example we show what you need at a minimum to get an image on Harbor deployed onto your PKS cluster. First we need the following to be able to run this basic demo
Required Steps
1. PKS installed with Harbor Registry tile added as shown below
2. VMware Harbor Registry integrated with Enterprise PKS as per the link below. The most important step is the one as follows "Import the CA Certificate Used to Sign the Harbor Certificate and Key to BOSH". You must complete that prior to creating a PKS cluster
https://docs.pivotal.io/partners/vmware-harbor/integrating-pks.html
3. A PKS cluster created. You must have completed step #2 before you create the cluster
https://docs.pivotal.io/pks/1-4/create-cluster.html
$ pks cluster oranges
Name: oranges
Plan Name: small
UUID: 21998d0d-b9f8-437c-850c-6ee0ed33d781
Last Action: CREATE
Last Action State: succeeded
Last Action Description: Instance provisioning completed
Kubernetes Master Host: oranges.run.yyyy.bbbb.pivotal.io
Kubernetes Master Port: 8443
Worker Nodes: 4
Kubernetes Master IP(s): 1.1.1.1
Network Profile Name:
4. Docker Desktop Installed on your local machine
Steps
1. First let's log into Harbor and create a new project. Make sure you record your username and password you have assigned for the project. In this example I make the project public.
Details
2. Next in order to be able to connect to our registry from our local laptop we will need to install
The VMware Harbor registry isn't running on a public domain, and is using a self-signed certificate. So we need to access this registry with self-signed certificates from my mac osx clients given I am using Docker for Mac. This link shows how to add the self signed certificate to Linux and Mac clients
https://blog.container-solutions.com/adding-self-signed-registry-certs-docker-mac
You can download the self signed cert from Pivotal Ops Manager as sown below
With all that in place a command as follows is all I need to run
$ sudo security add-trusted-cert -d -r trustRoot -k /Library/Keychains/System.keychain ca.crt
3. Now lets login to the registry using a command as follows
$ docker login harbor.haas-bbb.yyyy.pivotal.io -u pas
Password:
Login Succeeded
4. Now I have an image sitting on Docker Hub itself so let's tag that and then deploy that to our VMware Harbor registry as shown below
$ docker tag pasapples/customer-api:latest harbor.haas-bbb.yyyy.io/cto_apj/customer-api:latest
$ docker push harbor.haas-bbb.yyyy.io/cto_apj/customer-api:latest
5. Now lets create a new secret for accessing the container registry
$ kubectl create secret docker-registry regcred --docker-server=harbor.haas-bbb.yyyy.io --docker-username=pas --docker-password=**** --docker-email=papicella@pivotal.io
6. Now let's deploy this image to our PKS cluster using a deployment YAML file as follows
customer-api.yaml
apiVersion: extensions/v1beta1
kind: Deployment
metadata:
name: customer-api
spec:
replicas: 1
template:
metadata:
labels:
app: customer-api
spec:
containers:
- name: customer-api
image: harbor.haas-206.pez.pivotal.io/cto_apj/customer-api:latest
ports:
- containerPort: 8080
---
apiVersion: v1
kind: Service
metadata:
name: customer-api-service
labels:
name: customer-api-service
spec:
ports:
- port: 80
targetPort: 8080
protocol: TCP
selector:
app: customer-api
type: LoadBalancer
7. Deploy as follows
$ kubectl create -f customer-api.yaml
8. You should see the POD and SERVICE running as follows
$ kubectl get pods | grep customer-api
customer-api-7b8fcd5778-czh46 1/1 Running 0 58s
$ kubectl get svc | grep customer-api
customer-api-service LoadBalancer 10.100.2.2 10.195.1.1.80.5 80:31156/TCP
More Information
PKS Release Notes 1.4
https://docs.pivotal.io/pks/1-4/release-notes.html
VMware Harbor Registry
https://docs.vmware.com/en/VMware-Enterprise-PKS/1.4/vmware-harbor-registry/GUID-index.html
In this simple example we show what you need at a minimum to get an image on Harbor deployed onto your PKS cluster. First we need the following to be able to run this basic demo
Required Steps
1. PKS installed with Harbor Registry tile added as shown below
2. VMware Harbor Registry integrated with Enterprise PKS as per the link below. The most important step is the one as follows "Import the CA Certificate Used to Sign the Harbor Certificate and Key to BOSH". You must complete that prior to creating a PKS cluster
https://docs.pivotal.io/partners/vmware-harbor/integrating-pks.html
3. A PKS cluster created. You must have completed step #2 before you create the cluster
https://docs.pivotal.io/pks/1-4/create-cluster.html
$ pks cluster oranges
Name: oranges
Plan Name: small
UUID: 21998d0d-b9f8-437c-850c-6ee0ed33d781
Last Action: CREATE
Last Action State: succeeded
Last Action Description: Instance provisioning completed
Kubernetes Master Host: oranges.run.yyyy.bbbb.pivotal.io
Kubernetes Master Port: 8443
Worker Nodes: 4
Kubernetes Master IP(s): 1.1.1.1
Network Profile Name:
4. Docker Desktop Installed on your local machine
Steps
1. First let's log into Harbor and create a new project. Make sure you record your username and password you have assigned for the project. In this example I make the project public.
Details
- Project Name: cto_apj
- Username: pas
- Password: ****
2. Next in order to be able to connect to our registry from our local laptop we will need to install
The VMware Harbor registry isn't running on a public domain, and is using a self-signed certificate. So we need to access this registry with self-signed certificates from my mac osx clients given I am using Docker for Mac. This link shows how to add the self signed certificate to Linux and Mac clients
https://blog.container-solutions.com/adding-self-signed-registry-certs-docker-mac
You can download the self signed cert from Pivotal Ops Manager as sown below
With all that in place a command as follows is all I need to run
$ sudo security add-trusted-cert -d -r trustRoot -k /Library/Keychains/System.keychain ca.crt
3. Now lets login to the registry using a command as follows
$ docker login harbor.haas-bbb.yyyy.pivotal.io -u pas
Password:
Login Succeeded
4. Now I have an image sitting on Docker Hub itself so let's tag that and then deploy that to our VMware Harbor registry as shown below
$ docker tag pasapples/customer-api:latest harbor.haas-bbb.yyyy.io/cto_apj/customer-api:latest
$ docker push harbor.haas-bbb.yyyy.io/cto_apj/customer-api:latest
5. Now lets create a new secret for accessing the container registry
$ kubectl create secret docker-registry regcred --docker-server=harbor.haas-bbb.yyyy.io --docker-username=pas --docker-password=**** --docker-email=papicella@pivotal.io
6. Now let's deploy this image to our PKS cluster using a deployment YAML file as follows
customer-api.yaml
apiVersion: extensions/v1beta1
kind: Deployment
metadata:
name: customer-api
spec:
replicas: 1
template:
metadata:
labels:
app: customer-api
spec:
containers:
- name: customer-api
image: harbor.haas-206.pez.pivotal.io/cto_apj/customer-api:latest
ports:
- containerPort: 8080
---
apiVersion: v1
kind: Service
metadata:
name: customer-api-service
labels:
name: customer-api-service
spec:
ports:
- port: 80
targetPort: 8080
protocol: TCP
selector:
app: customer-api
type: LoadBalancer
7. Deploy as follows
$ kubectl create -f customer-api.yaml
8. You should see the POD and SERVICE running as follows
$ kubectl get pods | grep customer-api
customer-api-7b8fcd5778-czh46 1/1 Running 0 58s
$ kubectl get svc | grep customer-api
customer-api-service LoadBalancer 10.100.2.2 10.195.1.1.80.5 80:31156/TCP
More Information
PKS Release Notes 1.4
https://docs.pivotal.io/pks/1-4/release-notes.html
VMware Harbor Registry
https://docs.vmware.com/en/VMware-Enterprise-PKS/1.4/vmware-harbor-registry/GUID-index.html
Thursday, 28 March 2019
Two nice Pivotal Container Service (PKS) CLI commands I use very often
Having always created multiple PKS clusters at times I forget the configuration of my K8S clusters and this command comes in very handy
First lets list those clusters we have created with PKS
papicella@papicella:~$ pks clusters
Name Plan Name UUID Status Action
lemons small 5c19c39e-88ae-4e06-a1cf-050b517f1b9c succeeded CREATE
banana small 7c3ab1b3-a25c-498e-8179-9a14336004ff succeeded CREATE
Now lets see how many master nodes and how many worker nodes actually exist in my cluster using "pks cluster {name} --json"
papicella@papicella:~$ pks cluster banana --json
{
"name": "banana",
"plan_name": "small",
"last_action": "CREATE",
"last_action_state": "succeeded",
"last_action_description": "Instance provisioning completed",
"uuid": "7c3ab1b3-a25c-498e-8179-9a14336004ff",
"kubernetes_master_ips": [
"10.0.0.1"
],
"parameters": {
"kubernetes_master_host": "banana.yyyy.hhh.pivotal.io",
"kubernetes_master_port": 8443,
"kubernetes_worker_instances": 3
}
}
One final PKS CLI command I use often when creating my clusters is the --wait option so I know when it's done creating the cluster rather then continually checking using "pks cluster {name}"
papicella@papicella:~$ pks create-cluster cluster1 -e cluster1.run.yyyy.hhh.pivotal.io -p small -n 4 --wait
More Information
https://docs.pivotal.io/runtimes/pks/1-3/cli/index.html
First lets list those clusters we have created with PKS
papicella@papicella:~$ pks clusters
Name Plan Name UUID Status Action
lemons small 5c19c39e-88ae-4e06-a1cf-050b517f1b9c succeeded CREATE
banana small 7c3ab1b3-a25c-498e-8179-9a14336004ff succeeded CREATE
Now lets see how many master nodes and how many worker nodes actually exist in my cluster using "pks cluster {name} --json"
papicella@papicella:~$ pks cluster banana --json
{
"name": "banana",
"plan_name": "small",
"last_action": "CREATE",
"last_action_state": "succeeded",
"last_action_description": "Instance provisioning completed",
"uuid": "7c3ab1b3-a25c-498e-8179-9a14336004ff",
"kubernetes_master_ips": [
"10.0.0.1"
],
"parameters": {
"kubernetes_master_host": "banana.yyyy.hhh.pivotal.io",
"kubernetes_master_port": 8443,
"kubernetes_worker_instances": 3
}
}
One final PKS CLI command I use often when creating my clusters is the --wait option so I know when it's done creating the cluster rather then continually checking using "pks cluster {name}"
papicella@papicella:~$ pks create-cluster cluster1 -e cluster1.run.yyyy.hhh.pivotal.io -p small -n 4 --wait
More Information
https://docs.pivotal.io/runtimes/pks/1-3/cli/index.html
Monday, 17 September 2018
PKS - What happens when we create a new namespace with NSX-T
I previously blogged about the integration between PKS and NSX-T on this post
http://theblasfrompas.blogspot.com/2018/09/pivotal-container-service-pks-with-nsx.html
On this post lets show the impact of what occurs within NSX-T when we create a new Namespace in our K8s cluster.
1. List the K8s clusters with have available
pasapicella@pas-macbook:~/pivotal/PCF/APJ/PEZ-HaaS/haas-148$ pks clusters
Name Plan Name UUID Status Action
apples small d9f258e3-247c-4b4c-9055-629871be896c succeeded UPDATE
2. Fetch the cluster config for our cluster into our local Kubectl config
pasapicella@pas-macbook:~/pivotal/PCF/APJ/PEZ-HaaS/haas-148$ pks get-credentials apples
Fetching credentials for cluster apples.
Context set for cluster apples.
You can now switch between clusters by using:
$kubectl config use-context
3. Create a new Namespace for the K8s cluster as shown below
pasapicella@pas-macbook:~/pivotal/PCF/APJ/PEZ-HaaS/haas-148$ kubectl create namespace production
namespace "production" created
4. View the Namespaces in the K8s cluster
pasapicella@pas-macbook:~/pivotal/PCF/APJ/PEZ-HaaS/haas-148$ kubectl get ns
NAME STATUS AGE
default Active 12d
kube-public Active 12d
kube-system Active 12d
production Active 9s
Using NSX-T manager the first thing you will see is a new Tier 1 router created for the K8s namespace "production"
Lets view it's configuration via the "Overview" screen
Finally lets see the default "Logical Routes" as shown below
When we push workloads to the "Production" namespace it's this configuration which was dynamically created which we will get out of the box allowing us to expose a "LoadBalancer" service as required across the Pods deployed within the Namspace
http://theblasfrompas.blogspot.com/2018/09/pivotal-container-service-pks-with-nsx.html
On this post lets show the impact of what occurs within NSX-T when we create a new Namespace in our K8s cluster.
1. List the K8s clusters with have available
pasapicella@pas-macbook:~/pivotal/PCF/APJ/PEZ-HaaS/haas-148$ pks clusters
Name Plan Name UUID Status Action
apples small d9f258e3-247c-4b4c-9055-629871be896c succeeded UPDATE
pasapicella@pas-macbook:~/pivotal/PCF/APJ/PEZ-HaaS/haas-148$ pks get-credentials apples
Fetching credentials for cluster apples.
Context set for cluster apples.
You can now switch between clusters by using:
$kubectl config use-context
3. Create a new Namespace for the K8s cluster as shown below
pasapicella@pas-macbook:~/pivotal/PCF/APJ/PEZ-HaaS/haas-148$ kubectl create namespace production
namespace "production" created
4. View the Namespaces in the K8s cluster
pasapicella@pas-macbook:~/pivotal/PCF/APJ/PEZ-HaaS/haas-148$ kubectl get ns
NAME STATUS AGE
default Active 12d
kube-public Active 12d
kube-system Active 12d
production Active 9s
Using NSX-T manager the first thing you will see is a new Tier 1 router created for the K8s namespace "production"
Lets view it's configuration via the "Overview" screen
Finally lets see the default "Logical Routes" as shown below
When we push workloads to the "Production" namespace it's this configuration which was dynamically created which we will get out of the box allowing us to expose a "LoadBalancer" service as required across the Pods deployed within the Namspace
Wednesday, 5 September 2018
Pivotal Container Service (PKS) with NSX-T on vSphere
It taken some time but now I officially was able to test PKS with NSX-T rather then using Flannel.
While there is a bit of initial setup to install NSX-T and PKS and then ensure PKS networking is NSX-T, the ease of rolling out multiple Kubernetes clusters with unique networking is greatly simplified by NSX-T. Here I am going to show what happens after pushing a workload to my PKS K8s cluster
First Before we can do anything we need the following...
Pre Steps
1. Ensure you have NSX-T setup and a dashboard UI as follows
2. Ensure you have PKS installed in this example I have it installed on vSphere which at the time of this blog is the only supported / applicable version we can use for NSX-T
PKS tile would need to ensure it's setup to use NSX-T which is done on this page of the tile configuration
3. You can see from the NSX-T manager UI we have a Load Balancers setup as shown below. Navigate to "Load Balancing -> Load Balancers"
And this Load Balancer is backed by few "Virtual Servers", one for http (port 80) and the other for https (port 443), which can be seen when you select the Virtual Servers link
From here we have logical switches created for each of the Kubernetes namespaces. We see two for our load balancer, and the other 3 are for the 3 K8s namespaces which are (default, kube-public, kube-system)
Here is how we verify the namespaces we have in our K8s cluster
pasapicella@pas-macbook:~/pivotal $ kubectl get ns
NAME STATUS AGE
default Active 5h
kube-public Active 5h
kube-system Active 5h
All of the logical switches are connected to the T0 Logical Switch by a set of T1 Logical Routers
For these to be accessible, they are linked to the T0 Logical Router via a set of router ports
Now lets push a basic K8s workload and see what NSX-T and PKS give us out of the box...
Steps
Lets create our K8s cluster using the PKS CLI. You will need a PKS CLI user which can be created following this doc
https://docs.pivotal.io/runtimes/pks/1-1/manage-users.html
1. Login using the PKS CLI as follows
$ pks login -k -a api.pks.haas-148.pez.pivotal.io -u pas -p ****
2. Create a cluster as shown below
$ pks create-cluster apples --external-hostname apples.haas-148.pez.pivotal.io --plan small
Name: apples
Plan Name: small
UUID: d9f258e3-247c-4b4c-9055-629871be896c
Last Action: CREATE
Last Action State: in progress
Last Action Description: Creating cluster
Kubernetes Master Host: apples.haas-148.pez.pivotal.io
Kubernetes Master Port: 8443
Worker Instances: 3
Kubernetes Master IP(s): In Progress
3. Wait for the cluster to have created as follows
$ pks cluster apples
Name: apples
Plan Name: small
UUID: d9f258e3-247c-4b4c-9055-629871be896c
Last Action: CREATE
Last Action State: succeeded
Last Action Description: Instance provisioning completed
Kubernetes Master Host: apples.haas-148.pez.pivotal.io
Kubernetes Master Port: 8443
Worker Instances: 3
Kubernetes Master IP(s): 10.1.1.10
The PKS CLI is basically telling BOSH to go ahead an based on the small plan create me a fully functional/working K8's cluster from VM's to all the processes that go along with it and when it's up keep it up and running for me in the event of failure.
His an example of the one of the WORKER VM's of the cluster shown in vSphere Web Client
4. Using the following YAML file as follows lets push that workload to our K8s cluster
apiVersion: v1
kind: Service
metadata:
labels:
app: fortune-service
deployment: pks-workshop
name: fortune-service
spec:
ports:
- port: 80
name: ui
- port: 9080
name: backend
- port: 6379
name: redis
type: LoadBalancer
selector:
app: fortune
---
apiVersion: v1
kind: Pod
metadata:
labels:
app: fortune
deployment: pks-workshop
name: fortune
spec:
containers:
- image: azwickey/fortune-ui:latest
name: fortune-ui
ports:
- containerPort: 80
protocol: TCP
- image: azwickey/fortune-backend-jee:latest
name: fortune-backend
ports:
- containerPort: 9080
protocol: TCP
- image: redis
name: redis
ports:
- containerPort: 6379
protocol: TCP
5. Push the workload as follows once the above YAML is saved to a file
$ kubectl create -f fortune-teller.yml
service "fortune-service" created
pod "fortune" created
6. Verify the PODS are running as follows
$ kubectl get all
NAME READY STATUS RESTARTS AGE
po/fortune 3/3 Running 0 35s
NAME TYPE CLUSTER-IP EXTERNAL-IP PORT(S) AGE
svc/fortune-service LoadBalancer 10.100.200.232 10.195.3.134 80:30591/TCP,9080:32487/TCP,6379:32360/TCP 36s
svc/kubernetes ClusterIP 10.100.200.1 443/TCP 5h
Great so now lets head back to our NSX-T manager UI and see what has been created. From the above output you can see a LB service is created and external IP address assigned
7. First thing you will notice is in "Virtual Servers" we have some new entries for each of our containers as shown below
and ...
Finally the LB we previously had in place shows our "Virtual Servers" added to it's config and routable
More Information
Pivotal Container Service
https://docs.pivotal.io/runtimes/pks/1-1/
VMware NSX-T
https://docs.vmware.com/en/VMware-NSX-T/index.html
While there is a bit of initial setup to install NSX-T and PKS and then ensure PKS networking is NSX-T, the ease of rolling out multiple Kubernetes clusters with unique networking is greatly simplified by NSX-T. Here I am going to show what happens after pushing a workload to my PKS K8s cluster
First Before we can do anything we need the following...
Pre Steps
1. Ensure you have NSX-T setup and a dashboard UI as follows
2. Ensure you have PKS installed in this example I have it installed on vSphere which at the time of this blog is the only supported / applicable version we can use for NSX-T
PKS tile would need to ensure it's setup to use NSX-T which is done on this page of the tile configuration
3. You can see from the NSX-T manager UI we have a Load Balancers setup as shown below. Navigate to "Load Balancing -> Load Balancers"
And this Load Balancer is backed by few "Virtual Servers", one for http (port 80) and the other for https (port 443), which can be seen when you select the Virtual Servers link
From here we have logical switches created for each of the Kubernetes namespaces. We see two for our load balancer, and the other 3 are for the 3 K8s namespaces which are (default, kube-public, kube-system)
Here is how we verify the namespaces we have in our K8s cluster
pasapicella@pas-macbook:~/pivotal $ kubectl get ns
NAME STATUS AGE
default Active 5h
kube-public Active 5h
kube-system Active 5h
All of the logical switches are connected to the T0 Logical Switch by a set of T1 Logical Routers
For these to be accessible, they are linked to the T0 Logical Router via a set of router ports
Now lets push a basic K8s workload and see what NSX-T and PKS give us out of the box...
Steps
Lets create our K8s cluster using the PKS CLI. You will need a PKS CLI user which can be created following this doc
https://docs.pivotal.io/runtimes/pks/1-1/manage-users.html
1. Login using the PKS CLI as follows
$ pks login -k -a api.pks.haas-148.pez.pivotal.io -u pas -p ****
2. Create a cluster as shown below
$ pks create-cluster apples --external-hostname apples.haas-148.pez.pivotal.io --plan small
Name: apples
Plan Name: small
UUID: d9f258e3-247c-4b4c-9055-629871be896c
Last Action: CREATE
Last Action State: in progress
Last Action Description: Creating cluster
Kubernetes Master Host: apples.haas-148.pez.pivotal.io
Kubernetes Master Port: 8443
Worker Instances: 3
Kubernetes Master IP(s): In Progress
3. Wait for the cluster to have created as follows
$ pks cluster apples
Name: apples
Plan Name: small
UUID: d9f258e3-247c-4b4c-9055-629871be896c
Last Action: CREATE
Last Action State: succeeded
Last Action Description: Instance provisioning completed
Kubernetes Master Host: apples.haas-148.pez.pivotal.io
Kubernetes Master Port: 8443
Worker Instances: 3
Kubernetes Master IP(s): 10.1.1.10
The PKS CLI is basically telling BOSH to go ahead an based on the small plan create me a fully functional/working K8's cluster from VM's to all the processes that go along with it and when it's up keep it up and running for me in the event of failure.
His an example of the one of the WORKER VM's of the cluster shown in vSphere Web Client
4. Using the following YAML file as follows lets push that workload to our K8s cluster
apiVersion: v1
kind: Service
metadata:
labels:
app: fortune-service
deployment: pks-workshop
name: fortune-service
spec:
ports:
- port: 80
name: ui
- port: 9080
name: backend
- port: 6379
name: redis
type: LoadBalancer
selector:
app: fortune
---
apiVersion: v1
kind: Pod
metadata:
labels:
app: fortune
deployment: pks-workshop
name: fortune
spec:
containers:
- image: azwickey/fortune-ui:latest
name: fortune-ui
ports:
- containerPort: 80
protocol: TCP
- image: azwickey/fortune-backend-jee:latest
name: fortune-backend
ports:
- containerPort: 9080
protocol: TCP
- image: redis
name: redis
ports:
- containerPort: 6379
protocol: TCP
5. Push the workload as follows once the above YAML is saved to a file
$ kubectl create -f fortune-teller.yml
service "fortune-service" created
pod "fortune" created
6. Verify the PODS are running as follows
$ kubectl get all
NAME READY STATUS RESTARTS AGE
po/fortune 3/3 Running 0 35s
NAME TYPE CLUSTER-IP EXTERNAL-IP PORT(S) AGE
svc/fortune-service LoadBalancer 10.100.200.232 10.195.3.134 80:30591/TCP,9080:32487/TCP,6379:32360/TCP 36s
svc/kubernetes ClusterIP 10.100.200.1
Great so now lets head back to our NSX-T manager UI and see what has been created. From the above output you can see a LB service is created and external IP address assigned
7. First thing you will notice is in "Virtual Servers" we have some new entries for each of our containers as shown below
and ...
Finally the LB we previously had in place shows our "Virtual Servers" added to it's config and routable
More Information
Pivotal Container Service
https://docs.pivotal.io/runtimes/pks/1-1/
VMware NSX-T
https://docs.vmware.com/en/VMware-NSX-T/index.html
Wednesday, 9 May 2018
Deploying a Spring Boot Application on a Pivotal Container Service (PKS) Cluster on GCP
I have been "cf pushing" for as long as I can remember so with Pivotal Container Service (PKS) let's walk through the process of deploying a basic Spring Boot Application with a PKS cluster running on GCP.
Few assumptions:
1. PKS is already installed as shown by my Operations Manager UI below
2. A PKS Cluster already exists as shown by the command below
pasapicella@pas-macbook:~$ pks list-clusters
Name Plan Name UUID Status Action
my-cluster small 1230fafb-b5a5-4f9f-9327-55f0b8254906 succeeded CREATE
Example:
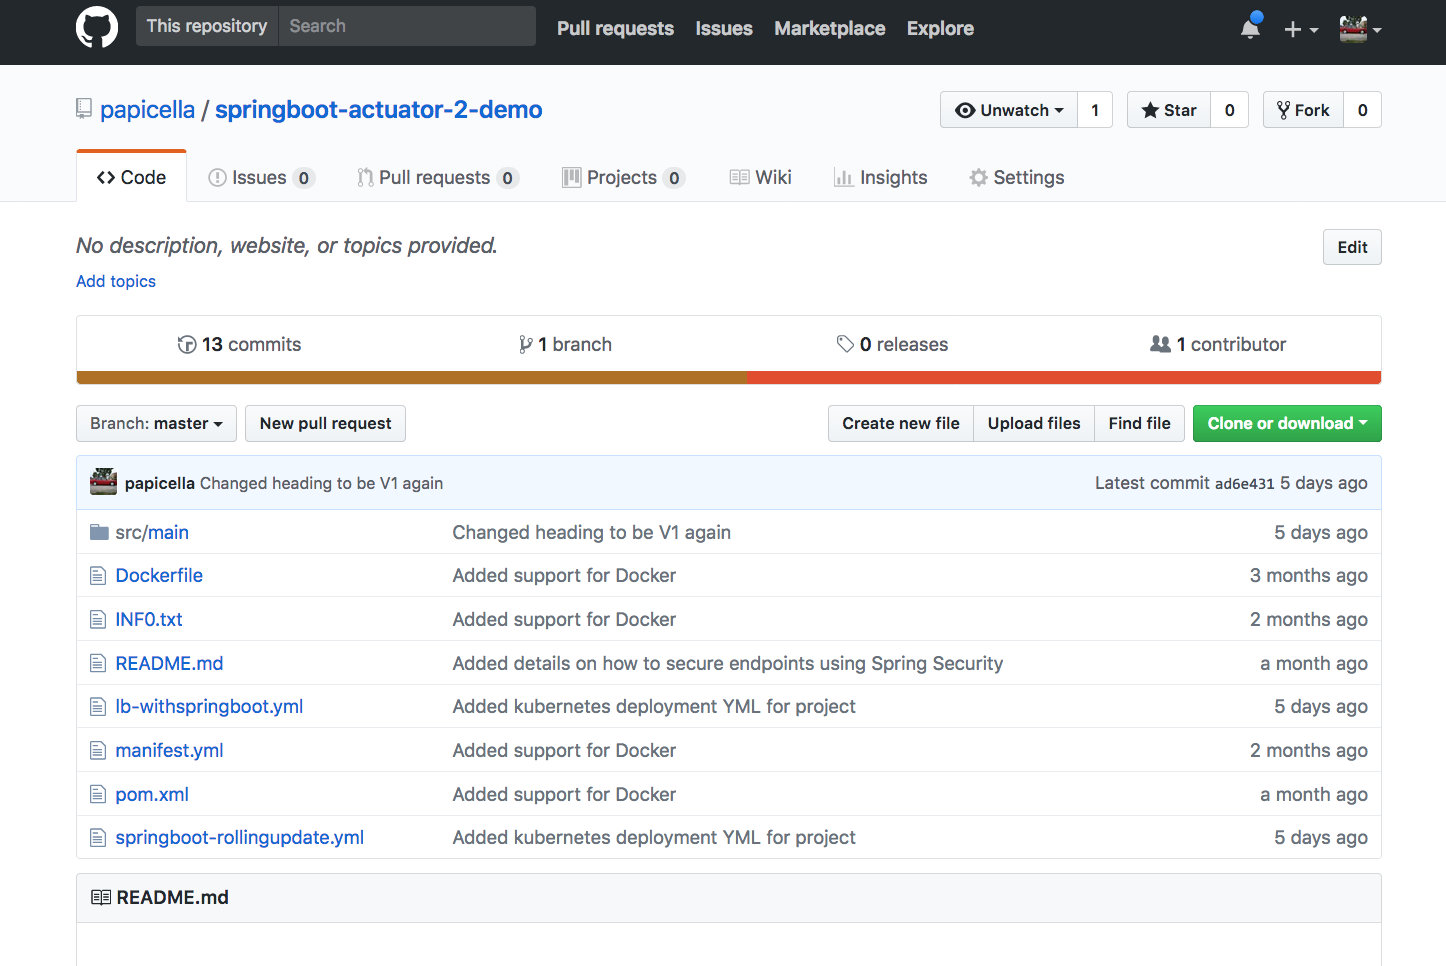
We will be using this Spring Boot application at the following GitHub URL
https://github.com/papicella/springboot-actuator-2-demo
1. In this example my Spring Boot application has what is required within my maven build.xml file to allow me to create a Docker image as shown below
2. Once a docker image was built I then pushed that to Docker Hub as shown below
3. Now we will need a PKS cluster as shown below before we can continue
pasapicella@pas-macbook:~$ pks cluster my-cluster
Name: my-cluster
Plan Name: small
UUID: 1230fafb-b5a5-4f9f-9327-55f0b8254906
Last Action: CREATE
Last Action State: succeeded
Last Action Description: Instance provisioning completed
Kubernetes Master Host: cluster1.pks.pas-apples.online
Kubernetes Master Port: 8443
Worker Instances: 3
Kubernetes Master IP(s): 192.168.20.10
4. Now we want to wire "kubectl" using a command as follows
pasapicella@pas-macbook:~$ pks get-credentials my-cluster
Fetching credentials for cluster my-cluster.
Context set for cluster my-cluster.
You can now switch between clusters by using:
$kubectl config use-context
pasapicella@pas-macbook:~$ kubectl cluster-info
Kubernetes master is running at https://cluster1.pks.pas-apples.online:8443
Heapster is running at https://cluster1.pks.pas-apples.online:8443/api/v1/namespaces/kube-system/services/heapster/proxy
KubeDNS is running at https://cluster1.pks.pas-apples.online:8443/api/v1/namespaces/kube-system/services/kube-dns/proxy
monitoring-influxdb is running at https://cluster1.pks.pas-apples.online:8443/api/v1/namespaces/kube-system/services/monitoring-influxdb/proxy
To further debug and diagnose cluster problems, use 'kubectl cluster-info dump'.
5. Now we are ready to deploy a Spring Boot workload to our cluster. To do that lets download the YAML file below
https://github.com/papicella/springboot-actuator-2-demo/blob/master/lb-withspringboot.yml
Once downloaded create a deployment as follows
$ kubectl create -f lb-withspringboot.yml
pasapicella@pas-macbook:~$ kubectl create -f lb-withspringboot.yml
service "spring-boot-service" created
deployment "spring-boot-deployment" created
6. Now let’s verify our deployment using some kubectl commands as follows
$ kubectl get deployment spring-boot-deployment
$ kubectl get pods
$ kubectl get svc
RESTful End Point
pasapicella@pas-macbook:~$ http http://35.197.187.43:8080/employees/1
HTTP/1.1 200
Content-Type: application/hal+json;charset=UTF-8
Date: Wed, 09 May 2018 05:26:19 GMT
Transfer-Encoding: chunked
{
"_links": {
"employee": {
"href": "http://35.197.187.43:8080/employees/1"
},
"self": {
"href": "http://35.197.187.43:8080/employees/1"
}
},
"name": "pas"
}
More Information
Using PKS
https://docs.pivotal.io/runtimes/pks/1-0/using.html
Few assumptions:
1. PKS is already installed as shown by my Operations Manager UI below
2. A PKS Cluster already exists as shown by the command below
pasapicella@pas-macbook:~$ pks list-clusters
Name Plan Name UUID Status Action
my-cluster small 1230fafb-b5a5-4f9f-9327-55f0b8254906 succeeded CREATE
Example:
We will be using this Spring Boot application at the following GitHub URL
https://github.com/papicella/springboot-actuator-2-demo
1. In this example my Spring Boot application has what is required within my maven build.xml file to allow me to create a Docker image as shown below
<!-- tag::plugin[] -->
<plugin>
<groupId>com.spotify</groupId>
<artifactId>dockerfile-maven-plugin</artifactId>
<version>1.3.6</version>
<configuration>
<repository>${docker.image.prefix}/${project.artifactId}</repository>
<buildArgs>
<JAR_FILE>target/${project.build.finalName}.jar</JAR_FILE>
</buildArgs>
</configuration>
</plugin>
<!-- end::plugin[] -->
<plugin>
<groupId>org.apache.maven.plugins</groupId>
<artifactId>maven-dependency-plugin</artifactId>
<executions>
<execution>
<id>unpack</id>
<phase>package</phase>
<goals>
<goal>unpack</goal>
</goals>
<configuration>
<artifactItems>
<artifactItem>
<groupId>${project.groupId}</groupId>
<artifactId>${project.artifactId}</artifactId>
<version>${project.version}</version>
</artifactItem>
</artifactItems>
</configuration>
</execution>
</executions>
</plugin>
2. Once a docker image was built I then pushed that to Docker Hub as shown below
3. Now we will need a PKS cluster as shown below before we can continue
pasapicella@pas-macbook:~$ pks cluster my-cluster
Name: my-cluster
Plan Name: small
UUID: 1230fafb-b5a5-4f9f-9327-55f0b8254906
Last Action: CREATE
Last Action State: succeeded
Last Action Description: Instance provisioning completed
Kubernetes Master Host: cluster1.pks.pas-apples.online
Kubernetes Master Port: 8443
Worker Instances: 3
Kubernetes Master IP(s): 192.168.20.10
4. Now we want to wire "kubectl" using a command as follows
pasapicella@pas-macbook:~$ pks get-credentials my-cluster
Fetching credentials for cluster my-cluster.
Context set for cluster my-cluster.
You can now switch between clusters by using:
$kubectl config use-context
pasapicella@pas-macbook:~$ kubectl cluster-info
Kubernetes master is running at https://cluster1.pks.pas-apples.online:8443
Heapster is running at https://cluster1.pks.pas-apples.online:8443/api/v1/namespaces/kube-system/services/heapster/proxy
KubeDNS is running at https://cluster1.pks.pas-apples.online:8443/api/v1/namespaces/kube-system/services/kube-dns/proxy
monitoring-influxdb is running at https://cluster1.pks.pas-apples.online:8443/api/v1/namespaces/kube-system/services/monitoring-influxdb/proxy
To further debug and diagnose cluster problems, use 'kubectl cluster-info dump'.
5. Now we are ready to deploy a Spring Boot workload to our cluster. To do that lets download the YAML file below
https://github.com/papicella/springboot-actuator-2-demo/blob/master/lb-withspringboot.yml
Once downloaded create a deployment as follows
$ kubectl create -f lb-withspringboot.yml
pasapicella@pas-macbook:~$ kubectl create -f lb-withspringboot.yml
service "spring-boot-service" created
deployment "spring-boot-deployment" created
6. Now let’s verify our deployment using some kubectl commands as follows
$ kubectl get deployment spring-boot-deployment
$ kubectl get pods
$ kubectl get svc
pasapicella@pas-macbook:~$ kubectl get deployment spring-boot-deployment
NAME DESIRED CURRENT UP-TO-DATE AVAILABLE AGE
spring-boot-deployment 1 1 1 1 1m
pasapicella@pas-macbook:~$ kubectl get pods
NAME READY STATUS RESTARTS AGE
spring-boot-deployment-ccd947455-6clwv 1/1 Running 0 2m
pasapicella@pas-macbook:~$ kubectl get svc
NAME TYPE CLUSTER-IP EXTERNAL-IP PORT(S) AGE
kubernetes ClusterIP 10.100.200.1 443/TCP 23m
spring-boot-service LoadBalancer 10.100.200.137 35.197.187.43 8080:31408/TCP 2m
7. Using the external IP Address we got GCP to expose for us we can access our Spring Boot application on port 8080 as shown below using the external IP address. In this example
http://35.197.187.43:8080/
RESTful End Point
pasapicella@pas-macbook:~$ http http://35.197.187.43:8080/employees/1
HTTP/1.1 200
Content-Type: application/hal+json;charset=UTF-8
Date: Wed, 09 May 2018 05:26:19 GMT
Transfer-Encoding: chunked
{
"_links": {
"employee": {
"href": "http://35.197.187.43:8080/employees/1"
},
"self": {
"href": "http://35.197.187.43:8080/employees/1"
}
},
"name": "pas"
}
More Information
Using PKS
https://docs.pivotal.io/runtimes/pks/1-0/using.html
Wednesday, 4 April 2018
Deploying my first Pivotal Container Service (PKS) workload to my PKS cluster
If you followed along on the previous blogs you would of installed PKS 1.0 on GCP (Google Cloud Platform) and created your first PKS cluster and wired it into kubectl as well as provided an external load balancer as per the previous two posts.
Previous posts:
Install Pivotal Container Service (PKS) on GCP and getting started
http://theblasfrompas.blogspot.com.au/2018/04/install-pivotal-container-service-pks.html
Wiring kubectl / Setup external LB on GCP into Pivotal Container Service (PKS) clusters to get started
http://theblasfrompas.blogspot.com.au/2018/04/wiring-kubectl-setup-external-lb-on-gcp.html
So lets now create our first workload as shown below
1. Download YML demo from here
https://github.com/cloudfoundry-incubator/kubo-ci/blob/master/specs/nginx-lb.yml
2. Deploy as shown below
pasapicella@pas-macbook:~/pivotal/GCP/install/21/PKS/demo-workload$ kubectl create -f nginx-lb.yml
service "nginx" created
deployment "nginx" created
3. Check current status
pasapicella@pas-macbook:~/pivotal/GCP/install/21/PKS/demo-workload$ kubectl get pods
NAME READY STATUS RESTARTS AGE
nginx-679dc9c764-8cwzq 1/1 Running 0 22s
nginx-679dc9c764-p8tf2 1/1 Running 0 22s
nginx-679dc9c764-s79mp 1/1 Running 0 22s
4. Wait for External IP address of the nginx service to be assigned
pasapicella@pas-macbook:~/pivotal/GCP/install/21/PKS/demo-workload$ kubectl get svc
NAME TYPE CLUSTER-IP EXTERNAL-IP PORT(S) AGE
kubernetes ClusterIP 10.100.200.1 443/TCP 17h
nginx LoadBalancer 10.100.200.143 35.189.23.119 80:30481/TCP 1m
5. In a browser access the K8's workload as follows, using the external IP
http://35.189.23.119
More Info
https://docs.pivotal.io/runtimes/pks/1-0/index.html
Previous posts:
Install Pivotal Container Service (PKS) on GCP and getting started
http://theblasfrompas.blogspot.com.au/2018/04/install-pivotal-container-service-pks.html
Wiring kubectl / Setup external LB on GCP into Pivotal Container Service (PKS) clusters to get started
http://theblasfrompas.blogspot.com.au/2018/04/wiring-kubectl-setup-external-lb-on-gcp.html
So lets now create our first workload as shown below
1. Download YML demo from here
https://github.com/cloudfoundry-incubator/kubo-ci/blob/master/specs/nginx-lb.yml
2. Deploy as shown below
pasapicella@pas-macbook:~/pivotal/GCP/install/21/PKS/demo-workload$ kubectl create -f nginx-lb.yml
service "nginx" created
deployment "nginx" created
3. Check current status
pasapicella@pas-macbook:~/pivotal/GCP/install/21/PKS/demo-workload$ kubectl get pods
NAME READY STATUS RESTARTS AGE
nginx-679dc9c764-8cwzq 1/1 Running 0 22s
nginx-679dc9c764-p8tf2 1/1 Running 0 22s
nginx-679dc9c764-s79mp 1/1 Running 0 22s
4. Wait for External IP address of the nginx service to be assigned
pasapicella@pas-macbook:~/pivotal/GCP/install/21/PKS/demo-workload$ kubectl get svc
NAME TYPE CLUSTER-IP EXTERNAL-IP PORT(S) AGE
kubernetes ClusterIP 10.100.200.1
nginx LoadBalancer 10.100.200.143 35.189.23.119 80:30481/TCP 1m
5. In a browser access the K8's workload as follows, using the external IP
http://35.189.23.119
More Info
https://docs.pivotal.io/runtimes/pks/1-0/index.html
Wiring kubectl / Setup external LB on GCP into Pivotal Container Service (PKS) clusters to get started
Now that I have PCF 2.1 running with PKS 1.0 installed and a cluster up and running how would I get started accessing that cluster? Here are the steps for GCP (Google Cloud Platform) install of PCF 2.1 with PKS 1.0. It goes through the requirements around an External LB for the cluster as well as wiring kubectl into the cluster to get started creating deployments.
Previous blog as follows:
http://theblasfrompas.blogspot.com.au/2018/04/install-pivotal-container-service-pks.html
1. First we will want an external Load Balancer for our K8's clusters which will need to exist and it would be a TCP Load balancer using Port 8443 which is the port the master node would run on. The external IP address is what you will need to use in the next step
2. Create a Firewall Rule for the LB with details as follows.
Note: the LB name is "pks-cluster-api-1". Make sure to include the network tag and select the network you installed PKS on.
3. Now you could easily just create a cluster using the external IP address from above or use a DNS entry which is mapped to the external IP address which is what I have done so I have use a FQDN instead
pasapicella@pas-macbook:~$ pks create-cluster my-cluster --external-hostname cluster1.pks.pas-apples.online --plan small
Name: my-cluster
Plan Name: small
UUID: 64a086ce-c94f-4c51-95f8-5a5edb3d1476
Last Action: CREATE
Last Action State: in progress
Last Action Description: Creating cluster
Kubernetes Master Host: cluster1.pks.pas-apples.online
Kubernetes Master Port: 8443
Worker Instances: 3
Kubernetes Master IP(s): In Progress
4. Now just wait a while while it creates a VM's and runs some tests , it's roughly around 10 minutes. Once done you will see the cluster as created as follows
pasapicella@pas-macbook:~/pivotal/GCP/install/21/PKS$ pks list-clusters
Name Plan Name UUID Status Action
my-cluster small 64a086ce-c94f-4c51-95f8-5a5edb3d1476 succeeded CREATE
5. Now one of the VM's created would be the master Vm for the cluster , their a few ways to determine the master VM as shown below.
5.1. Use GCP Console VM instances page and filter by "master"
5.2. Run a bosh command to view the VM's of your deployments. We are interested in the VM's for our cluster service. The master instance is named as "master/ID" as shown below.
$ bosh -e gcp vms --column=Instance --column "Process State" --column "VM CID"
Task 187. Done
Deployment 'service-instance_64a086ce-c94f-4c51-95f8-5a5edb3d1476'
Instance Process State VM CID
master/13b42afb-bd7c-4141-95e4-68e8579b015e running vm-4cfe9d2e-b26c-495c-4a62-77753ce792ca
worker/490a184e-575b-43ab-b8d0-169de6d708ad running vm-70cd3928-317c-400f-45ab-caf6fa8bd3a4
worker/79a51a29-2cef-47f1-a6e1-25580fcc58e5 running vm-e3aa47d8-bb64-4feb-4823-067d7a4d4f2c
worker/f1f093e2-88bd-48ae-8ffe-b06944ea0a9b running vm-e14dde3f-b6fa-4dca-7f82-561da9c03d33
4 vms
6. Attach the VM to the load balancer backend configuration as shown below.
7. Now we can get the credentials from PKS CLI and pass them to kubectl as shown below
pasapicella@pas-macbook:~/pivotal/GCP/install/21/PKS$ pks get-credentials my-cluster
Fetching credentials for cluster my-cluster.
Context set for cluster my-cluster.
You can now switch between clusters by using:
$kubectl config use-context
pasapicella@pas-macbook:~/pivotal/GCP/install/21/PKS$ kubectl cluster-info
Kubernetes master is running at https://cluster1.pks.domain-name:8443
Heapster is running at https://cluster1.pks.domain-name:8443/api/v1/namespaces/kube-system/services/heapster/proxy
KubeDNS is running at https://cluster1.pks.domain-name:8443/api/v1/namespaces/kube-system/services/kube-dns/proxy
monitoring-influxdb is running at https://cluster1.pks.domain-name:8443/api/v1/namespaces/kube-system/services/monitoring-influxdb/proxy
8. To verify it worked for you here are some commands you would run. The "kubectl cluster-info" is one of those.
pasapicella@pas-macbook:~/pivotal/GCP/install/21/PKS$ kubectl get componentstatus
NAME STATUS MESSAGE ERROR
controller-manager Healthy ok
scheduler Healthy ok
etcd-0 Healthy {"health": "true"}
pasapicella@pas-macbook:~/pivotal/GCP/install/21/PKS$ kubectl get pods
No resources found.
pasapicella@pas-macbook:~/pivotal/GCP/install/21/PKS$ kubectl get deployments
No resources found.
9. Finally lets start the Kubernetes UI to monitor this cluster. We do that as easily as this.
pasapicella@pas-macbook:~/pivotal/GCP/install/21/PKS$ kubectl proxy
Starting to serve on 127.0.0.1:8001
The UI URL requires you to append /ui to the url above
Eg: http://127.0.0.1:8001/ui
Note: It will prompt you for the kubectl config file which would be in the $HOME/.kube/config file. Failure to present this means the UI won't show you much and give lost of warnings
More Info
https://docs.pivotal.io/runtimes/pks/1-0/index.html
Previous blog as follows:
http://theblasfrompas.blogspot.com.au/2018/04/install-pivotal-container-service-pks.html
1. First we will want an external Load Balancer for our K8's clusters which will need to exist and it would be a TCP Load balancer using Port 8443 which is the port the master node would run on. The external IP address is what you will need to use in the next step
2. Create a Firewall Rule for the LB with details as follows.
Note: the LB name is "pks-cluster-api-1". Make sure to include the network tag and select the network you installed PKS on.
- Network: Make sure to select the right network. Choose the value that matches with the VPC Network name you installed PKS on
- Ingress - Allow
- Target: pks-cluster-api-1
- Source: 0.0.0.0/0
- Ports: tcp:8443
3. Now you could easily just create a cluster using the external IP address from above or use a DNS entry which is mapped to the external IP address which is what I have done so I have use a FQDN instead
pasapicella@pas-macbook:~$ pks create-cluster my-cluster --external-hostname cluster1.pks.pas-apples.online --plan small
Name: my-cluster
Plan Name: small
UUID: 64a086ce-c94f-4c51-95f8-5a5edb3d1476
Last Action: CREATE
Last Action State: in progress
Last Action Description: Creating cluster
Kubernetes Master Host: cluster1.pks.pas-apples.online
Kubernetes Master Port: 8443
Worker Instances: 3
Kubernetes Master IP(s): In Progress
4. Now just wait a while while it creates a VM's and runs some tests , it's roughly around 10 minutes. Once done you will see the cluster as created as follows
pasapicella@pas-macbook:~/pivotal/GCP/install/21/PKS$ pks list-clusters
Name Plan Name UUID Status Action
my-cluster small 64a086ce-c94f-4c51-95f8-5a5edb3d1476 succeeded CREATE
5. Now one of the VM's created would be the master Vm for the cluster , their a few ways to determine the master VM as shown below.
5.1. Use GCP Console VM instances page and filter by "master"
5.2. Run a bosh command to view the VM's of your deployments. We are interested in the VM's for our cluster service. The master instance is named as "master/ID" as shown below.
$ bosh -e gcp vms --column=Instance --column "Process State" --column "VM CID"
Task 187. Done
Deployment 'service-instance_64a086ce-c94f-4c51-95f8-5a5edb3d1476'
Instance Process State VM CID
master/13b42afb-bd7c-4141-95e4-68e8579b015e running vm-4cfe9d2e-b26c-495c-4a62-77753ce792ca
worker/490a184e-575b-43ab-b8d0-169de6d708ad running vm-70cd3928-317c-400f-45ab-caf6fa8bd3a4
worker/79a51a29-2cef-47f1-a6e1-25580fcc58e5 running vm-e3aa47d8-bb64-4feb-4823-067d7a4d4f2c
worker/f1f093e2-88bd-48ae-8ffe-b06944ea0a9b running vm-e14dde3f-b6fa-4dca-7f82-561da9c03d33
4 vms
6. Attach the VM to the load balancer backend configuration as shown below.
7. Now we can get the credentials from PKS CLI and pass them to kubectl as shown below
pasapicella@pas-macbook:~/pivotal/GCP/install/21/PKS$ pks get-credentials my-cluster
Fetching credentials for cluster my-cluster.
Context set for cluster my-cluster.
You can now switch between clusters by using:
$kubectl config use-context
pasapicella@pas-macbook:~/pivotal/GCP/install/21/PKS$ kubectl cluster-info
Kubernetes master is running at https://cluster1.pks.domain-name:8443
Heapster is running at https://cluster1.pks.domain-name:8443/api/v1/namespaces/kube-system/services/heapster/proxy
KubeDNS is running at https://cluster1.pks.domain-name:8443/api/v1/namespaces/kube-system/services/kube-dns/proxy
monitoring-influxdb is running at https://cluster1.pks.domain-name:8443/api/v1/namespaces/kube-system/services/monitoring-influxdb/proxy
pasapicella@pas-macbook:~/pivotal/GCP/install/21/PKS$ kubectl get componentstatus
NAME STATUS MESSAGE ERROR
controller-manager Healthy ok
scheduler Healthy ok
etcd-0 Healthy {"health": "true"}
pasapicella@pas-macbook:~/pivotal/GCP/install/21/PKS$ kubectl get pods
No resources found.
pasapicella@pas-macbook:~/pivotal/GCP/install/21/PKS$ kubectl get deployments
No resources found.
9. Finally lets start the Kubernetes UI to monitor this cluster. We do that as easily as this.
pasapicella@pas-macbook:~/pivotal/GCP/install/21/PKS$ kubectl proxy
Starting to serve on 127.0.0.1:8001
The UI URL requires you to append /ui to the url above
Eg: http://127.0.0.1:8001/ui
Note: It will prompt you for the kubectl config file which would be in the $HOME/.kube/config file. Failure to present this means the UI won't show you much and give lost of warnings
More Info
https://docs.pivotal.io/runtimes/pks/1-0/index.html
Install Pivotal Container Service (PKS) on GCP and getting started
With the release of Pivotal Cloud Foundry 2.1 (PCF) I decided this time to install Pivotal Application Service (PAS) as well as Pivotal Container Service (PKS) using the one Bosh Director which isn't recommended for production installs BUT ok for dev installs. Once installed you will have both the PAS tile and PKS tile as shown below.
https://content.pivotal.io/blog/pivotal-cloud-foundry-2-1-adds-cloud-native-net-envoy-native-service-discovery-to-boost-your-transformation
So here is how to get started with PKS once it's installed
1. Create a user for the PKS client to login with.
1.1. ssh into the ops manager VM
1.2. Target the UAA endpoint for PKS this was setup in the PKS tile
ubuntu@opsman-pcf:~$ uaac target https://PKS-ENDPOINT:8443 --skip-ssl-validation
Unknown key: Max-Age = 86400
Target: https://PKS-ENDPOINT:8443
More Info
https://docs.pivotal.io/runtimes/pks/1-0/index.html
https://content.pivotal.io/blog/pivotal-cloud-foundry-2-1-adds-cloud-native-net-envoy-native-service-discovery-to-boost-your-transformation
So here is how to get started with PKS once it's installed
1. Create a user for the PKS client to login with.
1.1. ssh into the ops manager VM
1.2. Target the UAA endpoint for PKS this was setup in the PKS tile
ubuntu@opsman-pcf:~$ uaac target https://PKS-ENDPOINT:8443 --skip-ssl-validation
Unknown key: Max-Age = 86400
Target: https://PKS-ENDPOINT:8443
1.3. Authenticate with UAA using the secret you retrieve from the PKS tile / Credentials tab as shown in the image below. Run the following command, replacing UAA-ADMIN-SECRET with your UAA admin secret
ubuntu@opsman-pcf:~$ uaac token client get admin -s UAA-ADMIN-SECRET
Unknown key: Max-Age = 86400
Successfully fetched token via client credentials grant.
Target: https://PKS-ENDPIONT:8443
Context: admin, from client admin
1.4. Create an ADMIN user as shown below using the UAA-ADMIN-SECRET password obtained form ops manager UI as shown above
ubuntu@opsman-pcf:~$ uaac user add pas --emails papicella@pivotal.io -p PASSWD
user account successfully added
ubuntu@opsman-pcf:~$ uaac member add pks.clusters.admin pas
success
2. Now lets login using the PKS CLI with a new admin user we created
pasapicella@pas-macbook:~$ pks login -a PKS-ENDPOINT -u pas -p PASSWD -k
API Endpoint: pks-api.pks.pas-apples.online
User: pas
3. You can test whether you have a DNS issue with a command as follows.
Note: A test as follows determines any DNS issues you may have
pasapicella@pas-macbook:~$ nc -vz PKS-ENDPOINT 8443
found 0 associations
found 1 connections:
1: flags=82
outif en0
src 192.168.1.111 port 62124
dst 35.189.1.209 port 8443
rank info not available
TCP aux info available
Connection to PKS-ENDPOINT port 8443 [tcp/pcsync-https] succeeded!
4. You can run a simple command to verify your connected as follows, below shows no K8's clusters exist at this stage
pasapicella@pas-macbook:~$ pks list-clusters
Name Plan Name UUID Status Action
You can use PKS CLI to create a new cluster, view clusters, resize clusters etc
pasapicella@pas-macbook:~$ pks
The Pivotal Container Service (PKS) CLI is used to create, manage, and delete Kubernetes clusters. To deploy workloads to a Kubernetes cluster created using the PKS CLI, use the Kubernetes CLI, kubectl.
Version: 1.0.0-build.3
Note: The PKS CLI is under development, and is subject to change at any time.
Usage:
pks [command]
Available Commands:
cluster View the details of the cluster
clusters Show all clusters created with PKS
create-cluster Creates a kubernetes cluster, requires cluster name and an external host name
delete-cluster Deletes a kubernetes cluster, requires cluster name
get-credentials Allows you to connect to a cluster and use kubectl
help Help about any command
login Login to PKS
logout Logs user out of the PKS API
plans View the preconfigured plans available
resize Increases the number of worker nodes for a cluster
Flags:
-h, --help help for pks
--version version for pks
Use "pks [command] --help" for more information about a command.
5. You would create a cluster as follows now you have logged in and yu will get aK8's cluster to begin working with
pasapicella@pas-macbook:~$ pks create-cluster my-cluster --external-hostname EXT-LB-HOST --plan small
Name: my-cluster
Plan Name: small
UUID: 64a086ce-c94f-4c51-95f8-5a5edb3d1476
Last Action: CREATE
Last Action State: in progress
Last Action Description: Creating cluster
Kubernetes Master Host: cluster1.FQDN
Kubernetes Master Port: 8443
Worker Instances: 3
Kubernetes Master IP(s): In Progress
Finally when done you will see "Last Action:" as "succeeded" as shown below
pasapicella@pas-macbook:~$ pks cluster my-cluster
Name: my-cluster
Plan Name: small
UUID: 64a086ce-c94f-4c51-95f8-5a5edb3d1476
Last Action: CREATE
Last Action State: succeeded
Last Action Description: Instance provisioning completed
Kubernetes Master Host: cluster1.FQDN
Kubernetes Master Port: 8443
Worker Instances: 3
Kubernetes Master IP(s): MASTER-IP-ADDRESS
https://docs.pivotal.io/runtimes/pks/1-0/index.html
Subscribe to:
Posts (Atom)